Your LG front-load washer won’t start, flashes a DE error, and the door won’t lock. You press Start, but nothing happens. No fill, no spin, just silence and frustration. This is a classic sign of a failed door lock switch, one of the most common issues in LG washing machines. The good news is it’s a DIY-friendly repair that takes under an hour and costs far less than a service call.
In this guide, you’ll learn how to diagnose the DE error, replace the faulty door lock, reassemble the seal correctly, and test your machine. No fluff, no jargon. Just clear, actionable instructions to get your washer running again.
Decode the DE Error Code on Your LG Washer

What the DE Error Means
The DE error on your LG washer means the control system detects the door isn’t securely locked. Even if the door appears closed, the machine won’t start the cycle as a safety measure. This error prevents water fill and drum rotation, avoiding dangerous mid-cycle door openings.
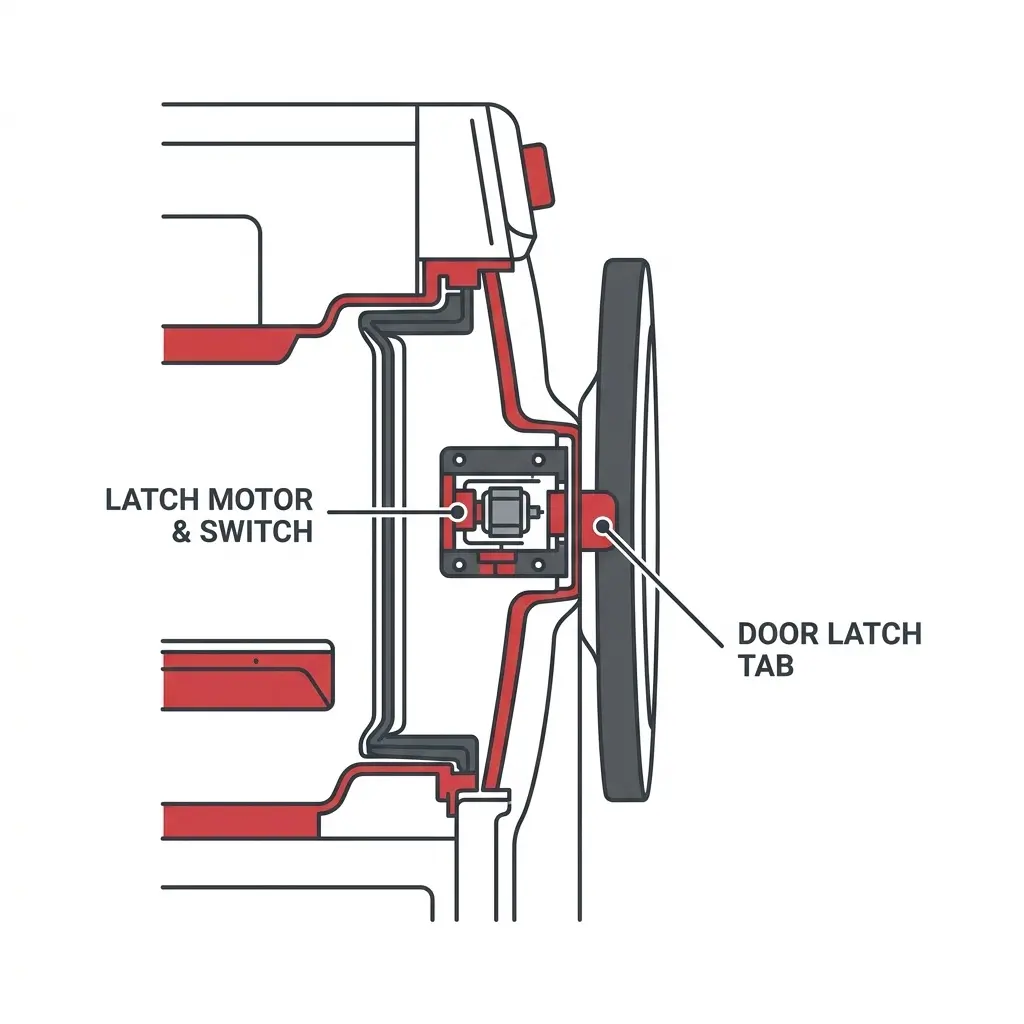
This isn’t a mechanical jam. It’s an electrical signal failure. The door lock assembly includes a solenoid that physically engages the latch and a switch that tells the main board the door is locked. When either fails, the DE error triggers.
Common Symptoms of Lock Failure
Watch for these telltale signs that your door lock has failed.
• DE error appears instantly when pressing Start
• No clicking sound from the door area
• Door lock light stays off, flashes, or stays on permanently
• Washer beeps but doesn’t start
• Door remains unlocked despite closure
If your washer displays any of these, the door lock switch is likely dead, a high-probability fix with a simple replacement.
When It’s Not the Door Lock
In rare cases, replacing the lock doesn’t fix the error. Possible causes include a loose or damaged wiring harness, a faulty main control board (cost around $180 AUD), or a power supply issue. Always rule out a bad connection before assuming the board is faulty.
Gather Tools and Safety Steps Before Repair
Required Repair Tools
You only need a few basic tools to complete this repair.
• Phillips head screwdriver for latch screws
• Flat head screwdriver to pry and release spring
• Needle-nose pliers essential for boot ring
• Replacement door lock that matches your model number
• Optional boot ring installation tool eases reassembly
Ensure the new lock matches your model. Check the label inside the door or on the back panel.
Power and Water Safety
Before touching a single screw, follow these critical safety steps.
- Unplug the washer from the wall outlet
- Turn off both water valves hot and cold
- Close the detergent drawer to avoid damage
This prevents electrical shock, accidental flooding, or unintended startup.
Confirm Model Compatibility
Most LG front-loaders share similar door lock designs. However, latch shapes and connector types vary. Always verify part compatibility using LG’s official parts lookup, your machine’s model number on the door rim or back, or retailer cross-reference tools. Using the wrong lock causes fit issues or electrical mismatches.
Remove the Door Seal for Lock Access

Locate the Retaining Spring
Open the washer door fully. At the 6 o’clock position, you’ll see a small metal spring attached to a wire retaining ring (boot ring) that holds the rubber seal to the front panel. This ring is under high tension. Handle with care.
Use needle-nose pliers or a flat head screwdriver to grip the spring end. Press down or push forward to release tension, then pull the spring out of its slot. Once loose, the ring can be removed from the seal groove.
Take Off the Boot Ring
With the spring detached, work the metal ring around the seal by hand. It will resist. This is normal. Remove it completely and set aside.
Pro tip: Place the spring and ring in a small container. They’re easy to lose.
Peel Back the Rubber Boot
Use your fingers to lift the inner lip of the rubber seal off the metal front panel. Work slowly around the entire circumference. Once free, fold the boot inward into the drum. This exposes the front cabinet frame and the hidden door lock.
Warning: Don’t cut or stretch the rubber. A torn seal causes leaks.
Replace the Faulty Door Lock Assembly

Remove Mounting Screws
Reach between the folded boot and the chassis. The door lock is mounted on the lower right side (facing the machine). You’ll see two Phillips screws holding it in place.
Remove both screws. Keep one hand behind the lock. It’s still wired in and may fall when the last screw comes out.
Disconnect the Wiring Harness
Pull the lock slightly forward to access the electrical connector on the back. Never pull by the wires. Grip the plastic housing and press the release tab if present, then unplug it.
Inspect the connector for corrosion or bent pins. Clean gently if needed.
Install the New Door Lock
Take the new lock and plug in the harness before mounting. Ensure it clicks fully into place. A loose connection mimics a failed switch.
Slide the new unit into the chassis slot. Align the screw holes and secure with the two Phillips screws. Make sure the lock sits flush and the latch arm faces the door strike.
Check alignment: Close the door manually without power. The latch should catch smoothly.
Reassemble the Door Seal Correctly
Reseat the Rubber Boot
Pull the folded boot back out of the drum. Reattach the inner lip over the metal front panel edge. Work your fingers around the entire perimeter, ensuring the seal sits evenly with no twists or gaps.
Visual cue: The boot should form a perfect circle with no bulges.
Reinstall the Retaining Ring
This is the toughest step. The wire ring must be stretched back into the groove around the boot.
- Insert one end of the ring into the groove at the bottom
- Use needle-nose pliers to pull the ring around the seal section by section
- Work slowly. Don’t rush
- When you reach the spring end, position it at 6 o’clock
- Use the flat head screwdriver to push the spring into the groove and lock it in place
Critical: If the spring isn’t fully seated, the seal can blow out during a cycle, causing major water leaks.
Pro tip: A boot ring tool or second person makes this much easier.
Test the Repair and Verify Success

Power and Connection Check
- Plug the washer back in
- Turn water valves on
- Close the door firmly
Listen for a distinct clicking sound. That’s the solenoid engaging. If you hear it, the lock is working.
Verify Indicator Light
The door lock light on the control panel should illuminate when the door locks. If it does, proceed.
If the light flashes or stays off, double-check the harness connection behind the seal.
Run a Test Cycle
- Select a normal wash cycle
- Press Start
- Watch for no DE error, water fill begins, and drum starts agitating
If all three happen, the repair is successful.
Fix a Persistent DE Error After Replacement
Recheck the Wiring Harness
If the DE error returns after your repair, don’t panic. The problem is usually simple.
• Unplug the machine
• Remove the boot again
• Unplug and reconnect the harness. Ensure it’s fully seated
• Look for pinched wires or moisture damage
A loose plug is the number one reason for post-repair failure.
Diagnose Main Control Board Issues
If the new lock is connected properly but the error persists, the main control board may not be reading the lock signal. Test this by closing the door with power on. If no click and no light, but the new lock is good, the board is likely faulty.
Board replacement is more complex. It requires removing the top panel and disconnecting multiple harnesses. Consider professional help unless you have experience with electronics.
Avoid Common DIY Mistakes
Don’t Skip the Boot Ring
Reassembling without the retaining ring or spring causes immediate leaks. The ring holds 80% of the seal’s tension. Never operate the washer without it fully installed.
Don’t Force the Door
If the door won’t close after repair, don’t slam it. Likely causes include lock misalignment (loosen screws and reposition) or boot pinched in the door (reseat the seal evenly). Forcing it can damage the new lock or door hinge.
Don’t Ignore Moisture
If the old lock failed due to water ingress, check for a cracked boot, clogged drain hose causing overflow, or detergent buildup near the lock. Clean the area before installing the new part.
Extend Your Door Lock Lifespan
Clean the Door Seal Monthly
Wipe the rubber boot with a damp cloth. Remove lint, hair, and detergent residue. Leave the door ajar after use to dry the seal and prevent mold.
Avoid Overloading
Too much laundry strains the door closure. The latch must work harder to engage, accelerating wear on the lock mechanism.
Use HE Detergent Only
Regular detergent creates excess suds that can seep into electrical components, including the lock and control board. High-efficiency detergent prevents this issue.
Key Takeaways for LG Washing Machine Door Lock Repair
The DE error in LG washing machines is almost always fixed by replacing the door lock switch, a 30 to 45 minute DIY job that saves you hundreds in service fees. With a Phillips screwdriver, pliers, and the correct part, you can restore full function. Focus on proper boot reassembly and secure electrical connection. These are the make-or-break steps. If the error persists, suspect a loose harness before replacing the main board. Keep old electronics for R2 or e-Stewards recycling. Now run that test cycle, hear the click, and enjoy a washer that works just like it should.
Frequently Asked Questions About LG Washing Machine Door Lock Repair
What does the DE error mean on my LG washer?
The DE error means the machine’s control system detects the door isn’t properly locked, even when it appears closed. The washer won’t start the cycle as a safety measure to prevent door opening during operation.
Can I repair the door lock myself, or do I need a professional?
This is a DIY-friendly repair that takes 30 to 45 minutes with basic tools. Most homeowners can handle it. However, if the error persists after replacing the lock, the main control board may be faulty, which requires more advanced skills.
How much does a replacement door lock cost?
Door lock switches are low-cost components. The exact price varies by model, but it’s significantly cheaper than a service call (which could cost $150 or more) or a new control board ($180 AUD).
Why does the door seal need special attention during this repair?
The rubber boot seal must be properly reassembled with the retaining ring fully seated. If the ring is loose or the spring isn’t properly engaged, the seal can blow out during a wash cycle, causing major water leaks.
What tools do I need for LG door lock repair?
You need a Phillips head screwdriver, flat head screwdriver, needle-nose pliers, and a replacement door lock matching your model number. A boot ring installation tool is optional but recommended.
How do I know if the main control board is the problem instead of the door lock?
If you install a new door lock, verify the connection is secure, and the error still appears with no clicking sound and no lock light, the main control board likely isn’t reading the lock signal. This requires professional diagnosis or board replacement.