If your GE washing machine won’t spin, makes grinding noises, or leaks from the base, you may be facing a transmission failure. The transmission is the heart of the washer’s mechanical system, and when it fails, the entire machine stops functioning properly. Unlike simpler fixes like replacing a drive belt or pump, GE washing machine transmission repair is a complex job that demands precision, the right tools, and careful diagnosis. But with the correct approach, you can save hundreds compared to professional repairs or avoid premature replacement of an otherwise functional appliance.
This guide walks you through everything you need to know: how to confirm transmission failure, whether to repair or replace, step-by-step replacement procedures, and even advanced rebuild options. Whether you’re troubleshooting symptoms or preparing to fix your washer, this comprehensive resource gives you the knowledge to make informed decisions and complete the job successfully.
Identify Transmission Failure Symptoms Before Repair
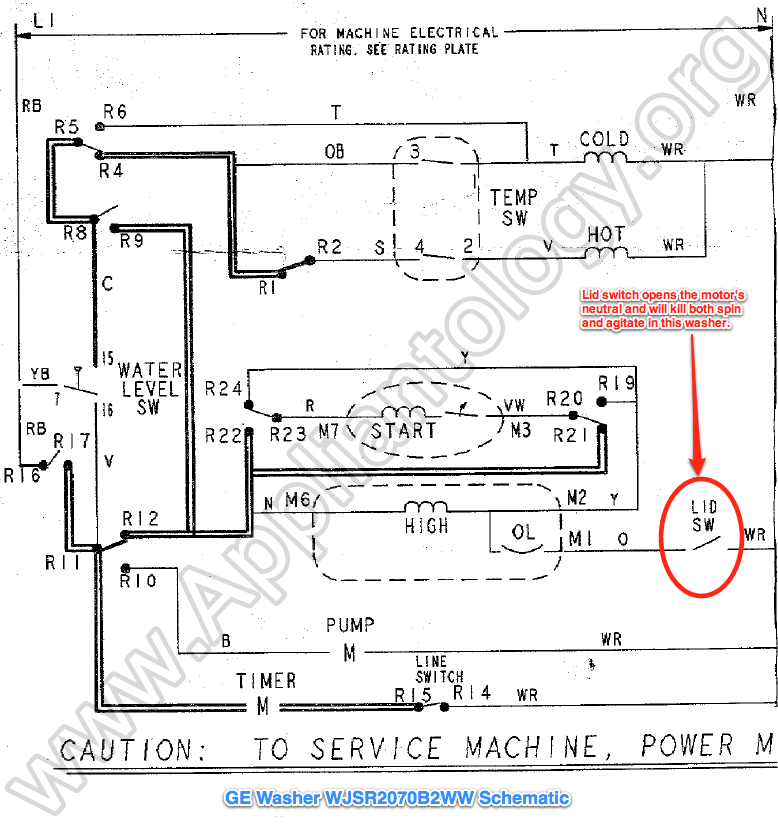
Before disassembling your washer, confirm the issue lies with the transmission. Misdiagnosis leads to wasted time and money. These signs point specifically to transmission or related component failure.
Listen for Grinding or Clunking Noises
A loud grinding, clunking, or whirring noise during the spin cycle is a red flag. If the washer agitates normally but makes noise only during high-speed spinning, the problem likely involves the brake assembly or transmission bearings. A rattling sound during spin, especially with no agitation issues, often indicates a failed bearing in the brake pack at the base of the transmission.
Check for No Agitation or Spin
If the tub fills but the agitator doesn’t move, the transmission isn’t engaging the wash cycle gears. Conversely, if the washer drains but fails to spin, the spin clutch inside the transmission may be worn or seized. Both conditions require transmission inspection.
Look for Leaks Under the Washer
Water pooling beneath the machine often means a failed tub seal inside the transmission housing. This is frequently accompanied by a chalky white residue (dried detergent) on the transmission casing. Worse, leaking oil or grease signals internal lubricant loss, which will destroy gears and bearings quickly.
Smell for Burning or Overheating
A burning smell during operation suggests friction from worn bearings or a locked-up transmission. Stop use immediately because continued operation can damage the motor or other components.
Feel for Excessive Vibration
Violent shaking during spin can stem from transmission instability, especially if internal components are failing. If load balancing doesn’t fix it, inspect the transmission and suspension.
Decide: Repair, Rebuild, or Replace
Transmission repair isn’t always worth it. Evaluate cost, age, and skill level before proceeding.
Calculate Total Repair Cost
A new transmission ranges from $132 to $400 depending on your model. Used or open-box units run $70 to $95. Professional labor costs $75 to $150 per hour, and the job takes 2 to 4 hours, totaling $350 to $700 or more. DIY costs fall between $160 and $580 for parts plus supplies.
Compare this to a new entry-level GE washer priced at $500 to $900. If repair costs exceed 50% of a new machine’s price, replacement is usually the smarter choice.
Apply the 8 to 10 Year Rule
If your washer is older than 8 to 10 years, consider replacement. New models offer better energy efficiency, quieter operation, and longer warranties. The transmission may fail again, or another major component could follow soon.
Consider a Rebuild for Bearing-Only Failure
If the issue is only a rattling noise during spin, the problem may be the 6205-2RS bearing in the brake assembly, not the entire transmission. A rebuild costs under $10 in parts and saves $150 or more versus full replacement. However, this requires advanced tools and mechanical skill.
Verify Warranty Status
Check if your washer is under manufacturer or extended warranty. Some GE models include 10-year limited warranties on the transmission. Always register your appliance and keep proof of purchase.
Confirm Part Compatibility Before Ordering
Using the wrong transmission ruins your repair. Match the part number exactly to your model.
Common GE Transmission Part Numbers
The WH38X27333 fits models like GTW465ASN2WW. The WH03X33729 replaces WH38X24475 and WH38X27335. The WH16X10146 is widely used, but you must verify fit for your specific model. Parts may also cross-reference to Frigidaire or Kenmore numbers such as 134612100, 134735700, and WH38X10014.
Check Physical Dimensions
For example, the WH16X10146 measures 12.5 inches tall, 7.25 inches wide, and 18 inches deep, weighing approximately 13 pounds. Ensure clearance under your washer and confirm the mounting bolt pattern matches your existing unit.
What Comes in a New Assembly
Most new transmissions ship with pre-installed tub seal and washer, a reverse-threaded hub nut, a hub nut washer (green dot side up), mounting hardware, and an agitator bolt. Always keep the old parts as backups until the new unit is tested and confirmed working.
Gather the Right Tools for the Job
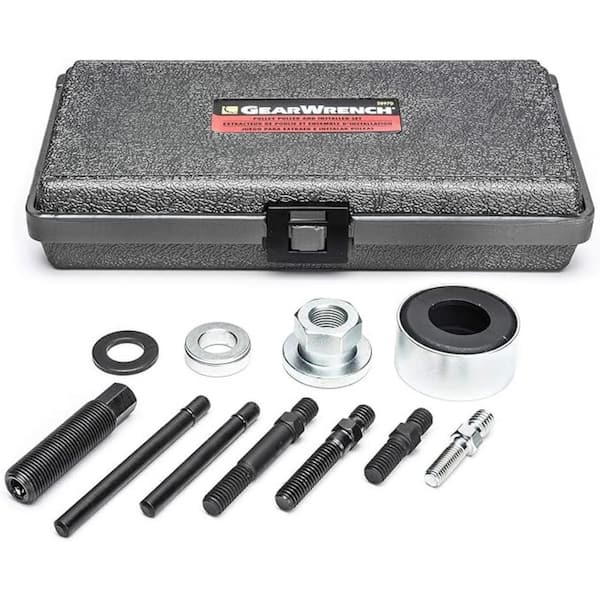
Using improper tools risks stripping bolts or damaging components. This job isn’t for a basic toolkit.
Essential Hand Tools
You will need 3/8-inch, 1/2-inch, 7/16-inch, 9/16-inch, and 11mm sockets. A 33mm or 1-5/16-inch deep socket is required for the hub nut (reverse-threaded). Have Phillips and flathead screwdrivers ready, plus nut drivers for hex screws on some models. Pliers, needle-nose pliers, a putty knife for prying caps and clips, a hammer, and a 2×4 block for tapping the transmission out round out the essentials.
Critical Specialized Tools
An impact driver is required for hub nut removal. A torque-limiting extension set to 90 ft-lb prevents over-tightening the hub nut. A pulley remover safely detaches the pulley without shaft damage. A spanner wrench handles the inner wash basket nut on some models. A special tub hub wrench fits the 1.5-inch brake assembly nut. Stock up on penetrating oil like PB Blaster for stuck bolts.
Rebuild-Only Tools
If rebuilding the brake bearing instead of replacing the entire unit, you need a vice and clamps, a hole saw with scrap wood for making a jig, a Dremel with cutoff wheel, 30mm and 36mm sockets, a 3/16-inch cold chisel (316 stainless steel preferred), and axle grease.
Replace the Transmission: Step-by-Step
Follow this sequence to avoid missed steps or damage to your washer.
Prepare Safely
Unplug the washer or turn off the breaker. Shut off water valves. Disconnect the drain line and water inlets, using towels and a bucket to catch residual water. Pull the unit away from the wall. Tilt the machine back safely, propping it on a 2×4 or sturdy box. Never work under an unstable washer. Remove the fabric softener dispenser to access the agitator area.
Remove Agitator and Hub Nut
Remove the auger or impeller by inserting a screwdriver through the shaft hole to lock it. Twist clockwise to release because it’s reverse-threaded. Lift out the auger. Remove the base by unscrewing the 11mm bolt and lifting it off. Loosen the hub nut using an impact driver with a 33mm or 1-5/16-inch socket plus a 90 ft-lb torque limiter. Turn clockwise to loosen because it’s reverse-threaded. Remove the Belleville washer, noting that the green dot faces up when reinstalling.
Disconnect Mechanical Components
Access the harness by unthreading the screw holding the main wire harness. Remove the belt cover by taking out three screws. Remove the belt by loosening the pulley nuts, sliding the belt off the transmission pulley first, then the motor pulley. Remove the pulleys using a pulley remover to avoid shaft damage. Remove the drain pump by unplugging the connector, removing three 3/8-inch screws, and pulling the pump out while catching residual water.
Disconnect Shifter, Clutch, and Motor
Unplug the mode shifter and speed sensor by pressing the red tab. Remove the dual bracket by unscrewing it from the transmission and disconnecting connectors. Remove the shifter by unscrewing two bolts and pulling it out; the clutch and spring come with it. Remove the motor by unplugging the harness, removing two 1/2-inch bolts while supporting the motor’s weight, and lifting it out.
Extract the Old Transmission
Unbolt the transmission by removing eight 3/8-inch bolts from the tub base. Place a towel underneath to catch the unit. Break the seal by setting the washer upright, placing a 2×4 over the shaft, and tapping gently with a hammer to push the transmission out of the seal. Remove the old unit and clean the seal surface on the tub thoroughly.
Install the New Transmission
Lubricate the seal by applying water to ease insertion. Insert the shaft by feeding it through the tub opening from below. Seat the unit fully by pushing up until the seal contacts the tub, then spin the shaft to align the splines. Secure by reinstalling eight bolts, tightening evenly. Reattach the harness by snapping wire retainers into the new transmission clips.
Reassemble Components
Install the motor by aligning pegs into the transmission, reinstalling the 1/2-inch bolts, and plugging in the harness. Connect the speed sensor by plugging it in and pressing the red tab to lock. Install the clutch and shifter by sliding the spring over the shaft, installing the clutch while aligning splines, attaching the shifter by inserting pegs and securing with two screws, then reinstalling the bracket and connectors. Reinstall the drain pump by reattaching with a wetted seal, tightening three screws, and plugging in connectors. Install pulleys and belt by sliding pulleys on while aligning splines, tightening nuts slowly, installing the belt with the ribbed side inward, looping over the transmission pulley first. Reinstall the belt cover and attach the ground wire under one cover screw.
Final Assembly and Test
Set the washer upright. Install the Belleville washer with the green dot facing up. Tighten the hub nut using an impact driver with a torque limiter, turning counter-clockwise (reverse thread) without exceeding 90 ft-lb. Reinstall the base and auger by aligning the spline and securing the 11mm bolt, then twisting the auger counter-clockwise to lock. Reconnect utilities by attaching the drain hose and water lines, turning on the water, and plugging in power. Run a test cycle and verify no leaks, smooth agitation and spin, no grinding noises, and proper drainage.
Rebuild the Brake Assembly for Bearing-Only Failure

Only attempt this advanced repair if the only symptom is rattling during spin and the rest of the transmission functions properly.
Confirm Bearing Failure
The noise should be isolated to the spin cycle while agitation works normally with no oil leaks. The culprit is likely the 6205-2RS bearing in the brake pack.
Disassemble the Brake
Remove the hub nut and brake assembly. Build a jig from scrap wood using a hole saw cut to fit the housing. Clamp the assembly upside down in a vice using the jig. Remove spiral spring clips and clean grooves with a dental pick. Compress the brake disc with clamps.
Replace the Bearing
Use a Dremel to cut off the four crimped lips securing the old bearing. Hammer out the bearing using a 30mm socket. Clean the housing thoroughly, removing all burrs. Install the new 6205-2RS bearing using a 36mm socket, driving it until it rings flush.
Re-Crimp Securely
Use a sharp 3/16-inch cold chisel to create new crimps at 3 to 4 evenly spaced points. Each crimp must fully trap the bearing outer race. Weak crimps will fail under load, so this step requires precision.
Reassemble and Test
Lubricate with axle grease. Reinstall brass balls into the clutch. Reattach the brake disc and spring clips. Reinstall into the washer. Run a spin test to confirm the noise is gone.
Extend Transmission Life With Proper Maintenance
Prevent future failure with proper care and maintenance habits.
Avoid Overloading
Exceeding capacity strains gears and bearings. Stick to manufacturer load limits listed in your owner’s manual.
Balance Loads Properly
Unbalanced loads cause violent vibration that wears out suspension and transmission mounts. Distribute clothes evenly around the agitator.
Prevent Foreign Objects
Coins, keys, or small items can jam the pump or damage internal components. Check pockets before washing.
Use Correct Cycles
Don’t run heavy-duty cycles for light loads. Match the cycle to fabric weight for optimal performance and reduced wear.
Clean Regularly
Remove detergent gunk and lint from the agitator fins and tub to maintain balance and prevent buildup that affects rotation.
Replace Seals Early
If water gets near the transmission, replace the tub seal immediately. Water washes out grease and kills bearings fast.
Critical Safety Notes for GE Washing Machine Transmission Repair
The hub nut is reverse-threaded. Turn clockwise to loosen and counter-clockwise to tighten. Always use a torque-limiting extension to prevent stripped threads. Verify model compatibility because WH38X27333 does not equal WH03X33729. Unplug before working and never assume power is off. Support heavy components because the motor and transmission can fall during removal. Rebuilds require significant skill, so if you’re unsure, replace the entire assembly.
Frequently Asked Questions About GE Washing Machine Transmission Repair
How much does GE washing machine transmission repair cost?
DIY repair costs range from $160 to $580 for parts and supplies. Professional repair runs $350 to $700 or more, including labor. A new transmission alone costs $132 to $400.
Can I replace just the bearing instead of the whole transmission?
Yes, if the only symptom is a rattling noise during spin and agitation works normally. The 6205-2RS bearing in the brake assembly can be replaced for under $10 in parts. This advanced repair requires specific tools and mechanical skill.
How long does a GE washing machine transmission last?
With proper maintenance, a GE transmission typically lasts 8 to 12 years. If your washer is older than 8 to 10 years, replacement may be more economical than repair.
What are the first signs of transmission failure?
Common early warning signs include grinding or clunking noises during spin, failure to agitate or spin, water leaks under the machine, a burning smell, and excessive vibration during the spin cycle.
Is it worth repairing a GE washing machine transmission?
If the repair costs less than 50% of a new machine’s price and the washer is less than 8 years old, repair is worth considering. Otherwise, replacement is usually the better financial decision.
Can I do this repair myself?
Yes, with the right tools and mechanical aptitude, a determined DIYer can complete this repair. The job requires specialized tools including an impact driver, torque-limiting extension, and pulley remover. Budget 3 to 4 hours for the first attempt.
Key Takeaways for Successful GE Washing Machine Transmission Repair

A failed GE washing machine transmission doesn’t have to mean replacing the entire appliance. With proper diagnosis, the right tools, and careful attention to detail, you can restore full function and extend your washer’s life significantly. The most critical success factors are confirming the transmission is truly the problem (not a simpler issue like a drive belt or pump), using the correct replacement part for your specific model, and following the step-by-step procedure with proper safety precautions including the reverse-threaded hub nut orientation.
Whether you choose full replacement or the advanced bearing-only rebuild, this guide gives you the confidence to tackle the job safely and successfully. If the repair costs approach half the price of a new washer or your machine is over 10 years old, consider replacement instead. For everything else, roll up your sleeves, gather your tools, and get started.