Clothes stuck in your washing machine can turn a simple laundry day into a frustrating ordeal. Whether it’s a favorite sock wedged under the agitator, a drawstring trapped in a hidden gap, or an entire load jammed beneath the drum, this common problem affects thousands of households every year. The good news: most cases can be resolved at home with simple tools and the right technique. The key is knowing where the fabric is caught and how to safely retrieve it without damaging your machine.
This guide covers exactly what causes clothes to get stuck, how to remove them based on your specific washer model including GE, Whirlpool, Maytag, and HE front-loaders, and what to do when dealing with commercial laundromat machines. You’ll also learn proven prevention tips so this frustrating issue never happens again.
Agitator Damage Traps Clothes
Cracked Blades Pull in Fabric
Over time, the plastic blades at the base of a top-load washer’s agitator can crack or warp. As the agitator moves back and forth during the wash cycle, these damaged fins shift slightly, creating small gaps. Lightweight clothing like socks, underwear, or children’s shirts can slip into these spaces and become permanently snagged.
If you notice tears in small items after washing, inspect the agitator base for visible cracks or creases. A broken agitator won’t fix itself, so replace it before more clothes are lost. New agitator units typically cost between $30 and $60.
Fabric Enters Drain Holes
Sometimes clothes aren’t wrapped around the agitator shaft but pushed through drain holes beneath the agitator base. This happens most often with drawstrings, thin polyester garments, or loose threads. The symptom is telling: the agitator spins normally, but part of the clothing stays still. That means the fabric is lodged in a fixed point below, not rotating with the agitator.
To confirm and fix this, you must fully remove the agitator and inspect the space between the base and the tub floor.
Remove Agitator by Washer Brand
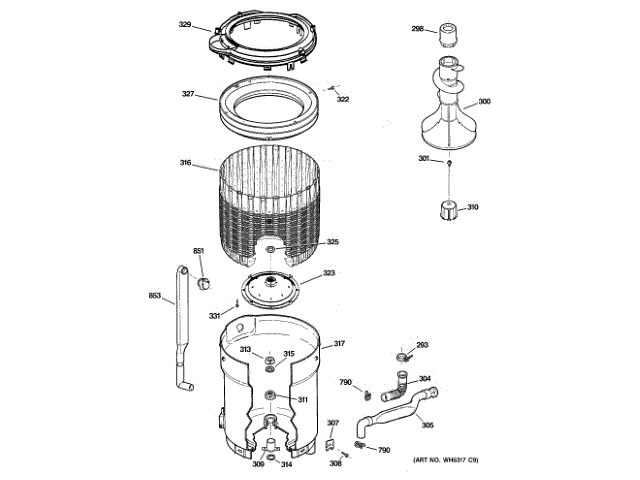
GE Top-Load: Pull Off No Tools
Many GE models use a snap-on agitator that requires zero tools to remove.
- Slide your fingers under the base of the agitator where it meets the tub.
- Pull straight up with firm, even pressure. It should pop off the splined drive shaft.
- Check underneath for trapped fabric. Use scissors to cut free any snags. Don’t yank.
- Reattach by aligning the base and pushing down until you hear a click. That sound confirms the agitator is locked in place.
Pro Tip: If it doesn’t click, the agitator isn’t seated properly. An unstable agitator increases the risk of future entrapment.
Whirlpool and Maytag: Unscrew the Bolt
Most Whirlpool and Maytag top-loaders have a central bolt at the top of the agitator. It’s usually 7/16-inch or 1/2-inch in size. Some models hide it under a removable cap. Pop the cap off to reveal the bolt head.
Free a Seized or Rusty Bolt
If the bolt won’t turn:
- Spray penetrating oil such as PB Blaster, WD-40, or Permatex Part-Getter onto the threads.
- Wait 10 to 15 minutes for it to soak in.
- Try again with a socket wrench.
If the bolt head is stripped, use a bolt extractor kit. Forcing a damaged bolt risks breaking the shaft or cracking the plastic housing.
Lift Without Damaging Tub
After removing the bolt:
- Use a plastic pry bar or wooden dowel to gently tap around the agitator base.
- Rotate your position and tap in multiple spots to loosen it evenly.
- While tapping, pull upward gently. The agitator should release with moderate force.
Never use metal tools. They can scratch the tub or shatter the agitator.
Handle Two-Part Agitators
Some models have a two-stage design. After removing the top bolt, a second bolt may appear underneath. Remove both to fully detach the lower section and access the tub floor.
Front-Load HE Models: Access Drum Cavity
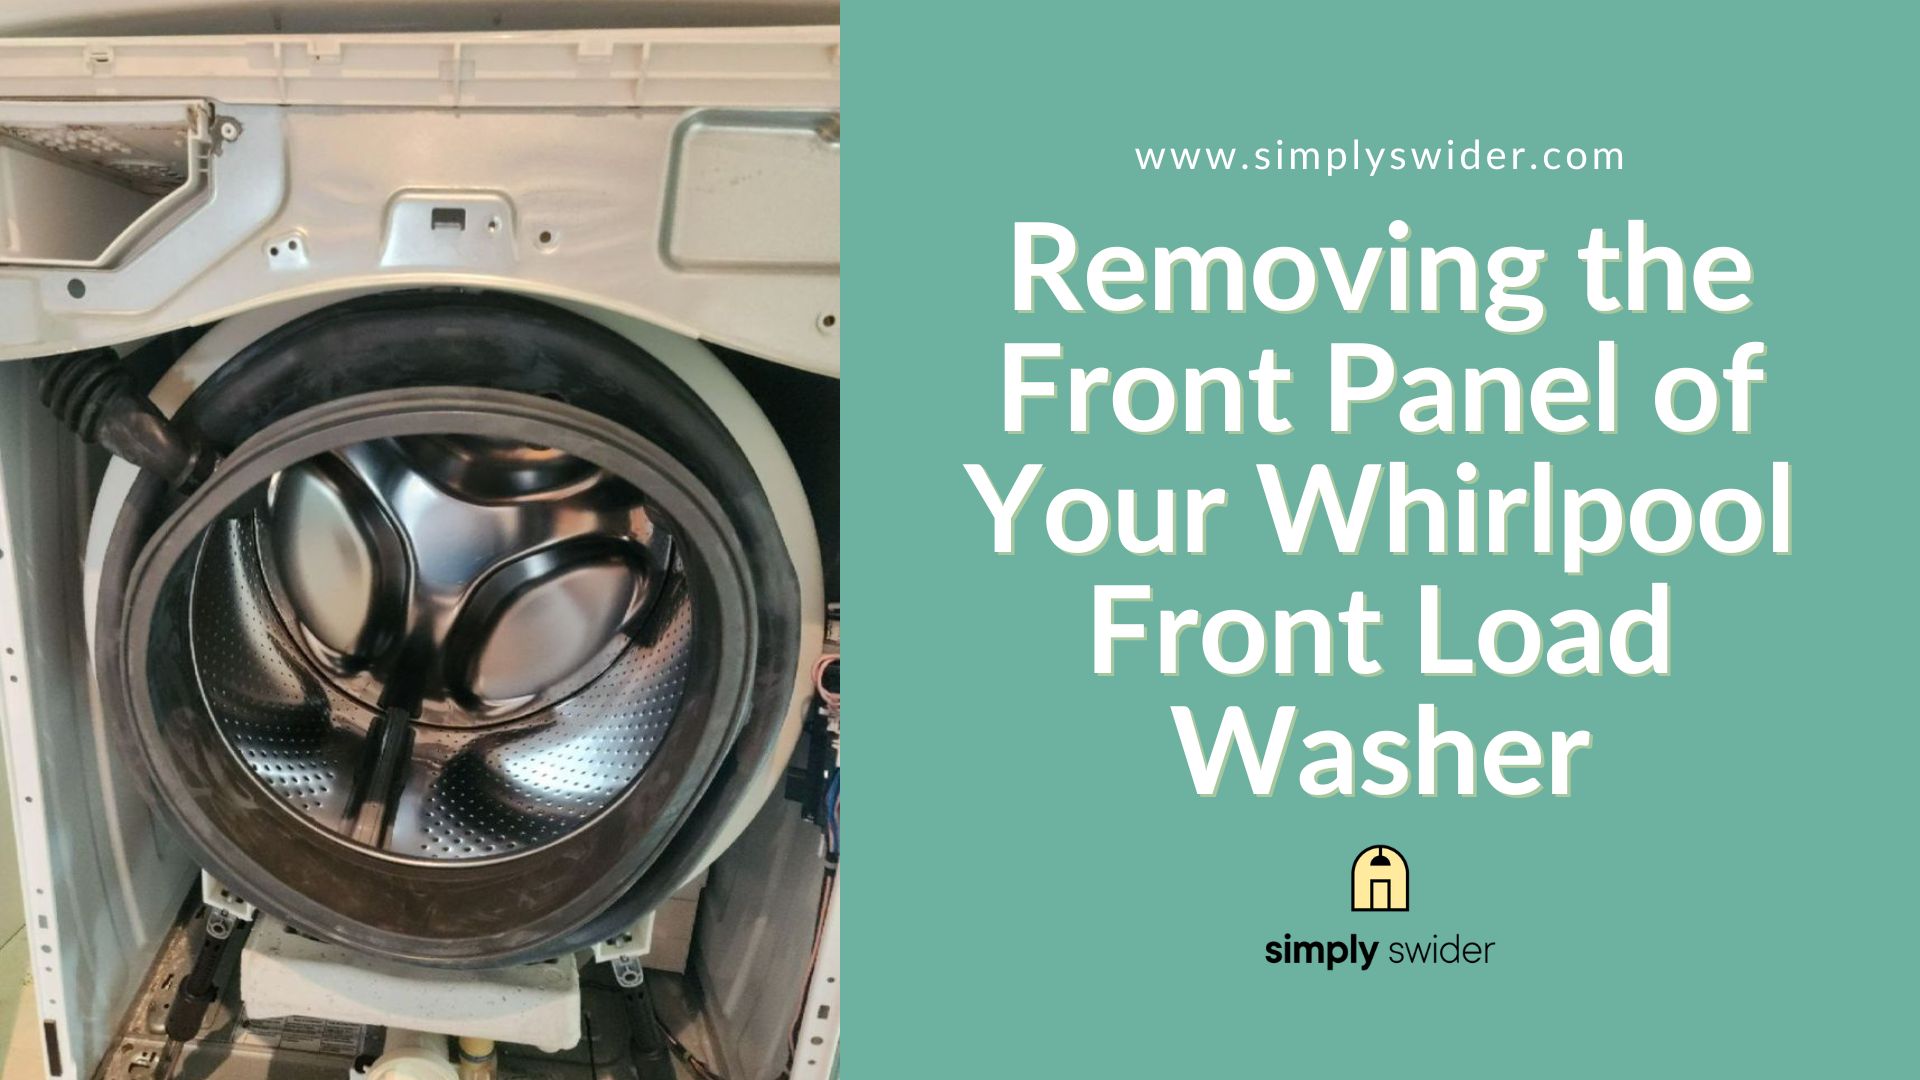
In high-efficiency front-load washers, clothes often get caught beneath the drum or behind the front seal, not near an agitator. To reach them:
Whirlpool HE: Remove Front Panel
Pop Off Lower Access Panel
Grab the bottom edge of the front panel and pull outward firmly. It’s designed to snap off without tools. Once removed, you’ll see the internal cavity and a single 11mm bolt.
Remove the 11mm Securing Bolt
Use an 11mm socket wrench to remove the bolt. If you don’t have one, vise grips clamped tightly on the bolt head work in a pinch. Apply steady pressure. The bolt may resist at first but should turn smoothly once loose.
Retrieve Trapped Clothing
Reach into the narrow space beneath the drum and pull out the stuck item. Be gentle to avoid damaging rubber seals or the drum surface.
Reassemble Securely
Replace the 11mm bolt and tighten it well. Snap the front panel back into place until it clicks. Loose panels can rattle or interfere with operation.
Laundromat: Follow Safety Protocols
Contact Staff Immediately
In commercial laundromats, never try to dismantle machines yourself. Instead:
- Look for service labels, QR codes, or hotline numbers on the machine.
- Ask on-site staff for help. They often have master keys or know the manual release steps.
- Many commercial washers have a manual release lever or emergency door unlock. Only trained personnel should operate these.
No Staff? Escalate Smartly
If no one is around:
- Search online for the laundromat’s website or social media to find contact info.
- For chain locations, call corporate customer support.
- If the machine is flooded or the door won’t open, contact a local appliance repair tech or plumber, especially if drainage is blocked.
Document Damage for Compensation
Take Photos and Keep Receipts
If your clothes are torn or lost due to a faulty machine:
- Photograph the machine, including serial numbers and the stuck item.
- Capture the time and date on your phone.
- Save your payment receipt or app transaction log.
This evidence supports claims for reimbursement, especially if the laundromat neglected maintenance.
Prevent Clothes From Getting Stuck
Load Heavy Items First
Create a fabric barrier by loading jeans, towels, and thick shirts at the bottom. Then place socks, bras, and kids’ clothes on top. Heavier items block the path to the agitator base, reducing the chance small pieces slip down.
Use Mesh Laundry Bags
For delicates and tiny items, small mesh bags are a game-changer. They keep socks and undergarments contained as a single unit, so nothing slips through gaps or wraps around the shaft.
Maintain Agitator and Suspension
Clean Debris Monthly
Every few weeks, remove the agitator and wipe away lint, hair, and gunk from the shaft and base. Buildup creates uneven surfaces that catch fabric.
Check Suspension Rods
While the agitator is out, inspect the suspension rods underneath the tub. Gently rock the drum side to side. If it wobbles excessively, the rods are worn. Failing suspension leads to imbalance and increases entrapment risk.
Replace Cracked Agitators
A damaged agitator is a hazard. Even small cracks can snag and destroy clothing. Replace it promptly. New units cost $30 to $60 and prevent ongoing losses.
Fix Common Stuck-Clothes Scenarios
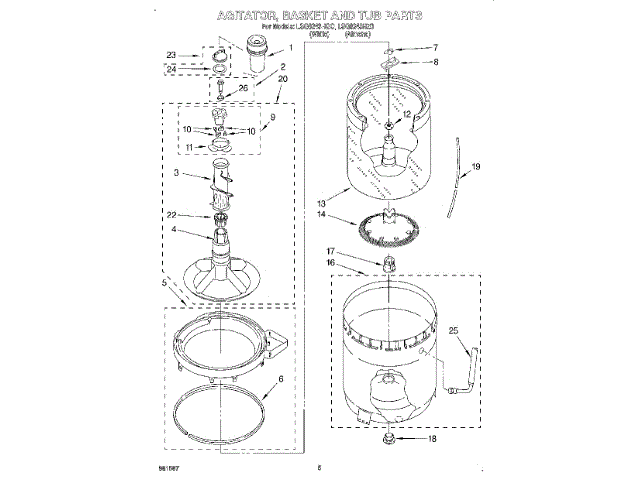
Agitator Spins, Clothes Don’t Move
Cause: Fabric is caught in drain holes or under the base, not wrapped on the shaft.
Fix: Remove the agitator completely. Cut the fabric free with scissors. Don’t pull hard.
Clothes Keep Getting Stuck
Cause: Cracked agitator blades or worn suspension rods.
Fix: Inspect for damage. Replace cracked parts and test tub stability.
Front-Load Door Won’t Open
Cause: Sensor error, water lock, or mechanical jam.
Fix: Check for a manual release lever. If none exists, contact staff or a repair professional. Never force the door.
Bolt Won’t Turn
Cause: Corrosion or stripped threads.
Fix: Apply penetrating oil, wait 15 minutes, then retry. For stripped bolts, use a bolt extractor kit.
Safety First: Critical Warnings
Avoid Metal Tools on Plastic
Metal screwdrivers or pry bars will scratch or crack plastic agitators and tubs. Always use plastic or wooden tools for lifting.
Don’t Force Stuck Parts
If the agitator or panel resists, double-check fasteners. Forcing it can break the splined shaft or crack the tub, leading to costly repairs.
Cut Fabric Carefully
When using scissors or a utility knife:
- Avoid puncturing rubber seals, hoses, or the agitator base.
- Cut only enough to free the fabric. Don’t slice through multiple layers.
Unplug Before Deep Access
Even though most steps are mechanical, unplug the washer or turn off the breaker if accessing areas near electrical components.
Expect Residual Water
Front-loaders and failed cycles may hold water. Keep towels or a shallow pan nearby when removing panels or agitators.
Tool Guide for Every Repair

| Task | Tool Needed | Notes |
|---|---|---|
| GE Agitator Removal | Hands only | Pull straight up; listen for click on reattach |
| Whirlpool/Maytag Bolt | 7/16″ or 1/2″ socket | Use penetrating oil if stuck |
| Front Panel Bolt | 11mm socket or vise grips | Behind lower panel on HE models |
| Lifting Aid | Plastic pry bar or dowel | Never use metal |
| Rusty Bolt Fix | PB Blaster or WD-40 | Soak 10 to 15 minutes |
| Stripped Bolt | Bolt extractor kit | Prevents further damage |
| Freeing Fabric | Scissors or utility knife | Cut, don’t pull, snagged items |
Key Takeaways for Fixing Clothes Stuck in Washing Machine
Clothes stuck in a washing machine don’t have to mean lost laundry or expensive repairs. With the right approach, you can safely retrieve garments and prevent future issues. Whether you own a GE top-loader, a Whirlpool HE front-loader, or you’re dealing with a laundromat machine, the steps in this guide give you exactly what you need to fix the problem.
The most important points to remember are: identify where the fabric is trapped, use the correct tools for your specific washer model, and never force any component. Focus on proper loading techniques, routine maintenance, and using mesh bags for small items. These simple habits will keep your washer running smoothly for years to come and save you from the frustration of retrieving stuck clothes.
Frequently Asked Questions About Clothes Stuck in Washing Machine
Why do clothes keep getting stuck in my washing machine?
Clothes typically get stuck due to cracked agitator blades, drawstrings or small items slipping into drain holes, or improper loading techniques. Worn suspension rods can also cause the drum to shift abnormally, increasing entrapment risk.
Can I remove a stuck agitator without tools on any washer model?
Only certain GE models feature a tool-free snap-on agitator design. Most Whirlpool and Maytag models require a socket wrench, while HE front-loaders require accessing the front panel. Check your owner’s manual for your specific model.
What should I do if the bolt won’t turn when removing the agitator?
Apply penetrating oil such as WD-40 or PB Blaster to the bolt threads and wait 10 to 15 minutes. If the bolt is stripped, use a bolt extractor kit to avoid breaking the shaft. Forcing the bolt can cause costly damage.
How do I prevent clothes from getting stuck in the future?
Load heavier items like jeans and towels at the bottom, then place smaller items on top. Use mesh laundry bags for socks and delicates. Clean the agitator monthly and replace any cracked or warped parts immediately.
What should I do if clothes get stuck in a laundromat machine?
Contact on-site staff immediately for assistance. If no staff is available, look for contact information on the machine and search online for the laundromat’s contact details. Document the machine and damage with photos for any compensation claims.