
Is your Whirlpool washing machine sitting in the laundry room, but you’re not quite sure how to get the best results? You are not alone. With multiple cycles, settings, and features, it is easy to feel overwhelmed. But using your Whirlpool washer efficiently does not have to be complicated. Whether you have just installed a new model or want to optimize your current routine, this step-by-step guide will walk you through every stage, from sorting clothes to starting the cycle and maintaining peak performance.
By following these clear instructions, you will avoid common mistakes like residue buildup, mildew smells, or damaged fabrics. You will learn how to load correctly, choose the right cycle, use detergent properly, and keep your machine running like new. Most importantly, you will get cleaner clothes with less wear and tear, all with minimal effort.
Pre-Wash: Sort and Treat Clothes
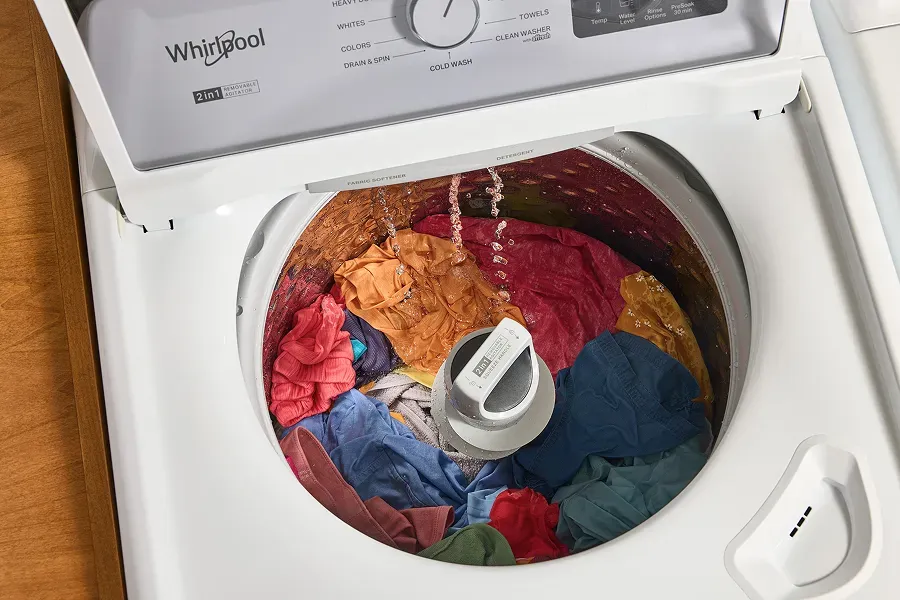
Before you even touch the control panel, proper preparation ensures better cleaning and longer-lasting garments. Taking a few minutes to sort and treat stains upfront prevents damage to fabrics and delivers superior cleaning results.
Check Pockets and Fasten Zippers
Always inspect pockets for loose items like coins, tissues, or keys. These can damage the drum or create lint. Close all zippers to prevent snagging delicate fabrics. Buttons should be fastened, and drawstrings tied to avoid tangling during the wash cycle.
Sort by Fabric and Color
Separate clothes into piles: whites, darks, colors, and delicates. Even if dyes are labeled colorfast, wash new or dark items separately the first time to prevent bleeding. Group similar fabric types together. Cottons with cottons, synthetics with synthetics. This matches cycle intensity to fabric strength and preserves garment quality.
Pre-Treat Stains Immediately
Do not wait until after washing to treat stains. Apply an enzyme-based stain remover directly to soiled areas and let it sit for 5 to 10 minutes as directed. Never put stained clothes in the dryer. Heat sets stains permanently and makes removal nearly impossible. Wash treated items first, and re-treat if needed before drying.
Install and Power On Correctly

If you are setting up a new Whirlpool washer, proper installation ensures safe and efficient operation from day one. Taking time to connect utilities correctly prevents leaks, vibrations, and performance issues later.
Connect Water and Drain Hoses
Attach the hot and cold water supply hoses to the correct valves at the back of the machine. Use a wrench to tighten, but avoid over-tightening which can damage the threads. Connect the drain hose to a standpipe or laundry sink, ensuring it is not kinked or positioned too low, which causes siphoning problems.
Level the Machine
Adjust the front leveling legs so the washer sits flat and steady. An unbalanced unit vibrates loudly during spin cycles and can shift across the floor. Use a bubble level to confirm the machine is perfectly level before use.
Activate and Reset the System
Press the Power button. A chime sounds and lights turn on. If the display flashes or acts erratically, hold Power for 5 seconds to reset. Wait for the lights to stabilize before selecting a cycle. On compatible models, the machine enters sensing mode when started, automatically detecting load size and adjusting water levels.
Load the Drum and Add Detergent
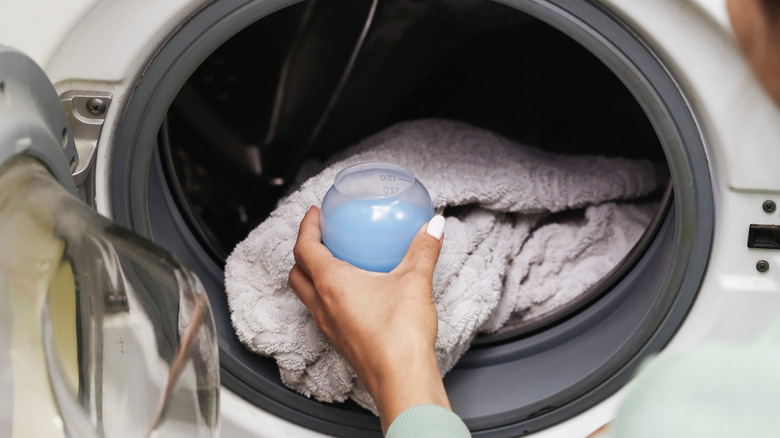
How you load your washer impacts cleaning performance and fabric care significantly. Proper loading techniques maximize agitation efficiency while preventing damage to clothes and the machine.
Use the Right Detergent Type
Use liquid detergent for best results in automatic washers. Powder can clump if not fully dissolved. If using powder, add it directly to the drum before clothes. Never exceed the fill line on the cap or dispenser. HE detergents are formulated for low-water cycles, so using too much defeats their purpose.
Apply Detergent Correctly
Choose one of these methods. Pour detergent into the bottom of the drum before adding clothes. Alternatively, place liquid detergent on top of the load, not bunched in one spot. Avoid over-sudsing. Extra detergent does not mean cleaner clothes. It traps in fabrics, reduces rinsing efficiency, and causes odors over time.
Add Fabric Softener Properly
If using a dispenser in the agitator, fill it to the line and dilute with warm water. For a Downy ball, place it upside down in the drum to ensure proper release during rinse. On drawer models, pour softener into the labeled compartment. Use sparingly. Frequent use reduces towel absorbency and degrades fibers over time.
Load Clothes Evenly
Place items loosely around the agitator. Do not cram the drum. Clothes need room to move for proper agitation and rinsing. Overloading strains the motor and leads to poor cleaning. garments should fill the drum no more than three-quarters full.
Close Lid to Start
Ensure the lid is fully closed. The washer will not start if the lid switch is not engaged. On some models, a lid lock light illuminates once secured. The machine will not operate if the lid is open or improperly latched.
Select the Right Wash Cycle
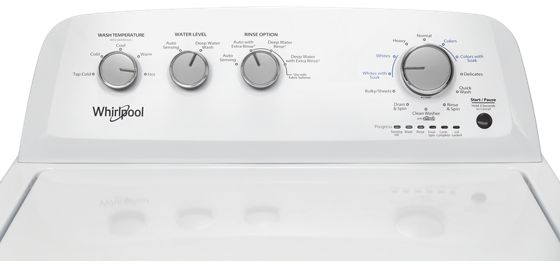
Whirlpool models vary, but most share similar control layouts and cycle logic. Understanding how to navigate the panel and match cycles to loads optimizes both cleaning results and energy efficiency.
Navigate the Control Panel
On single-dial models, press Program or P to enter selection mode. On multi-dial units, turn the main dial to choose your cycle. The model number is usually on the right side of the panel. Keep it handy for manuals and support when ordering parts.
Choose by Soil and Fabric Type
Normal cycle works for everyday clothes with average dirt. Heavy cycle handles workwear, muddy items, or heavily soiled loads. Light cycle is best for delicates, lingerie, or lightly worn garments. Clean Washer cycle should run every 30 loads to sanitize the tub. Use one Affresh tablet or 1 cup of bleach. Never mix cleaners.
Set Water Temperature
Match the setting to fabric care labels. Hot water works best for whites, towels, and bedding. It kills germs and removes oils. Warm water suits most colored clothes, balancing cleaning and fabric safety. Cold water prevents fading and shrinking on dark or bright colors. No Heat provides maximum energy savings and is ideal for delicate synthetics.
Adjust Soil Level and Agitation
Use the Soil Level selector to set wash intensity. Light setting is gentle on fabrics. Normal setting provides standard cleaning. Heavy setting offers more agitation for tough stains. Higher agitation cleans better but increases wear on clothes. Let Auto Sense on compatible models adjust water levels based on load size automatically.
Use Rinse, Soak, and Extra Options
Customize your cycle for better results with advanced settings. These options address specific laundry needs like sensitive skin, bulky items, or heavily soiled loads.
Choose Rinse Options
One Rinse is standard for most loads. Two Rinses is best for sensitive skin or heavy detergent use. Extra Rinse removes softener buildup or excess moisture from bulky items like comforters. It can reduce air-dry time significantly. The washer may auto-optimize rinses if Automatic Rinse is enabled.
Activate Presoak for Tough Loads
Press Presoak to add a soaking phase before washing. This is ideal for grass-stained jeans or oily work clothes. The presoak cycle adds 30 or more minutes to the total cycle time but reduces the need for rewashing.
Enable Deep Water Wash
On select models like WTW5057, press Options twice to activate Deep Water. The drum fills higher for improved cleaning of large or dense loads like blankets. An indicator light confirms activation when enabled.
Add Fabric Softener Automatically
Press Rinse Option once to enable softener release during the final rinse. This ensures even distribution without residue. The indicator light confirms the feature is active.
Start and Monitor the Cycle
Once everything is set, it is time to begin the wash. Proper starting procedures and monitoring ensure the cycle runs smoothly without interruptions.
Begin the Wash Cycle
Confirm water valves are open and power is on. Select your cycle, temperature, and options. Press Start. On some models, hold Start for 2 to 3 seconds to lock settings. Listen for a click. This means the lid is locked and the cycle has started. The lid lock indicator light will illuminate.
Watch Cycle Progress
Lights below the dial or a digital display show the current phase. You will see Wash, Rinse, or Spin indicated. A timer may count down remaining time. If the machine pauses during wash, it may be managing excess suds automatically. Let it complete. This prevents residue and ensures proper rinsing.
Pause to Add Forgotten Items
Forgot a sock? Press Stop. Wait for the lid to unlock, usually within 1 to 2 minutes. Open, add the item, close the lid, and press Start to resume. The machine will pick up where it left off.
Remove and Dry Clothes Promptly
What you do after the cycle ends matters just as much as the wash itself. Proper post-cycle handling prevents odors and wrinkles while extending garment life.
Take Out Clothes Immediately
As soon as the end-of-cycle chime sounds, remove laundry. Leaving wet clothes inside breeds mildew and odors. If you cannot monitor the machine, set a phone timer based on cycle length. Wait for the lid lock light to turn off before opening.
Dry According to Fabric Needs
Transfer clothes to the dryer or drying rack. Low Heat works for delicates and synthetics. Medium Heat suits blends and permanent press. High Heat is best for towels, sheets, and cottons. Air Fluff, no heat, refreshes clothes or dries heat-sensitive items. Timed Dry works if clothes are damp after spin. Extend drying in 10-minute increments.
Fold dress shirts and pants right away to minimize wrinkles. Hang items that need to dry straight to maintain their shape.
Maintain Your Washer Monthly

A clean washer equals clean clothes. Neglect leads to smells, residue, and poor performance. Regular maintenance protects your investment and ensures consistent results.
Run Clean Washer Cycle Every 30 Loads
Every month or after approximately 30 washes, run the Clean Washer cycle. Ensure the drum is empty. Add one Affresh tablet or 1 cup of liquid chlorine bleach. Select Clean Washer cycle. Start and let it complete. Never mix bleach with other cleaners. They can create toxic fumes.
Prevent Odors and Buildup
Leave the lid open between uses to air out moisture. Wipe the door seal and detergent dispenser weekly. Use high-efficiency HE detergent to reduce suds. These simple habits prevent the buildup that causes unpleasant odors.
Troubleshoot Common Issues
Detergent residue on clothes means you are using too much. Run an Extra Rinse cycle to remove buildup. Suds during rinse or spin causes the machine to pause automatically. Let it finish suds removal. Lid will not lock? Ensure the lid is fully closed. On some models, hold Start for 2 to 3 seconds. Low water level? Confirm Auto Sense is active or manually select Deep Water if needed.
Optimize Performance Long-Term
Get the most from your Whirlpool washer with smart habits. Consistent practices extend machine life and maintain cleaning quality over years of use.
Match Cycle to Load Size
Do not run a heavy cycle for two shirts. Use Light or Small Load settings when appropriate. Auto Sense adjusts water, but correct cycle selection maximizes efficiency and protects fabrics from unnecessary wear.
Respect Load Capacity
Overloading prevents proper agitation. Clothes should fill the drum no more than three-quarters full. Bulky items like comforters should be washed alone to ensure thorough cleaning and proper water circulation.
Use Detergent Wisely
Stick to the cap is fill line. HE detergents are formulated for low-water cycles. Using too much defeats their purpose and causes residue. Following dosage guidelines ensures cleaner clothes and prevents machine problems.
Frequently Asked Questions About Using a Whirlpool Washing Machine
What is the best detergent to use in a Whirlpool washing machine?
Liquid detergent works best in automatic Whirlpool washers. Powder detergent may be used if your model specifies it, but liquid dissolves more completely and leaves less residue. Always use HE detergent for high-efficiency models and never exceed the fill line on the cap.
How often should I run the Clean Washer cycle on my Whirlpool?
Run the Clean Washer cycle every 30 loads, which is approximately once per month. Use one Affresh tablet or 1 cup of liquid chlorine bleach in an empty drum. This prevents odor-causing buildup and keeps the interior sanitized.
Can I add clothes after the wash cycle has started on a Whirlpool washer?
Yes. Press Stop and wait 1 to 2 minutes for the lid to unlock. Open the lid, add the forgotten item, close the lid, and press Start to resume the cycle. The machine will continue from where it paused.
What temperature should I use for different types of laundry?
Hot water works best for whites, towels, and heavily soiled items. Warm water suits most colored clothes. Cold water prevents fading and shrinking on dark or bright fabrics. No Heat settings maximize energy savings for delicate synthetics.
Why does my Whirlpool washer pause during the wash cycle?
The washer may automatically pause to manage excess suds. This is normal. It extends the washing stage to remove suds before proceeding to rinse. Let the cycle complete. This ensures thorough cleaning and prevents residue on clothes.
How do I know if my Whirlpool washer is level?
An unbalanced washer vibrates loudly during spin cycles and may move across the floor. Place a bubble level on top of the machine. Adjust the front leveling legs until the bubble is centered. This prevents excessive vibration and noise.
Key Takeaways for Using Your Whirlpool Washing Machine
Using a Whirlpool washing machine effectively is about consistency, not complexity. Sort clothes before washing, load the drum properly without overfilling, and choose the right cycle for each load type. These simple habits deliver cleaner clothes while protecting your garments and the machine.
Always use the correct detergent type and amount. HE detergent in the right dosage prevents residue buildup and odors. Match water temperature and soil level to fabric care labels for optimal results. Do not forget monthly maintenance with the Clean Washer cycle to keep your machine running like new.
For model-specific details, always refer to your user manual using the model number on the control panel. With these practices, you will enjoy cleaner clothes, fewer repairs, and a washer that lasts for years.



