
You’ve noticed a leak, heard a strange noise, or your washer won’t spin, and now you need to get inside. The fastest way to access the motor, pump, or wiring is to remove the back panel. But before you grab a screwdriver, know this: every washing machine model removes its back panel differently. Some require just a few screws, while others demand cabinet disassembly first. Get it wrong, and you risk damaging clips, pinching wires, or even electrical shock.
This guide provides step-by-step, model-specific instructions for Samsung, Roper, Whirlpool, and Kenmore units. You’ll learn how to safely disconnect power, remove screws and clips, and free the rear panel without breaking anything. Whether you’re replacing a motor coupler or inspecting a leak, you’ll find clear directions, tool lists, and pro tips to avoid common mistakes.
Essential Safety Steps Before Starting
Disconnect Power and Water Supply
Never skip this step. Working on a plugged-in washer can lead to fatal electrical shock. Start by unplugging the machine from the wall outlet. Even if the washer appears off, capacitors in the control board can hold a charge. Keep the machine unplugged throughout the entire repair.
Next, shut off both hot and cold water supply valves behind the washer. Turn the knobs clockwise until tight. Then, disconnect the inlet hoses from the back of the washer using pliers to loosen the hose clamps. Place a towel underneath to catch residual water.
Finally, pull the washer away from the wall to access the rear freely. Ensure the floor is dry and level to prevent tipping during work.
Wear Protective Gear and Prepare Workspace
Washing machine cabinets have sharp metal edges, especially around the back panel frame. Wear heavy-duty gloves to protect your hands. Closed-toe shoes are mandatory in case a tool or panel slips.
Use a flashlight to inspect tight spaces and dark corners. Before removing any part, take photos with your phone of screw locations, wire connections, and hose routing. This makes reassembly faster and mistake-free.
Label screws and clips with tape or a small container. A dropped clip can roll under appliances and disappear.
Required Tools for Back Panel Removal
Basic Hand Tools
You will need just a few common tools for most back panel jobs:
- Phillips head screwdriver for removing securing screws
- Flathead screwdriver to release locking clips and pry panels gently
- Pliers for loosening hose clamps and removing ground wire bolts
- Putty knife or plastic pry bar to avoid scratching paint when releasing clips
For deeper repairs, you may also need a 7/16-inch socket for agitator bolts on top-loaders, a tub nut wrench to remove inner tubs, and a socket set for various nut sizes on motor mounts.
Keep all tools within reach. A magnetic tray helps prevent losing small screws.
Samsung: Remove Rear Cover Panel
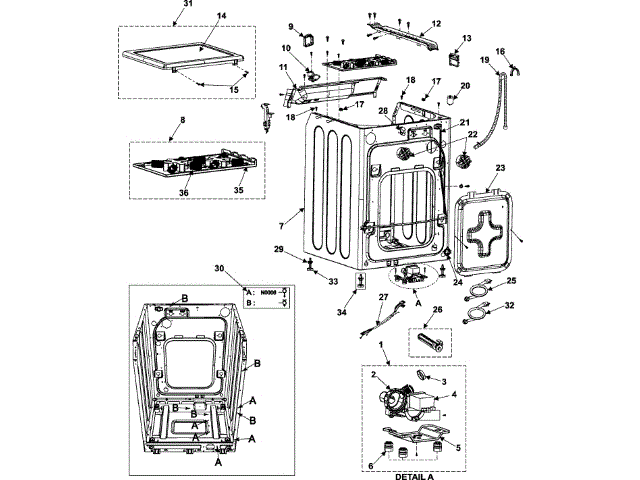
Locate and Remove Six Screws
Samsung models like those using part DC63-01433A have a simple back panel removal process. With the washer unplugged and pulled out, locate six Phillips head screws around the perimeter of the rear cover.
Remove all six screws completely. Set them aside in a labeled container. These screws are typically uniform in size, but mixing them with others can complicate reassembly.
Release Locking Clips and Lift Panel
After removing screws, the panel is still held by plastic locking clips at the bottom. Slide one hand under the lower edge of the panel to support it.
With your other hand, use a plastic pry bar or flathead screwdriver to gently push the clips inward. Apply even pressure. Do not force it. Once the clips release, tilt the panel upward and lift it off the frame.
Inspect the clips for cracks. If any are broken, replace them before reinstallation to ensure a secure fit.
Roper Model RAX4233PQ0: Back Panel Access
Remove Cabinet Before Back Panel
On Roper top-loaders like model RAX4233PQ0, you cannot remove the back panel directly. You must first remove the outer cabinet. This is a two-phase process.
Start by removing two Phillips screws at the back of the washer that secure the control console. Grasp the console from the rear, slide it forward about half an inch, then lift and pivot it backward onto its hinge straps.
Disconnect the lid switch wire harness from the top of the machine to free the console.
Release Cabinet Clips and Lift Off
Move to the front. Locate two retaining clips, one on each side, connecting the cabinet to the back panel. Insert a flathead screwdriver into the clip’s lip, push back to release, then push down and forward to remove it.
With clips off, open and tape the lid open. Grasp the cabinet from the inside front rim. Lift the back edge to a 45-degree angle, pull forward to clear the base, and lift the cabinet free.
Now the back panel is exposed but still secured.
Remove Back Panel Screws and Lift Away
With the cabinet off, remove two Phillips screws at the base of the back panel. These anchor the panel to the washer’s frame.
Once screws are out, lift the back panel straight up and away from the base. Set it aside carefully.
To reassemble, reverse the steps: align the panel, replace base screws, reinstall cabinet clips, reconnect wiring, and secure the console.
Whirlpool/Kenmore Top-Loaders: Panel Access Route
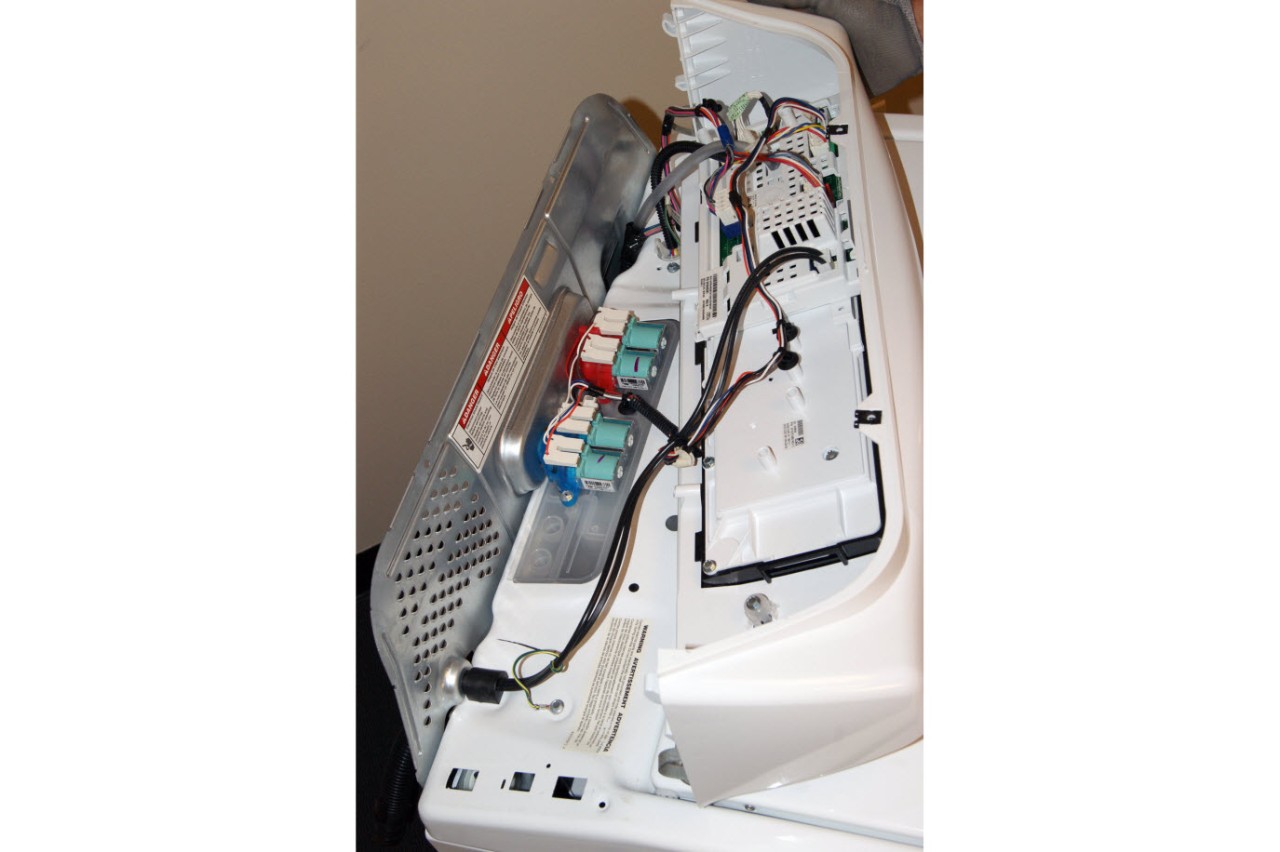
Remove Control Panel First
On Whirlpool and Kenmore top-loaders like model WTW4800XQ2, the back panel is not removed for most repairs. Internal access starts at the front instead.
Begin by taping the lid open to prevent it from slamming shut. Then, insert a putty knife under the front edge of the control panel. Push forward to release two spring clips hidden beneath.
Once released, rotate the control panel forward to expose the main top hinges.
Remove Hinge Screws and Lift Main Top
With the control panel forward, remove two hinge screws at the rear using a Phillips screwdriver.
Next, disconnect the wiring and tube cover by removing its single screw and pulling it off. This frees the hoses and wires.
Now, lift the main top forward and upward, supporting its weight as it clears the frame brackets. Set it aside.
With the top off, you can access the tub ring, agitator, and inner tub. No back panel removal is needed.
When You Need Deep Internal Access
If you are replacing the tub nut or motor, you will go further.
First, remove the agitator cap. Then use a 7/16-inch socket to remove the agitator bolt. Lift the agitator off the drive shaft.
Next, use a tub nut wrench and hammer to turn the tub nut counterclockwise and remove it. Lift the inner tub out.
The back panel stays on. The repair happens from the top.
When Not to Remove the Back Panel
Front Panel Removal Is Often Required
For many repairs, like fixing a broken motor coupler or clogged pump, removing the back panel will not help. The components are at the front bottom of the machine.
In these cases, front panel removal is necessary. This is common on direct-drive models where the motor sits behind the drum.
Steps to Remove Front Panel Instead
Remove control top screws at the bottom corners. Then tilt and lift the top panel and disconnect the wiring harness.
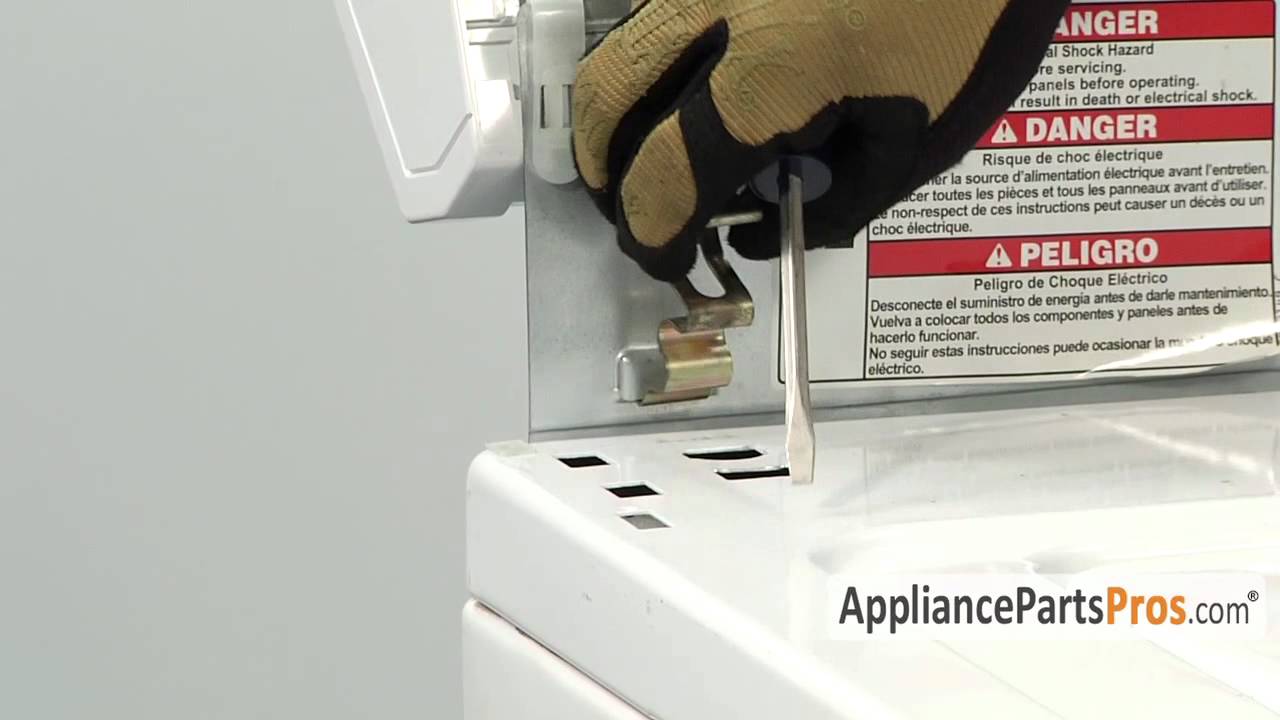
Locate two large front clips. Use a flathead screwdriver to push down on each until it pops loose.
Tilt the front panel upward from the back and remove it.
Now the pump and motor are exposed. You can replace the motor coupler, a rubber piece that often fails and costs under $20.
Never install plastic or metal couplers if the original was rubber. They are harder to remove if broken and do not shear safely under overload.
Reassemble With Confidence
Follow Reverse Order and Check Alignment
Reassembly is usually the reverse of disassembly, but alignment matters. For Samsung panels, insert the top edge at an angle, then rotate down until the locking tabs click.
For Whirlpool tops, align rear slots with frame tabs before lowering. Push until you hear a distinct click. This means clips are seated.
Misaligned panels can pinch wires or cause wobbling.
Reconnect All Wires and Hoses
Before securing panels, double-check all connections.
Reconnect the lid switch harness. Reattach the pressure relief hose to the water level switch. Secure ground wires with pliers and bolt. Clamp inlet and drain hoses tightly.
A loose hose causes leaks. A disconnected wire can prevent the washer from starting.
Final Checks Before Power-Up
Inspect for Gaps and Loose Parts
Once panels are on, walk around the washer. Look for gaps between panels and frame, wires caught under edges, missing screws or clips, and loose hose clamps.
A wobbling back panel usually means a clip did not seat or a screw is missing.
Run a Test Cycle
Only after everything is secure, plug the washer back in. Turn on water supply and open valves slowly.
Run a short test cycle with no clothes. Watch for leaks at hose connections, unusual noises like grinding or clicking, and proper agitation and draining.
If it fills but does not spin, suspect a failed motor coupler, a common issue on direct-drive models.
Pro Tips to Avoid Common Mistakes
Do Not Force Stuck Panels
If a panel will not budge, do not pry harder. Double-check that all screws are removed, clips are fully released, and no wire or hose is snagged.
Forcing it can break plastic tabs or bend metal.
Use Correct Replacement Parts
Order parts using your exact model number, found on the door label or back panel. A mismatched rear cover will not fit.
For motor couplers, bring the old part to the store. Rubber ones vary by model.
Keep a Repair Kit Handy
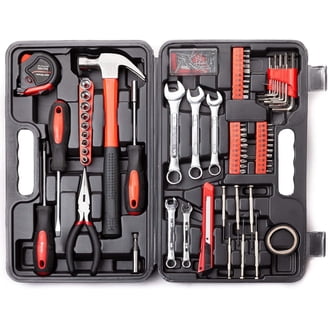
Store these items for future fixes: spare motor coupler priced at $15 to $20, extra hose clamps, Phillips and flathead screwdrivers, and pliers and socket set.
A 15-minute coupler swap can save a service call.
Frequently Asked Questions About Removing Washing Machine Back Panels
Can I remove the back panel on any washing machine model?
No. Some models, like Roper top-loaders, require removing the cabinet first before accessing the back panel. Samsung models have a straightforward six-screw removal. Whirlpool and Kenmore top-loaders often do not require back panel removal at all, since internal access is through the front or top.
What tools do I need to remove a washing machine back panel?
Most jobs require a Phillips head screwdriver, flathead screwdriver, pliers, and a putty knife or plastic pry bar. For deeper repairs involving the agitator or inner tub, you may need a 7/16-inch socket and a tub nut wrench.
Is it safe to remove the back panel while the washer is plugged in?
No. Always unplug the washer before starting any repair. Even when turned off, capacitors in the control board can hold a dangerous electrical charge. Disconnect power completely and keep the machine unplugged throughout the repair.
Why would I need to remove the back panel instead of the front panel?
The back panel provides access to components like the motor, pump, and wiring harness on some models. However, for many repairs, including motor coupler replacement, front panel access is required. Check your specific model’s repair needs before removing the back panel.
How do I know if my back panel clips are damaged?
Inspect the plastic locking clips for cracks or breaks when removing the panel. If any clip is damaged, replace it before reinstallation. A broken clip can cause the panel to wobble or not seat properly, leading to noise or air leaks.
Key Takeaways for Removing Your Washing Machine Back Panel
Removing a washing machine back panel is straightforward on some models like Samsung, but requires cabinet disassembly on others like Roper. Always start with safety: unplug the machine, shut off water, and wear gloves. Identify your specific model before starting, since screw locations and clip mechanisms vary between brands.
For most internal repairs including pump, motor, and coupler issues, front or top access is needed, not the back. Use this guide to pick the right access path for your model, avoid forced removal, and reassemble with confidence. When done right, you will have full access to fix the problem and get your washer running again without a technician.



