
Disconnecting a washing machine drain hose becomes necessary when moving house, upgrading to a new appliance, or performing maintenance to clear stubborn clogs. This task carries real risks if approached carelessly: water damage to flooring, electrical shocks from live components, or messy spills that soak walls and baseboards. The good news is that with proper preparation and a clear sequence of steps, you can complete this task safely in under thirty minutes without calling a professional. This guide covers everything you need: from cutting power and water supply to identifying connector types, draining residual water, and handling both freestanding and integrated washing machine models.
Essential Safety Precautions Before Starting
Water and electricity form a dangerous combination, and skipping safety steps risks shocks, leaks, or flooding that can damage your home significantly. Never attempt to disconnect any hose without completing these precautions first.
Disconnect Power Supply Completely
Unplug the washing machine directly from the wall outlet. This is the single most critical safety step because even when the machine appears off, internal components may still carry live current. For added protection, switch off any nearby electrical sockets located under sinks or behind cabinets where water spills could travel. Remove extension cords from the floor area immediately, as these pose both a tripping hazard and risk water damage during the draining process.
Turn Off Water Supply Valves
Although you are focused on the drain hose, the hot and cold water supply lines must also be secured to prevent accidental water flow. Locate the valves behind the machine or under the adjacent sink. They are typically color-coded with red for hot and blue for cold. Turn both valves clockwise until they are completely tight. In older homes with potentially corroded valves, consider turning off the main water supply to avoid unexpected leaks during disconnection.
Prepare Your Workspace
Clear the area around the washing machine completely. Move rugs, furniture, and keep children and pets away from the work zone. Place thick towels or old rags on the floor to absorb spills and protect flooring from scratches. Position a large bucket or bowl beneath the hose connections to catch residual water. Have a wrench, pliers, flat-blade screwdriver, and a cap or rag ready for sealing the hose end after removal.
Access the Washing Machine Safely
Reaching the drain hose requires adequate space around the appliance. How you access the machine depends on whether it is freestanding or built into your cabinetry.
Pull Out Freestanding Units
Gently pull the washing machine away from the wall, keeping it level to avoid tipping. Use furniture sliders or a dolly to reduce strain and prevent floor scratches. Do not yank power or water lines; ease the unit forward just enough to access the rear panel. Keep the drain hose elevated during movement to minimize water spillage from the hose interior.
Free Integrated Models from Cabinetry
Built-in washing machines are secured to cabinets or countertops and require additional steps. Open adjacent cabinet doors to expose the sides and top of the machine. Look for screws or brackets on the machine frame, typically found on the sides or beneath the worktop. Use a screwdriver to remove these fasteners carefully, preserving all hardware for reinstallation. Once unfastened, slide the unit forward and proceed with the same disconnection steps used for freestanding models.
Identify the Drain Hose and Connection Type
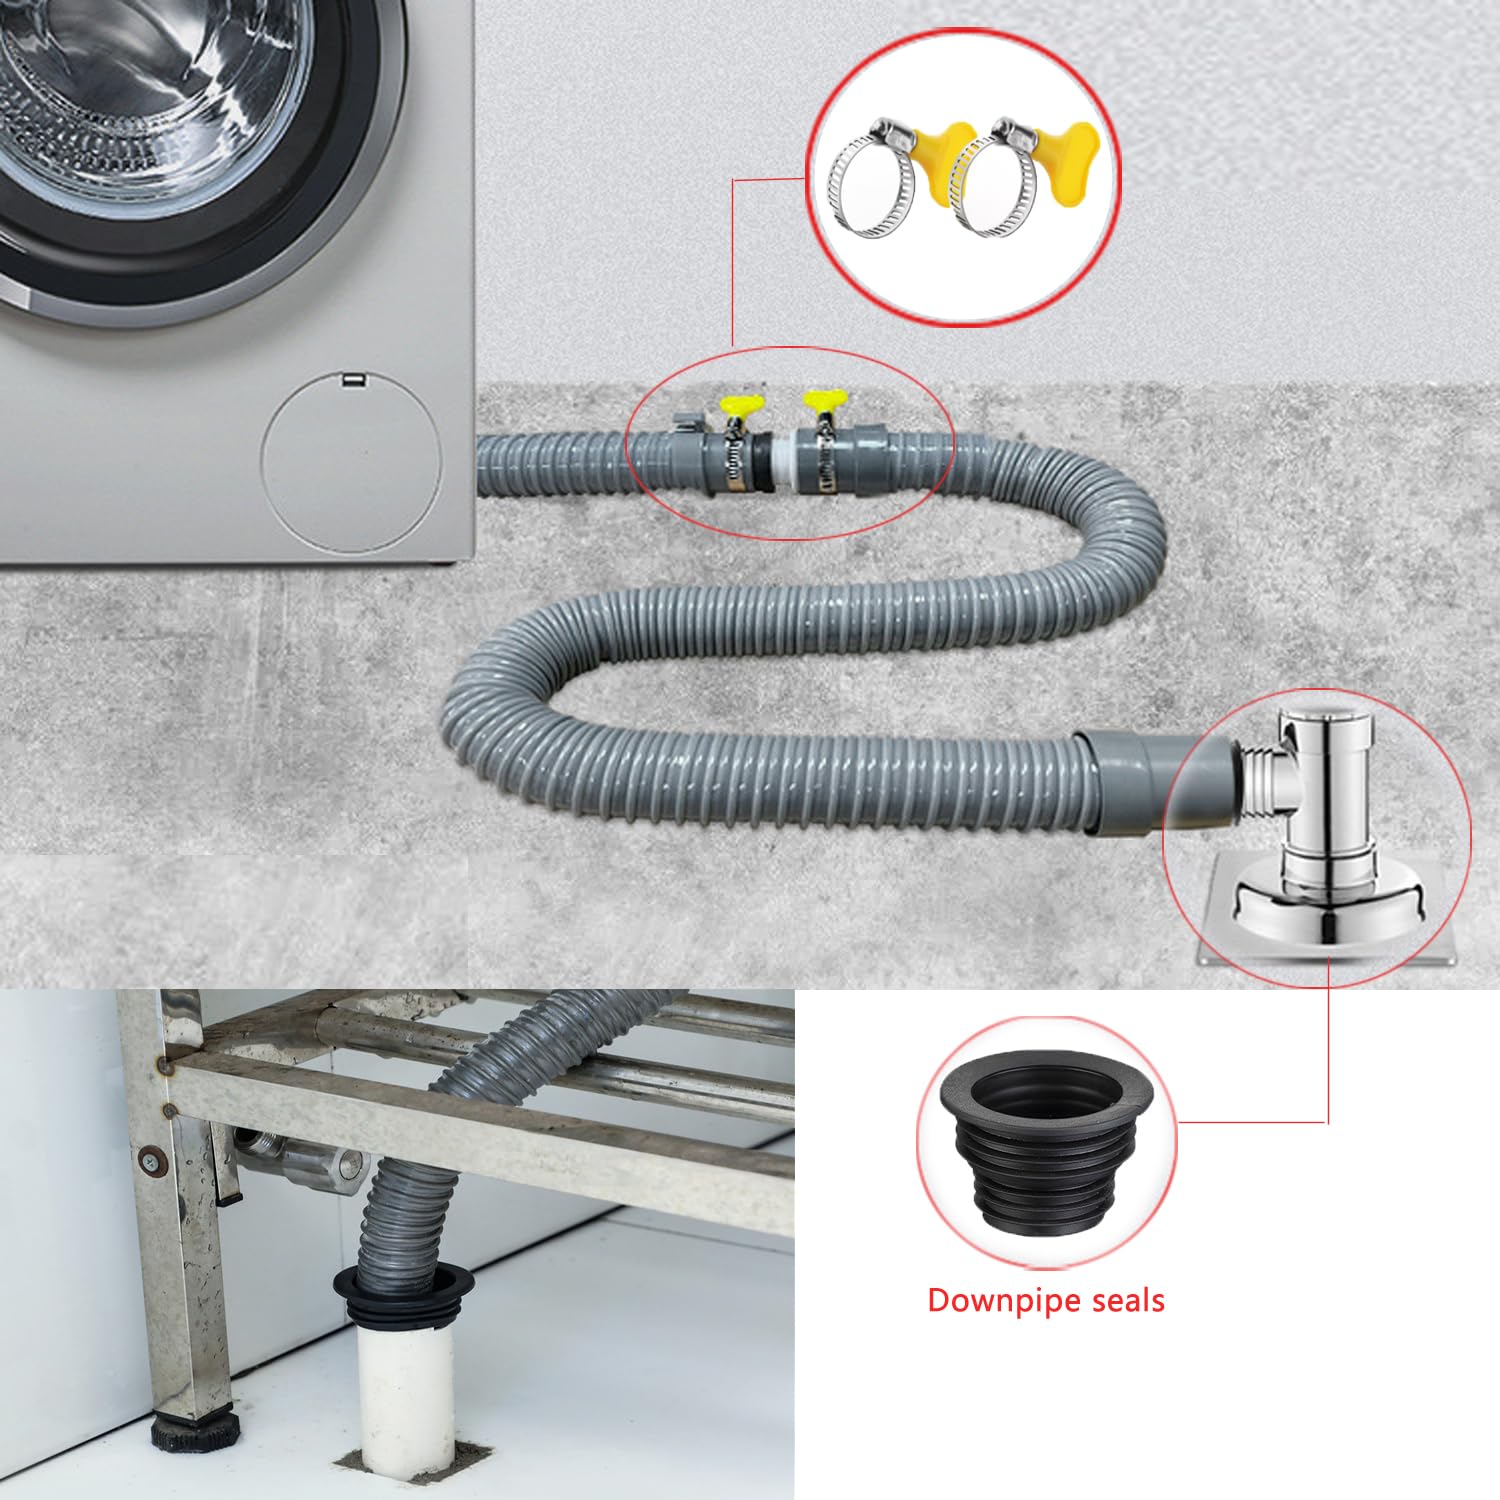
The drain hose is a flexible grey pipe located at the rear of the machine that carries wastewater to a standpipe, wall drain, or under-sink connection. Knowing how it is secured determines your disconnection method.
Locate the Hose at the Machine Back
Trace the hose from the household drain back to the washing machine. At the pump outlet, it is held by a clip or locking collar. Some models have a secondary clip anchoring the hose to the chassis along its path. Inspect closely because modern units often use a quick-release lever while older models rely on metal retaining clips.
Recognize Common Hose Fittings
Three main connection types exist, and identifying yours prevents damage during removal:
- Locking collar with release tab: Squeeze the lever and pull straight off
- Retaining clip (spring or screw type): Requires pliers to compress or loosen the band
- Friction fit with hose clamp: Found under sinks; secured by a tightened metal band
Disconnect from the Drain Pump

This is the critical mechanical step: freeing the hose from the machine itself. Work slowly because rusted or stiff clips may need gentle wiggling but never force them.
Remove the Retaining Clip
Use pliers to grip the metal or plastic clip around the hose and pump connection. Squeeze the ends together for spring clips or unscrew the band for screw-type clips. Slide the clip back along the hose to clear the fitting. Take your time during this step to avoid breaking brittle plastic clips.
Release the Locking Collar
On newer models, a plastic lever or tab acts as a quick disconnect. Firmly squeeze the release mechanism with one hand while pulling the hose upward and forward with the other. You should hear a soft click as it disengages. Avoid twisting or jerking because this can crack the fitting and create leaks.
Detach Secondary Chassis Clip
Check along the hose route for a second clip fastening it to the machine frame. Remove this to fully free the hose for removal or cleaning. Keep all clips and screws in a safe place for reinstallation.
Remove from Standpipe or Wall Drain
Once detached from the machine, unhook the hose from its household drainage point. Be prepared for immediate water flow once the connection breaks.
Extract from Standpipe
Pull the hose straight out of the vertical standpipe. As soon as it clears the opening, residual water will begin to flow. Immediately lower the hose end into your bucket or direct it into a floor drain. Never let it dangle freely because this causes uncontrolled spills across your floor.
Disconnect from Under-Sink Plumbing
If the hose connects beneath the kitchen sink, locate the hose clamp securing it to the drain trap. Use a flat-blade screwdriver or hose clip tool to loosen the clamp. Slide it back, then gently pull the hose off the fitting. Position a container directly underneath before loosening because water will spill.
Drain and Manage Residual Water
Even after the last wash cycle, your machine holds water in the pump and hose. Expect one to two cups of water to drain out, and the drain water may emit a foul smell due to stagnant water and accumulated debris.
Control the Water Flow
Before full disconnection, elevate the hose end above the machine base to delay siphoning. Once positioned over your bucket, lower it to allow complete drainage. Gently shake or flex the hose to release trapped pockets. Wait until dripping stops completely because rushing this step risks spills during transport or storage.
Seal the Hose After Removal
If moving or storing the machine, plug the open end of the drain hose with a cap, cork, or tightly tied rag. This prevents dirty water from leaking and stops sewer gases from entering your home.
Inspect, Clean, or Replace the Hose
:max_bytes(150000):strip_icc()/GettyImages-2188949093-a7815e871648489d83de319a7594c4ba.jpg)
Use this opportunity to check the hose condition and clear any blockages that may have caused drainage problems.
Check for Damage and Wear
Look for cracks, kinks, bulges, or soft spots along the hose length. A damaged hose can burst upon reconnection and cause flooding. If you see wear, replace it with a manufacturer-approved part. Never reuse a cracked or brittle hose.
Flush Out Debris and Buildup
If the machine had slow drainage or odors, flush the hose by removing it completely from both ends. Hold one end under a running tap, preferably with hot water, and point the other end into a sink, tub, or outside area. Let water blast through until it runs clear. Expect lint, soap scum, and gunk to flush out during this process.
Clean the Pump Filter
With the hose off, access the front filter, usually located behind a small panel at the bottom of the machine. Unscrew it slowly because water will spill. Pull out the filter and remove trapped coins, hair, or sludge. Reinstall tightly to prevent leaks.
Reconnect or Prepare for Moving
Whether reinstalling the same machine or preparing for relocation, proper final steps prevent future issues.
Reattach Securely for Reuse
Route the hose back through the machine chassis. Push it firmly onto the pump outlet until it seats fully. Reinstall the retaining clip or locking collar and ensure it is tight. Reconnect the other end to the standpipe or sink, securing all clamps. Run a test cycle to confirm no leaks.
Cap and Label for Relocation
When moving the machine, cap both water inlet hoses and the drain hose. Label each hose (hot, cold, drain) with tape for easy reinstallation. Secure hoses to the machine with twist-ties to prevent damage during transit.
Frequently Asked Questions About Disconnecting a Washing Machine Drain Hose
How do I know if my drain hose has a locking collar or retaining clip?
Inspect the connection point at the back of the machine. A locking collar will have a small lever, tab, or catch on the fitting. A retaining clip is a metal or plastic band that wraps around the hose and pump outlet. Modern machines typically use locking collars while older models use retaining clips.
Can I disconnect the drain hose without professional help?
Yes, this is a straightforward DIY task that most homeowners can complete safely. Professional plumbers typically charge under £60 for this service, but the procedure is simple enough to handle independently with basic tools and proper preparation.
What should I do if water keeps leaking after reconnection?
If leaks occur after reconnection, the retaining clip is likely not fully secured. Re-check the pump connection and the under-sink attachment. Ensure all clips are tight and the hose is seated properly into the fitting.
How much water remains in the hose after the last cycle?
Expect one to two cups of residual water to drain out when you disconnect the hose. This is normal and does not indicate a fault. The water may smell foul due to stagnant conditions, which is also normal.
Do I need to turn off the water supply to disconnect the drain hose?
While the drain hose disconnects from the drainage system rather than the water supply, turning off the hot and cold valves is recommended as a safety precaution. This prevents accidental water flow if the machine is moved or tilted during the process.
Key Takeaways for Disconnecting Your Washing Machine Drain Hose
Disconnecting a washing machine drain hose follows a clear sequence: power off, water off, access safely, identify the fitting type, drain completely, and seal properly. The most critical safety steps are unplugging the machine and turning off both hot and cold water valves before touching any hoses. Always position a bucket beneath the connection points because residual water will flow immediately upon disconnection. Identify whether your hose uses a locking collar or retaining clip to choose the correct release technique. If the hose shows cracks, kinks, or signs of wear, replace it rather than reusing it. For integrated models, preserve all mounting screws and brackets for reinstallation. With these steps completed, you can confidently disconnect the drain hose for moving, maintenance, or replacement without calling a professional.



