
Connecting a washing machine to a tap might seem straightforward, but doing it incorrectly can lead to leaks, water damage, or even appliance failure. Whether you’re installing a new machine in a kitchen, utility room, or garage, knowing how to connect a washing machine to a tap safely and securely is essential. This guide walks you through every step, from assessing your water supply to final leak testing, using only expert plumbing best practices.
You’ll learn how to choose the right adapter, install hoses correctly, avoid common mistakes like over-tightening, and troubleshoot leaks before they cause damage. Whether your tap is threaded, clamp-on, or part of a new installation, this guide ensures your connection is reliable, efficient, and built to last.
Verify Water Pressure and Safety Requirements
Before connecting any hose, confirm your home’s water pressure is within safe limits. Most washing machines require pressure between 30 and 80 psi. If pressure exceeds 80 psi, install a pressure-reducing valve to protect the machine’s internal components from damage. Use a pressure gauge on an outdoor tap to test. High pressure causes premature wear on hoses and valves, increasing burst risks.
Prepare the Appliance Safely
Switch off and unplug the washing machine. Remove all transport bolts from the back panel. These secure the drum during shipping and must be taken out before first use. Leaving them in destroys the suspension system.
Place the machine on a level, solid floor. Use a spirit level to check balance. If the unit wobbles, adjust the front feet with a spanner, then tighten the locking nuts. An unlevel machine vibrates violently during spin cycles.
Secure loose hoses with tape when moving the machine to prevent water spillage.
Identify Inlet Type and Select Correct Hose
Inspect the rear of the washing machine to determine your inlet configuration. Most modern front-loaders use a single inlet for cold water only. Connect this to your cold tap. Older or high-efficiency models may have dual inlets requiring both hot and cold supplies.
Never connect hot water to a cold-only inlet. This damages internal components and voids warranties.
Choose the Right Washing Machine Hose
Washing machine hoses are directional. The flat end connects to the tap, while the curved end screws into the machine inlet. Thread standards matter. Tap outlets are typically 3/4 inch or 1/2 inch BSP, while hose fittings use 3/4 BSP. If mismatched, use a reducer adapter.
Always use a new hose with intact rubber seals at both ends. Cracked or reused hoses are a top cause of leaks. Inspect for cracks, bulges, or kinks before installation.
Install Tap Adapter Correctly
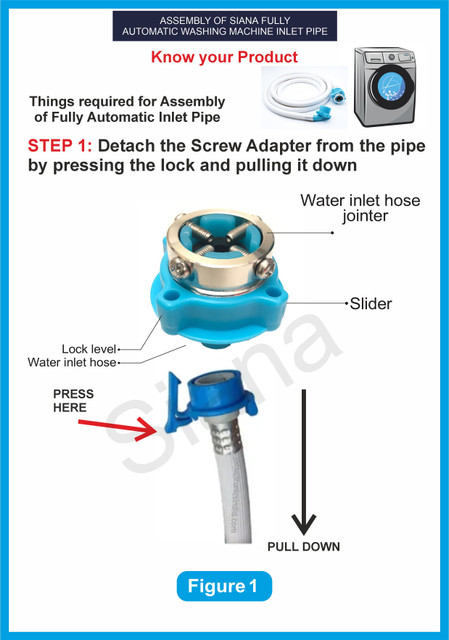
For non-threaded taps common in kitchens, use a screw-type faucet adapter. It has four key parts you must assemble in the correct order.
Assemble Clamp-On Adapter Components
The adapter contains a plastic nozzle, metal ring, rubber seal, and Teflon backup ring. Assembly order matters for a watertight seal.
Insert the rubber seal into the adapter base. Seat the Teflon backup ring under the four screws. This critical component stops the seal from lifting when tightened. Screw the plastic nozzle into the metal ring.
After tightening, a small gap should remain between the screws and nozzle. No gap means the Teflon ring is missing or upside down. Reinstall it properly.
Attach Adapter to the Tap
Loosen all four screws. Slide the adapter onto the tap spout with firm downward pressure. Rotate screws to the back if needed by pulling the adapter out slightly, turning, and reinserting.
Tighten screws evenly with a screwdriver. Do not overtighten. Once secure, hand-tighten the plastic nozzle onto the adapter.
Pro Tip: Never use pliers on plastic nozzles. Hand-tight is sufficient.
Connect to Threaded or Quick-Connect Taps
If your tap has external threads, screw the hose flat end directly onto the tap by hand. Stop when snug. Over-tightening cracks plastic threads. Ensure the rubber washer inside the hose end is present and undamaged.
Some hoses include an aqua valve, which is an anti-siphon device. Install it on the tap side to prevent backflow into the water supply.
Install One-Touch Quick Connect Systems
Modern taps may have a push-fit system. Press the release collar and slide the adapter onto the tap. Pull down the latch plate. Insert the hose nozzle until it clicks. Release the latch and listen for the secure snap. Gently tug to confirm the lock.
No tools are needed. These systems seal automatically when dry and undamaged.
Seal Threads with PTFE Tape
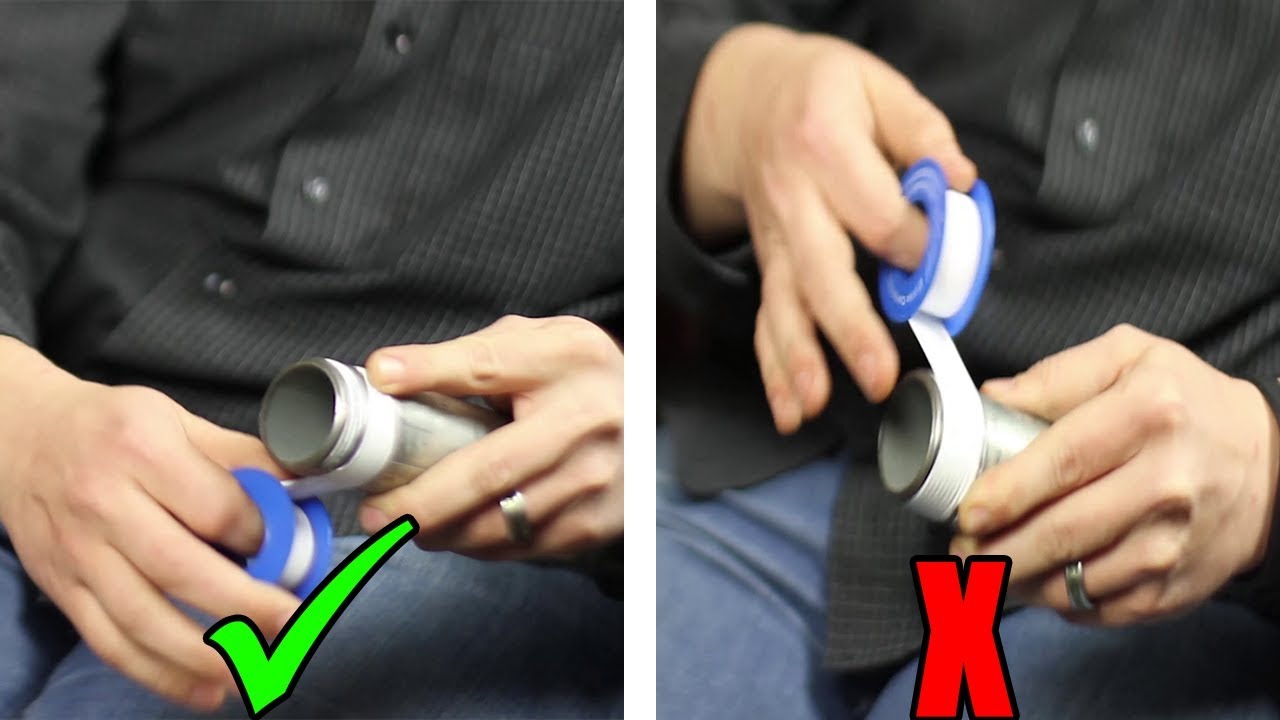
When installing reducers, valves, or new taps, apply PTFE tape to male threads. Wrap anticlockwise when viewed from the end. This direction prevents the tape from unraveling during tightening.
Cover all threads fully. Use 5 to 6 wraps. Too much tape causes joint misalignment or cracking. Keep tape away from the inner bore to avoid contaminating drinking water.
Warning: Never use PTFE tape on rubber-sealed connections like hose-to-machine. Use it only on metal-to-metal threaded joints.
Flush Line and Connect Hose to Machine
New or unused lines contain debris that clogs machine filters. Attach the flat end of the hose to the tap. Place the curved end in a bucket. Turn on water briefly and run until water flows clear.
This simple step prevents blockages in the inlet valve or spray arms later.
Attach Hose to Washing Machine
Locate the inlet valve at the top rear of the machine. Clean the filter inside if visible and dirty. Screw the curved end of the hose into the inlet by hand. Tighten only until snug. No tools.
Ensure the hose runs straight without kinks or twists. An over-tightened connection strips plastic threads, which is a common cause of leaks.
Fix Leaks at the Tap Connection
If your tap spout is bent or cracked, no adapter seals properly. Replace the entire faucet with a washing machine-compatible model featuring a flat, 90-degree face.
Clean Mineral Buildup
Hard water leaves scale on the tap face. Use fine emery paper or sandpaper to polish the surface smooth. Wipe clean with a damp cloth before reattaching the adapter.
Avoid vinegar soaks unless the tap is removable. Acid damages internal seals.
Correct Angled Tap Face
Even a clean tap leaks if the face is not perpendicular to the flow. The ideal angle is exactly 90 degrees. If off-angle, remove the tap, clamp in a vise, and grind the face flat. Alternatively, replace with a purpose-built 90-degree laundry tap.
Attempting to adjust with washers fails. Only a true flat surface works.
Recheck Adapter Components
Leaking from the top of the adapter indicates component issues. Confirm the Teflon backup ring seats under the screws. Ensure the rubber seal is not bulging upward. Reassemble in correct order: seal first, then backup ring.
Misalignment here is the number one cause of loose, leaking clamp adapters.
Test for Hose and Seal Leaks
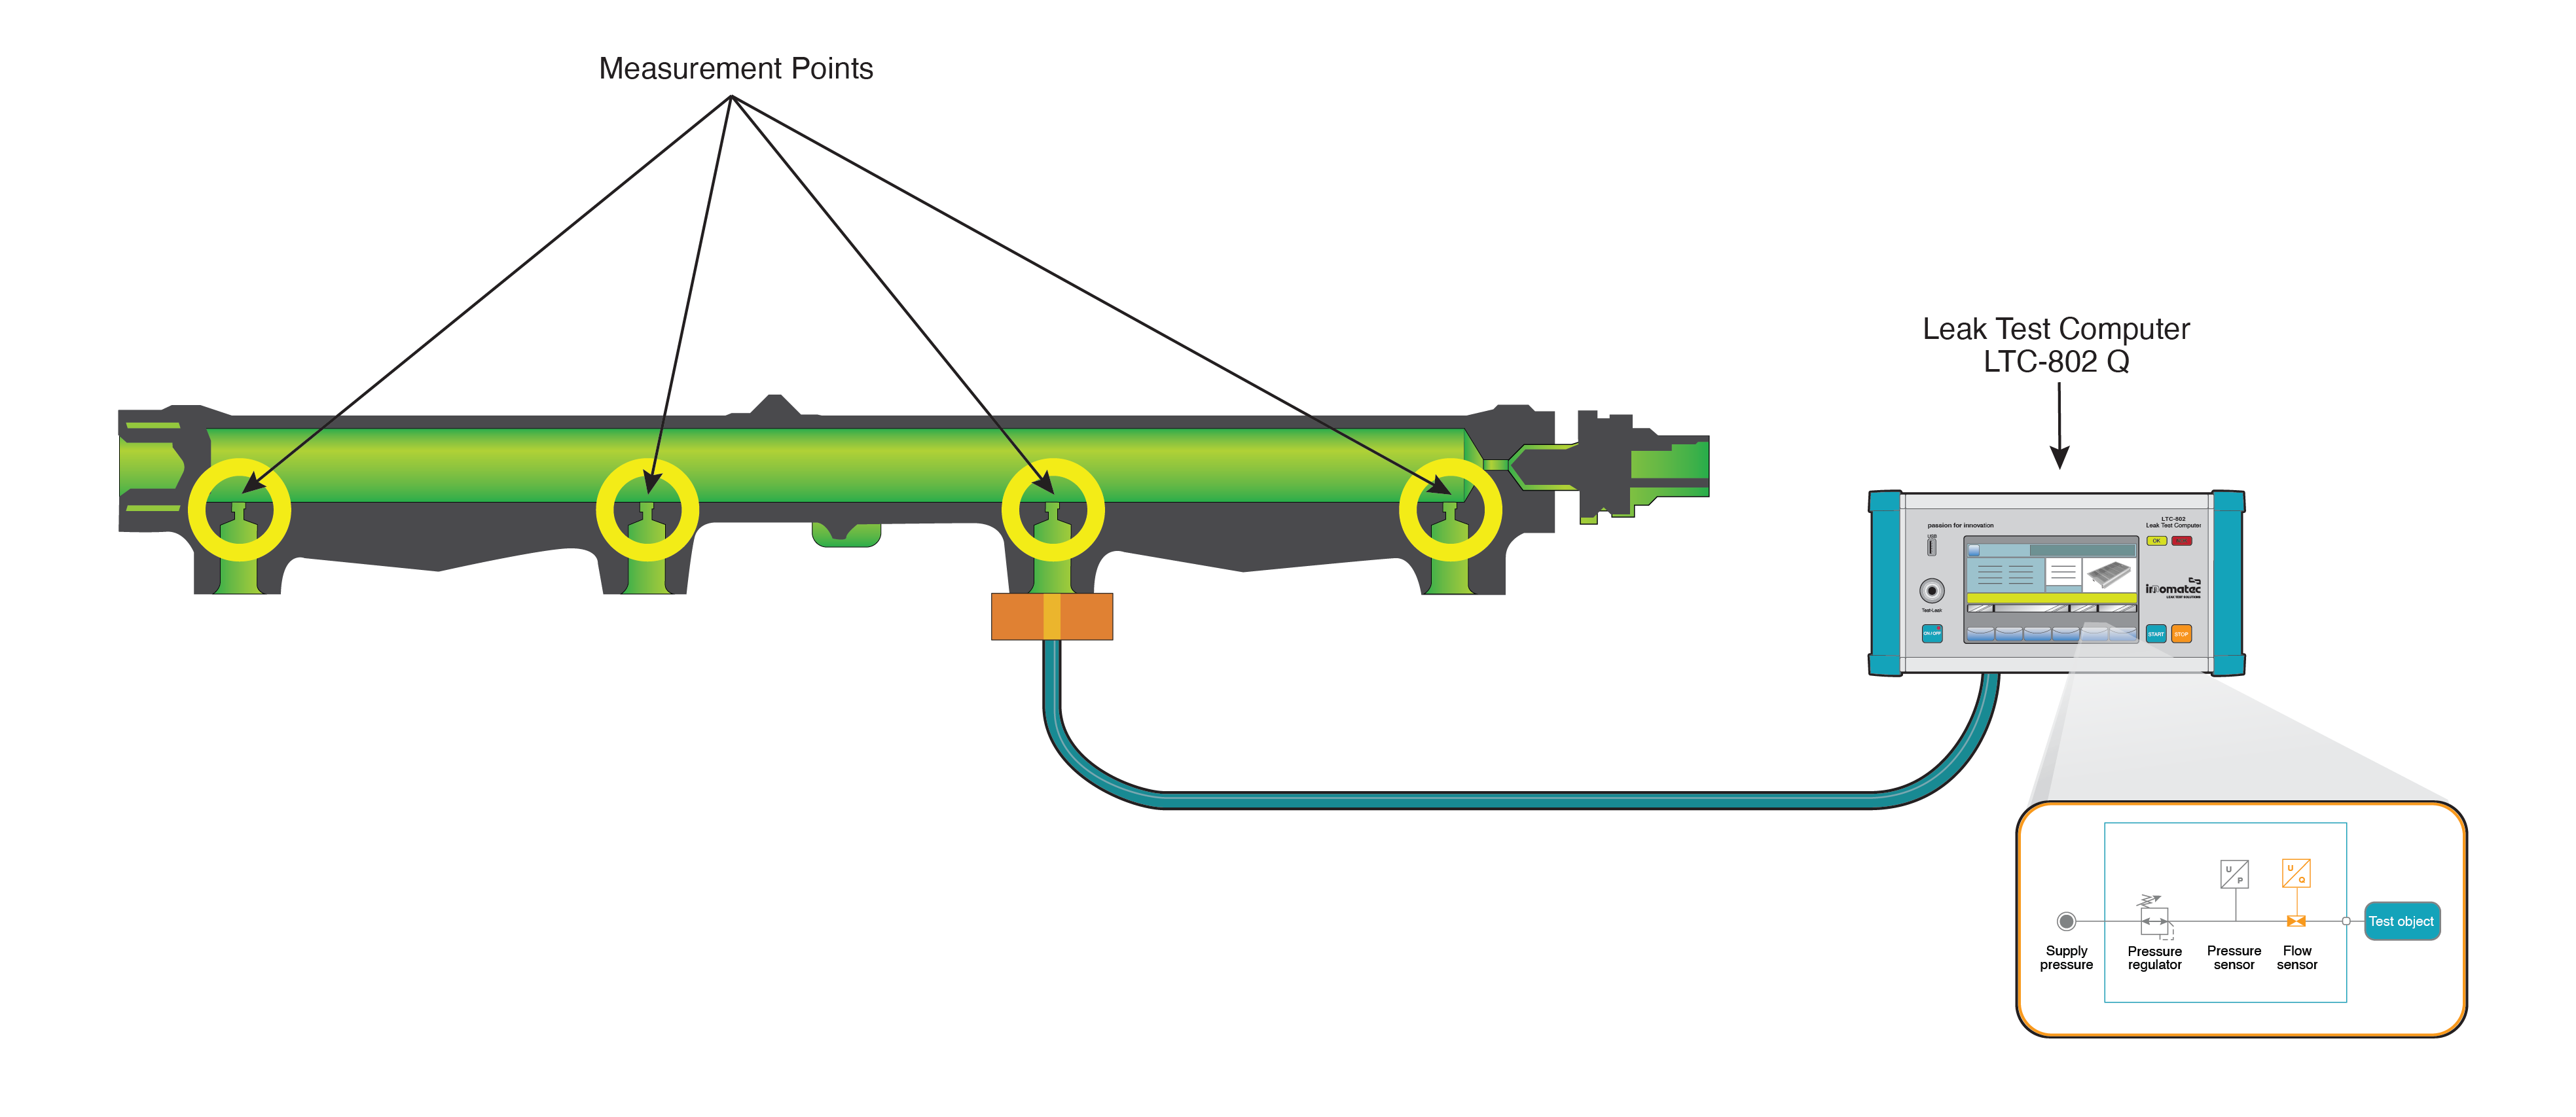
Check the entire hose length for physical damage. Look for cracks, bulges, or kinks. Replace if more than 5 years old or showing wear. Keep hoses away from sharp edges or hot surfaces.
Secure with clips to prevent movement during operation.
Perform a Leak Test
Slowly open the tap. Watch both ends of the hose at the tap adapter and at the machine inlet. If dampness appears, turn off water and re-tighten by hand slightly. If still leaking, replace the rubber seal or hose.
Monitor during the first three wash cycles. Some leaks appear only under pressure.
Install a New Tap from Water Inlet
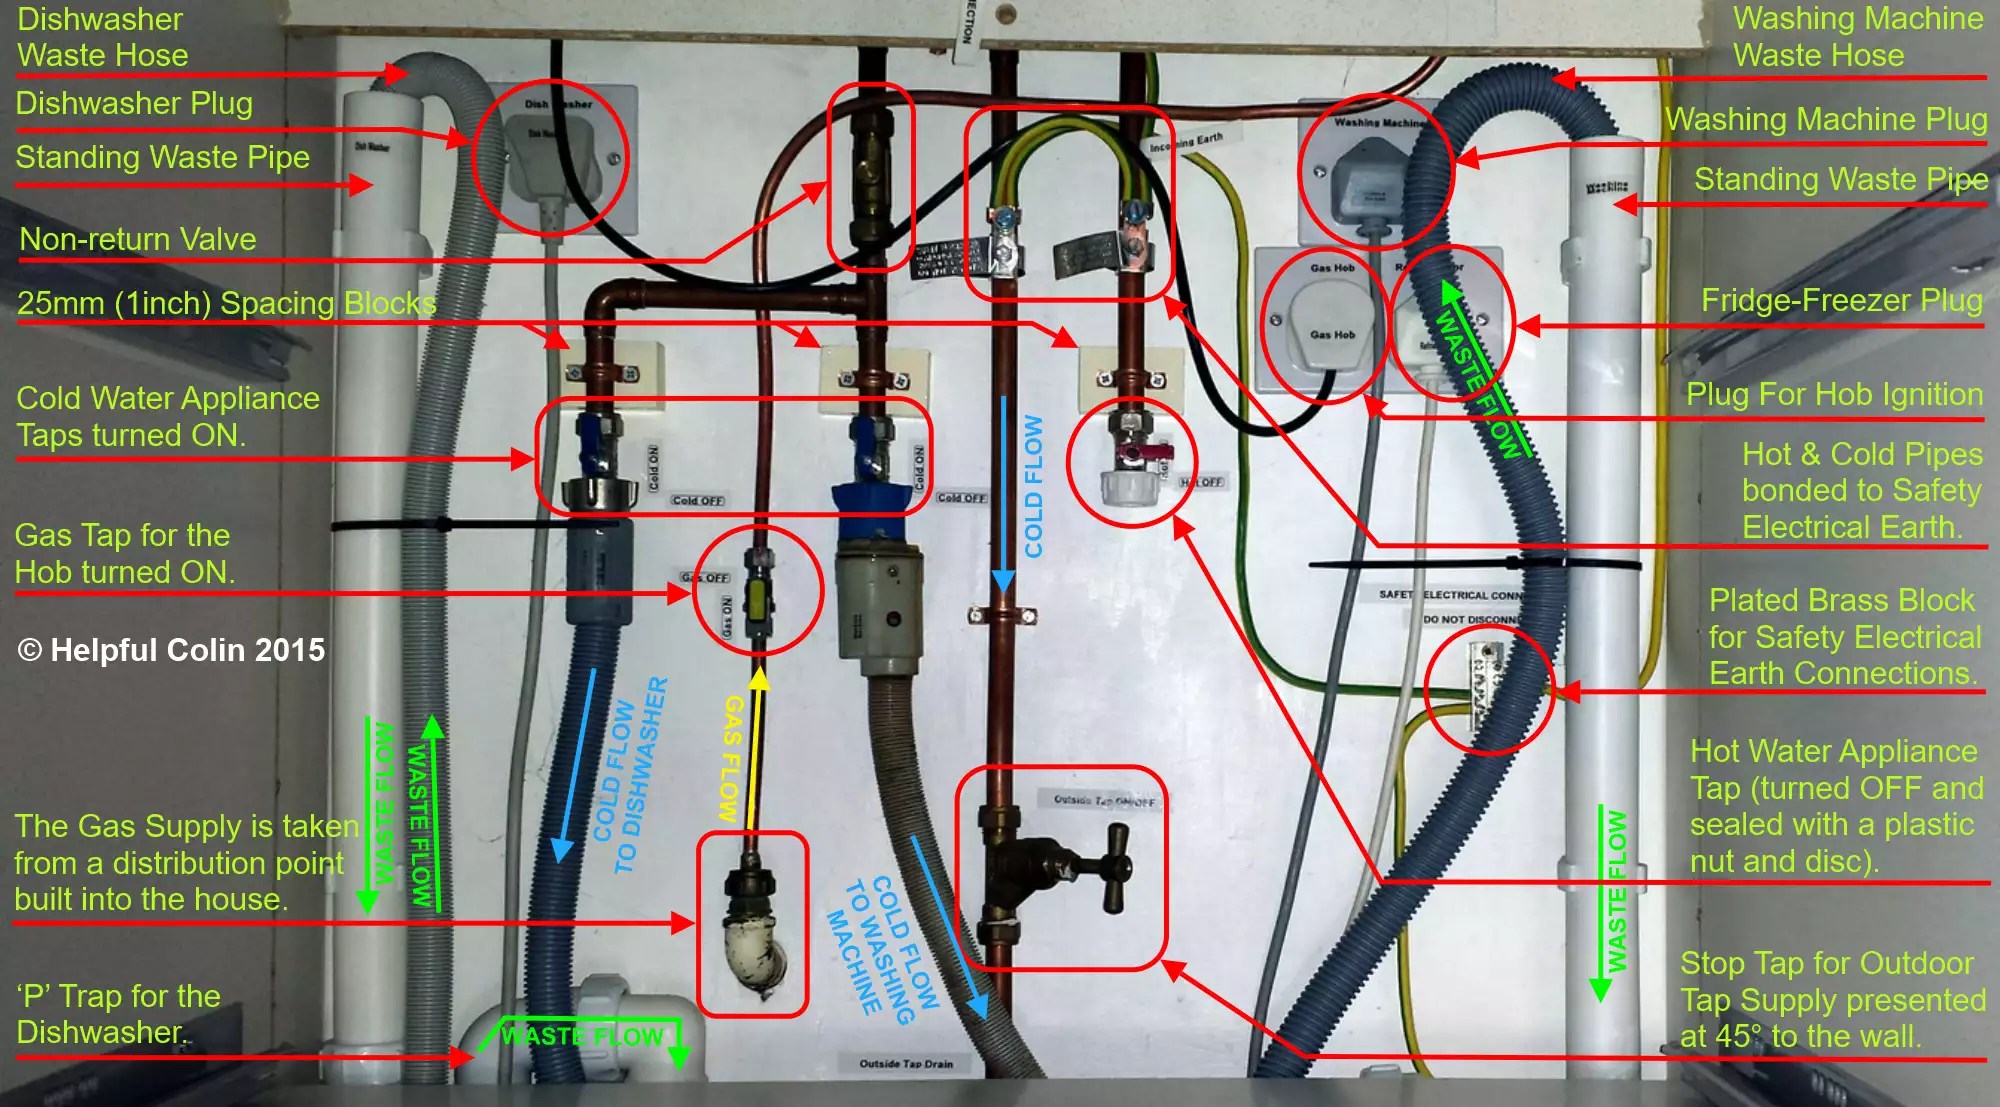
Need a dedicated tap in a garage or utility area? Shut off both valves on the existing cold water line. Disconnect the washing machine hose. Catch residual water in a bucket.
Now you can add a branching point.
Fit Two-Way Isolation Valve
Attach a two-way isolation valve to the cold inlet. Use the included rubber washer and inspect for nicks. Hand-tighten securely. Open one outlet and check for leaks.
This lets you run water to both the machine and a new tap.
Mount Wall Tap and Route Hose Safely
Choose a wall spot with slight downward slope for drainage. Mount the tap on a wooden block to create clearance. This prevents hose interference. Connect the tap to the 3/4 BSP outlet on the isolation valve.
Use Reducer if Needed
If the tap outlet is 1/2 inch BSP but the hose is 3/4 inch BSP, install a shower reducer adapter. Apply PTFE tape to male threads. Ensure internal washers are clean and seated.
Then attach the blue washing machine hose.
Drill and Route Hose
Drill a sealed hole through the wall for the hose. Use a stud finder to avoid pipes and wires. Feed the hose through, avoiding sharp bends. Seal the hole with silicone to prevent drafts and pests.
Maintain Connection Long-Term
Every 6 months, turn off water and disconnect the hose from the machine. Remove and rinse the inlet filter under running water. Check the hose for cracks or brittleness. Replace every 5 years as a preventive measure.
Clogged filters reduce water flow and trigger error codes.
Prevent Freeze Damage
In cold areas, shut off outdoor or garage taps before winter. Disconnect hoses and drain completely. Store indoors if possible.
Frozen water expands and bursts hoses or valves.
Contain Potential Leaks
Place a drip tray or shallow bucket under temporary or adapter-based taps. Even a small leak causes major floor damage over time.
Use wall clips to secure hoses and prevent accidental tugs.
Follow Best Practices for a Secure Installation
Never use pliers or wrenches on plastic fittings unless specified by the manufacturer. Over-tightening breaks seals and cracks connectors. The rule is simple: snug by hand equals secure enough.
Do use new hoses with intact seals. Do flush supply lines before connecting. Do check for level and stability. Do not reuse old hoses. Do not force mismatched threads. Do not ignore small drips.
Even minor leaks worsen over time.
Most washing machine doors open to the left and cannot be reversed. Check your manual before positioning near cabinets.
Frequently Asked Questions About Connecting a Washing Machine to a Tap
What type of adapter do I need for a kitchen tap?
Most kitchen taps without threads require a clamp-on screw-type faucet adapter. This adapter clamps around the tap spout and provides a connection point for the washing machine hose. Ensure the adapter includes a rubber seal and Teflon backup ring for a watertight fit.
How tight should washing machine hoses be?
Hand-tighten only. Use no tools. The connection is secure when snug. Over-tightening cracks plastic threads and causes leaks. This is the most common mistake DIY installers make.
Can I connect a washing machine to any tap?
Not always. The tap must have a flat, 90-degree face for proper sealing. Bent, angled, or damaged taps leak even with the best adapters. Some situations require installing a new washing machine-specific tap.
Why does my washing machine tap leak even after tightening?
The leak likely stems from a missing or misaligned Teflon backup ring, mineral buildup on the tap face, or a bent tap spout. Check these components first before tightening further. Over-tightening worsens the problem.
How often should I replace washing machine hoses?
Replace hoses every 5 years as a preventive measure. Inspect them regularly for cracks, bulges, or kinks. Old hoses are a leading cause of water damage in laundry areas.
Do I need a plumber to install a washing machine tap?
No. Connecting a washing machine to a tap is a DIY-friendly task if you follow proper procedures. However, installing a new tap from scratch or working with main water lines may require a professional.
Key Takeaways for Connecting Your Washing Machine to a Tap
The most critical steps are verifying water pressure, using new hoses with intact seals, and hand-tightening all connections. Never use tools on plastic fittings.
Adapter assembly matters. The Teflon backup ring must seat under the screws, or leaks guaranteed. Test for leaks during the first three wash cycles.
For long-term reliability, inspect hoses and filters every 6 months. Replace hoses every 5 years and winterize outdoor installations in cold climates. A small amount of preventive maintenance prevents major water damage.



