If your Kenmore washing machine agitates but won’t spin, or if clothes come out soaking wet after a full cycle, the culprit is likely a worn clutch. This critical component transfers power from the transmission to the drum during the spin cycle. Over time, especially in models like the Kenmore 90 Series or 110 Series, the clutch wears down, slips under heavy loads, or fails to engage entirely. Unlike problems with the motor or belt, clutch failure often means the machine drains and agitates normally but cannot generate the high-speed spin needed to extract water. Replacing the clutch restores full spinning power, saves you from costly service calls, and can extend your washer’s life by years. In this guide, you will learn how to diagnose clutch failure, identify the correct replacement part, and complete the repair with confidence.
Diagnose Clutch Failure First

Before removing any panels, confirm the clutch is the issue. Misdiagnosing can lead to wasted time and parts. The key is observing what the washer does and does not do.
Agitates But Won’t Spin
This is the hallmark sign of clutch failure. If the washer completes wash and rinse cycles, agitating as expected, but stops after draining and never spins up, the problem lies in the final drive stage. The motor and transmission are working, but the clutch is not engaging the inner tub.
What to check includes listening during the spin phase. Does the motor run? If yes, but the drum does not spin, the clutch is suspect. Try a load test with a few shirts. If it spins fine but towels or jeans remain wet, the clutch is slipping under torque. This load-dependent performance confirms wear.
Check for White Powder Residue
Remove the agitator and inspect the area below. If you find a fine white powder, it is degraded rubber or lubricant from internal components, often the clutch or agitator dogs. This residue indicates internal wear and breakdown. While not definitive proof of clutch failure, it supports the diagnosis when combined with poor spin performance.
Rule Out Other Causes
Do not jump straight to clutch replacement. Eliminate simpler, more common issues first.
The following table outlines common components to check:
| Component | Test Method | Failure Sign |
|---|---|---|
| Lid Switch | Close lid and listen for click. Test continuity with multimeter. | No spin, no lock sound. |
| Drive Belt | Inspect rear panel. Look for cracks, looseness, or glazing. | Drum does not move at all. |
| Motor Coupler | Remove back panel. Check for cracks or sheared prongs. | Motor runs, transmission does not turn. |
| Drain Pump | Ensure pump clears water fully. Test water level sensor. | Washer thinks water remains, skips spin. |
Quick diagnostic flow involves confirming power and cycle selection, verifying lid locks and switch clicks, inspecting belt and coupler visually, and running a drain-and-spin cycle. If motor runs but drum does not, clutch is likely faulty.
Identify the Correct Clutch Part
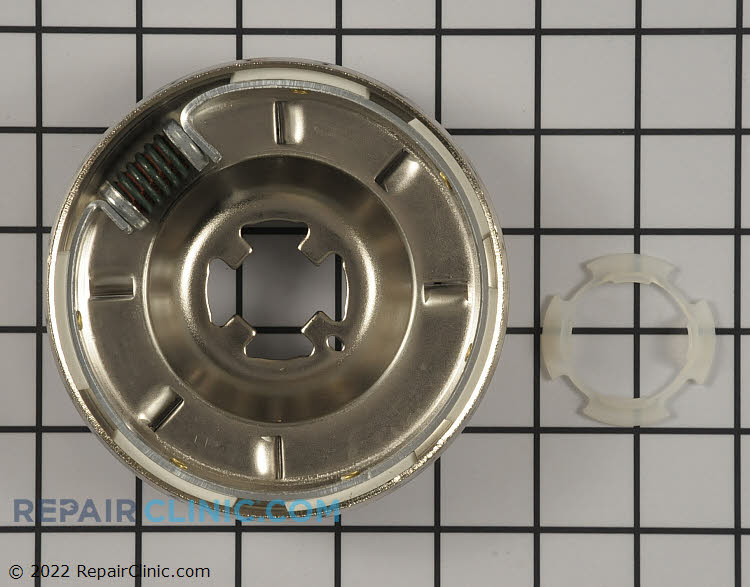
Using the wrong clutch leads to poor performance or damage. Kenmore washers, especially those made by Whirlpool, require precise part matching.
Key Clutch Part Numbers
Match your model to one of these common OEM and aftermarket kits:
- WP8299642: Large-capacity clutch, often used when agitator slips.
- 285785: Standard drive clutch for many top-load models.
- W10721967: “Splutch” kit with 6 parts, including spring, housing, cam ring, basket drive gear, pulley, and nut. Used with mode shift actuators.
- AEN73651401: Full clutch and tub bearing assembly. High-cost but includes bearing replacement.
Compatible Kenmore Models
Clutch issues are most common in the Kenmore 90 Series, which is prone to wear due to 3-speed motor and heavy use. The Kenmore Elite requires specific non-interchangeable clutches. The Model 110 Series is a vast line where clutch failure shows as agitation without spin.
Specific models affected include 110.28803890, 796.40272900, 110.24642300, 110.23812100, 110.82870120, and 110.82980120. Use your full model number, found on the back or inside the lid, to verify part compatibility on appliance parts websites.
Cost: DIY vs Professional
Aftermarket clutch kits cost approximately $15 and include clutch, spring, clips, dogs, and coupler. OEM clutch parts like the 285785 range from $35 to $47. A full clutch and bearing assembly can cost up to $372. Professional repair labor plus parts can exceed $200. DIY saves 50 to 80 percent. The repair is manageable with basic tools and care.
Gather Tools and Secure the Washer
Having the right tools prevents frustration and damage. Work safely since this repair involves lifting heavy parts and accessing electrical components.
Required Tools
- Socket set: 1/2-inch, 9/16-inch deep well, 3/8-inch, 1/4-inch
- Screwdrivers: Phillips and flathead
- Pliers: Channel lock and needle nose
- 1/2-inch square drive: For agitator retainer nut
- Multimeter: Test switches and sensors
- Towel or blanket: Protect floor and finish
- Plumber’s tape: For water line resealing
Safety Steps
Always unplug the washer first to prevent electrical shock. Shut off water valves, both hot and cold. Disconnect supply lines and drain hose, expecting residual water, and use a towel. When tipping the washer back, rest it on a towel and keep it stable before working underneath. Support heavy parts since the motor and transmission are heavy. Lift with both hands.
Remove Cabinet and Access Transmission
To reach the clutch, you must expose the motor and transmission. This requires removing the control panel, cabinet, and motor.
Remove Control Panel
Two methods exist, and you should use the one that fits your model.
Method A involves pulling off the plastic end caps on the control panel, removing the two Phillips screws underneath, lifting the panel upward, and disconnecting the lid switch wire with a flathead screwdriver.
Method B involves looking for screws at the back edge of the top panel, removing them, sliding the panel forward, then lifting it.
Pro tip: Do not rely on the putty knife method, which involves inserting a knife to pop clips, because many models use hidden screws instead.
Disconnect Wiring and Remove Cabinet
Disconnect the timer wiring harness by lifting the tab and pulling. Unplug the water level sensor harness. Use a flathead to pry out side retaining clips. Pull the cabinet forward and lift it off. Set it aside carefully.
Remove Pump and Motor
For the drain pump, remove retaining clips. You can leave hoses attached and set the pump aside.
For the motor, disconnect wire connectors. Remove the plastic clip from the transmission. Use a 1/4-inch socket to remove motor mounting screws. Pry off bottom and top mounting clips with a flathead. Support the motor as you release the last clip and let it hang safely.
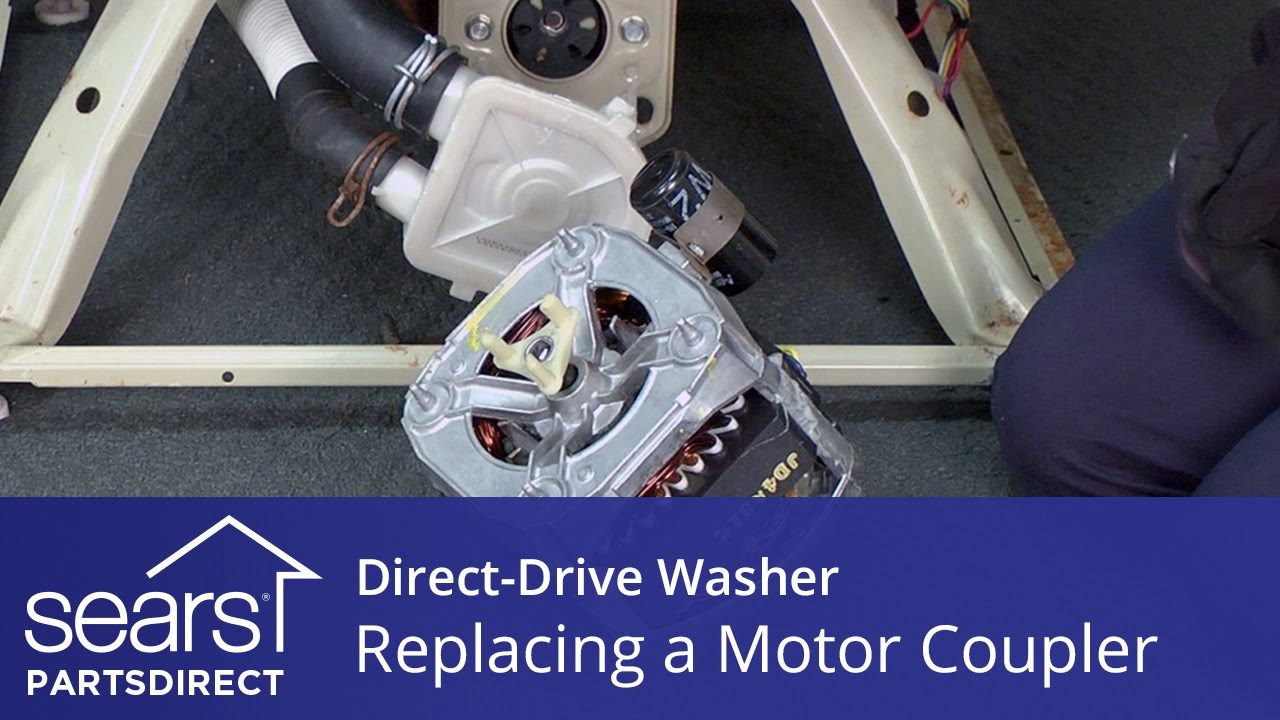
Inspect the motor coupler while the motor is out. If cracked or worn, replace it now since it is on the same labor path.
Extract the Transmission
Tip the washer back onto its rear, resting on a towel. Locate three bolts, either 1/2-inch or 3/8-inch, securing the transmission to the base. Remove the bolts. Detach the wire retainer from the housing. Gently pull the transmission out. It may be stuck, so rock it slightly to free it.
Replace the Clutch Assembly
With the transmission out, clutch replacement is straightforward.
Remove the Old Clutch
Place the transmission on a stable surface. Remove the outer thrust washer. Use a flathead screwdriver to pry off the C-clip or E-clip. Remove the retainer spring if separate. Slide the old clutch off the splined shaft.
What to look for includes stiffness or binding indicating worn internal components. Lubricant breakdown or debris suggests long-term wear.
Install the New Clutch
Prep the new clutch by pressing any plastic grommet or bushing into the bottom of the housing if included.
Installation steps involve sliding the new clutch onto the transmission shaft and aligning the splines. Reinstall the thrust washer. Add the retainer spring if applicable. Secure with the C-clip by snapping it firmly into the groove.
Check brake lever alignment. The brake release lever must move freely. Pushing it should release the brake while releasing it locks the drum. Misalignment prevents spinning, so adjust if needed.
Reassemble and Reinstall Components
Reverse the disassembly process carefully. Misalignment now causes noise or failure later.
Reinstall Transmission and Motor
Slide the transmission back into the unit. Align the shaft with the agitator drive. Reinstall and tighten the three mounting bolts. Snap the wire retainer back into place.
Reconnect the motor by aligning coupler prongs with isolator holes. Slide motor into position. Reattach mounting clips and screws. Reconnect wire harnesses.
Reattach Pump and Agitator
For the drain pump, realign it on the motor shaft or base. Secure with clips. Reconnect hoses if disconnected.
For agitator reassembly, place spacer and plastic washer on transmission shaft. Position lower agitator and ensure internal tab fits into the drive hole. Tighten the center bolt with a 9/16-inch deep well socket. Replace upper agitator bushing. Insert cam and cog assembly. Reinstall retainer and spring using a 1/2-inch square drive.
Pro tip: While the agitator is out, inspect the agitator dogs. If teeth are worn or you see white powder, replace them. Original OEM dogs often grip better than aftermarket.
Close Cabinet and Panel
Slide cabinet back onto base and align front edge under frame. Use your foot to push it into place and ensure side tabs lock. Reinstall rear spring clips. Reconnect lid switch wire. Lower control panel, snap clips, and re-screw. Snap end caps back on.
Reconnect Utilities and Test
Final connections and testing ensure a safe, functional repair.
Reconnect Water and Power
Reattach drain hose to coupler and secure with clamp. Reconnect hot and cold water lines. Use new plumber’s tape on threads if replacing hoses or if leaks occurred. Turn water valves on and check for leaks. Plug in power.
Run Diagnostic Tests
The dry spin test involves running a spin cycle with no water or load. The drum should spin rapidly with no slow rotation or lag. Listen for grinding or binding.
The full cycle test involves adding a small load and verifying normal agitation and high-speed spin. Check all connections for leaks.
The heavy load check involves washing a damp towel. After spin, it should be significantly drier than before. If still wet, the clutch may not be engaging, so recheck installation.
Prevent Future Failures

A successful repair lasts longer with smart maintenance.
Replace Worn Components Now
While you are in the machine, replace the motor coupler since it shares the same wear cycle as the clutch. Replace agitator dogs to prevent slipping and white powder buildup. Upgrade water inlet hoses to stainless steel braided to prevent leaks.
Keep Spares On Hand
For older Kenmore washers, clutch and agitator dog failures are common. Keep a clutch kit, agitator dog set, and motor coupler on hand. These parts cost under $25 together, which is cheaper than emergency repairs.
Level the Washer
An unlevel machine stresses the clutch and transmission. After reassembly, use a level on the top. Adjust front legs until balanced. Lock jam nuts.
Avoid Overloading
Heavy loads increase clutch wear. Do not overload with towels or jeans. Spread out bulky items.
Frequently Asked Questions About Kenmore Washing Machine Clutch Repair
How do I know if my Kenmore washing machine clutch is bad?
The most common signs include the washer agitating normally but not spinning, clothes coming out soaking wet after a full cycle, and slow or no spin even with light loads. You may also notice white powder residue near the agitator, which indicates worn internal components.
Can I replace the clutch myself on a Kenmore washer?
Yes, with basic tools and mechanical aptitude, you can replace the clutch yourself. The repair takes 1.5 to 3 hours and saves significant money compared to professional service. You need socket sets, screwdrivers, pliers, and a multimeter for testing.
What is the cost of a Kenmore washing machine clutch replacement?
Aftermarket clutch kits cost approximately $15. OEM clutches range from $35 to $47. Professional repair including labor typically exceeds $200. DIY repair is the most cost-effective option.
How long does a clutch typically last on a Kenmore washing machine?
With normal use, a clutch can last 10 to 15 years. However, heavy loads and frequent use accelerate wear. Models like the Kenmore 90 Series with 3-speed motors are particularly prone to earlier clutch failure.
What happens if I do not repair a failing clutch?
The washer will continue to agitate but cannot spin properly. Clothes will remain wet, requiring longer dryer times and increased energy costs. Eventually, the clutch may fail completely, leaving the washer unable to spin at all.
Key Takeaways for Kenmore Washing Machine Clutch Repair
Clutch failure in Kenmore washers manifests as normal agitation combined with poor or no spinning, leaving clothes wet. Accurate diagnosis requires ruling out the lid switch, drive belt, and motor coupler before concluding clutch failure. The correct replacement part must match your specific model number, with common options including WP8299642, 285785, and W10721967. The repair process involves removing the cabinet, extracting the transmission, replacing the clutch assembly, and reassembling everything with careful attention to alignment and connections. By performing this repair yourself, you save 50 to 80 percent compared to professional service and extend your washer’s life by years. If your Kenmore leaves clothes wet after washing, the clutch is likely the fix, and now you have the knowledge to do it right.