
You’re standing in front of your LG washing machine, laundry trapped inside, and the door won’t budge. It’s not just inconvenient, it’s urgent. Whether it’s a power glitch, a clogged filter, or a failed lock mechanism, knowing how to open an LG washing machine safely without damaging the unit or risking injury is essential. The good news? Most issues can be resolved without full disassembly. But when they can’t, you need a clear, step-by-step guide that prioritizes safety, precision, and practicality.
This guide covers everything from emergency door unlocking tricks to full panel removal for deep maintenance. You’ll learn how to diagnose why the door won’t open, use built-in manual release features, and safely disassemble your LG front loader for pump access or repairs. No guesswork. No jargon. Just actionable steps that work.
Understanding Why LG Washer Doors Stay Locked
LG washing machines use a safety interlock system that prevents the door from opening during operation, high temperature, or water retention. Understanding when and why the lock engages helps determine your next move.
Why Doors Remain Locked After a Cycle
The door may stay locked for up to 30 minutes after a cycle ends due to residual heat inside the drum, water remaining in the tub, or a control board glitch. The lock light provides diagnostic clues. A blinking lock light indicates a control board fault or software hang. A solid red light means the lock is actively engaged due to heat or water. No display at all suggests a power issue or board failure. If the drum feels warm, wait 2 to 3 minutes for it to cool naturally before attempting further action.
Error Code Indicators
When your LG washer displays “IE” or “le,” this indicates an inlet error. The machine failed to fill with water within 6 minutes, often caused by unbalanced loads with heavy towels. This triggers flood mode, which locks the door for 15 to 20 minutes as a safety precaution. Leave the machine plugged in during this time, as the system will attempt to drain and unlock automatically.
Emergency Door Unlock Methods
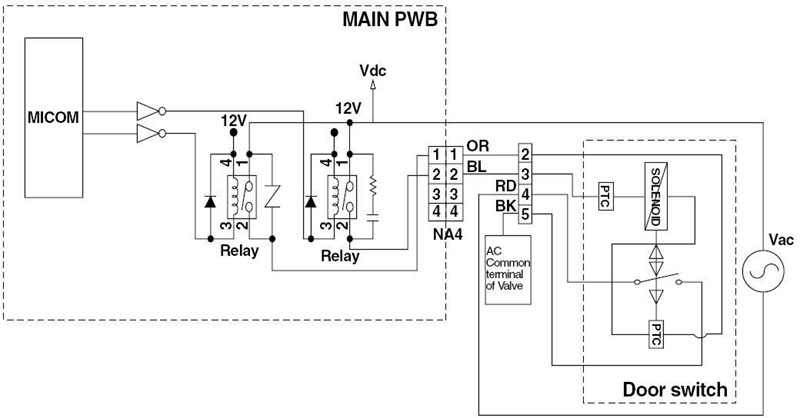
Before removing any panels, try these non-invasive techniques to open the door.
Drain and Reset the Cycle
If water remains inside the drum, the door will not unlock. To resolve this, press the Spin Speed button repeatedly until “No Spin” appears on the display. Start a drain-only cycle and wait for it to complete. Once drained, press Start/Pause to unlock the door. If the display is unresponsive, unplug the washer for 60 seconds, then plug it back in and retry.
Use the Add Item Function
For mid-cycle access when you need to add a forgotten garment, press the Add Item or Start/Pause button. Wait for the lock indicator to turn off, which takes up to 1 minute. Gently pull the door handle while the indicator is off. This method only works if water has drained and the drum is safe to access.
Power Cycle Reset
Unplug the power cord from the wall. Wait 1 to 2 minutes, or up to 30 minutes for stubborn glitches. Plug the unit back in. Push the door handle toward the washer and pull outward simultaneously. This simple reset resolves many electronic lock failures.
Manual Release via Top Panel

Some LG models allow access to a manual door release tab by removing the top panel.
Remove the Top Panel
Unplug the washer first. Locate the two mounting screws at the rear edge of the top panel. Unscrew them completely. Slide the panel backward approximately 1 inch, then lift upward to remove it. You will see the control board, inlet valves, and wiring harnesses exposed.
Pull the Emergency Release Tab
Look down near the door latch assembly on the front frame, accessible through the top opening. Find a 1-inch round plastic tab hanging from the lock mechanism. Pull this tab firmly downward to disengage the lock. Open the door immediately after pulling. Do not force it. If resistance is high, the lock may be mechanically jammed or still electrically engaged.
Front Access Panel Release

Many LG models feature a hidden release lever behind a lower front panel.
Locate the Emergency Access Door
Check the bottom front left or right corner for a small plastic cover. Some models have this on the left side, others on the right. Open it by hand or use a flathead screwdriver if needed.
Activate the Manual Lever
Look inside the access area for a pull cord, yellow tab, or lever connected to the door lock. Insert a narrow tool like a screwdriver into the opening. Gently push or pull the release mechanism while simultaneously pulling the main door handle. The lock should disengage. If it does not, the solenoid or latch assembly is likely faulty and requires replacement.
Prepare for Full Disassembly
If unlocking fails, you may need to remove panels to access internal components like the drain pump or door latch.
Essential Safety Steps
Always unplug the washer before working on it. Never work on live power. Turn off water supply valves and disconnect hoses. Drain residual water using the emergency hose or filter access. Move the unit away from the wall to access all sides. Place towels and a shallow container underneath to catch water. Take photos at every step to aid reassembly.
Required Tools
Gather these tools before starting. You will need Phillips and flathead screwdrivers. Have pliers ready for hose clamps. Use a small blade or plastic trim tool for clips. Keep a multimeter available for electrical testing. A spring expansion tool is essential for door boot clamps.
Remove the Front Panel

To access the door latch, pump, or tub, you must remove the front panel, but only after releasing the door boot seal.
Release the Door Boot Clamp
Open the door and locate the spring clamp around the rubber gasket. Use a spring expansion tool or flathead screwdriver to compress the spring. Slide the clamp down and remove it. Gently peel the rubber seal from the front panel lip. Fold the gasket into the drum to keep it out of the way. The metal spring will snap back when released, so control it carefully.
Remove Front Panel Mounting Screws
Remove the four or remaining screws securing the front panel to the cabinet frame. Brace the panel to prevent it from falling forward. Pull the panel forward and lift it upward to disengage from the bottom slots. Set the panel aside. This provides full access to the door lock switch, gasket, counterbalance weights, water pump, shock absorbers, and tub assembly.
Disconnect and Remove Latch Assembly

With the gasket out of the way, you can access the door lock mechanism.
Unmount the Door Latch
Locate the two screws securing the latch to the cabinet. Remove them with a Phillips screwdriver. Find the wire connector on the latch. Press the release tab and disconnect the harness. Support the connector while releasing. Do not pull on the wires. The latch can now be removed for inspection or replacement.
Open Access to Drain Pump
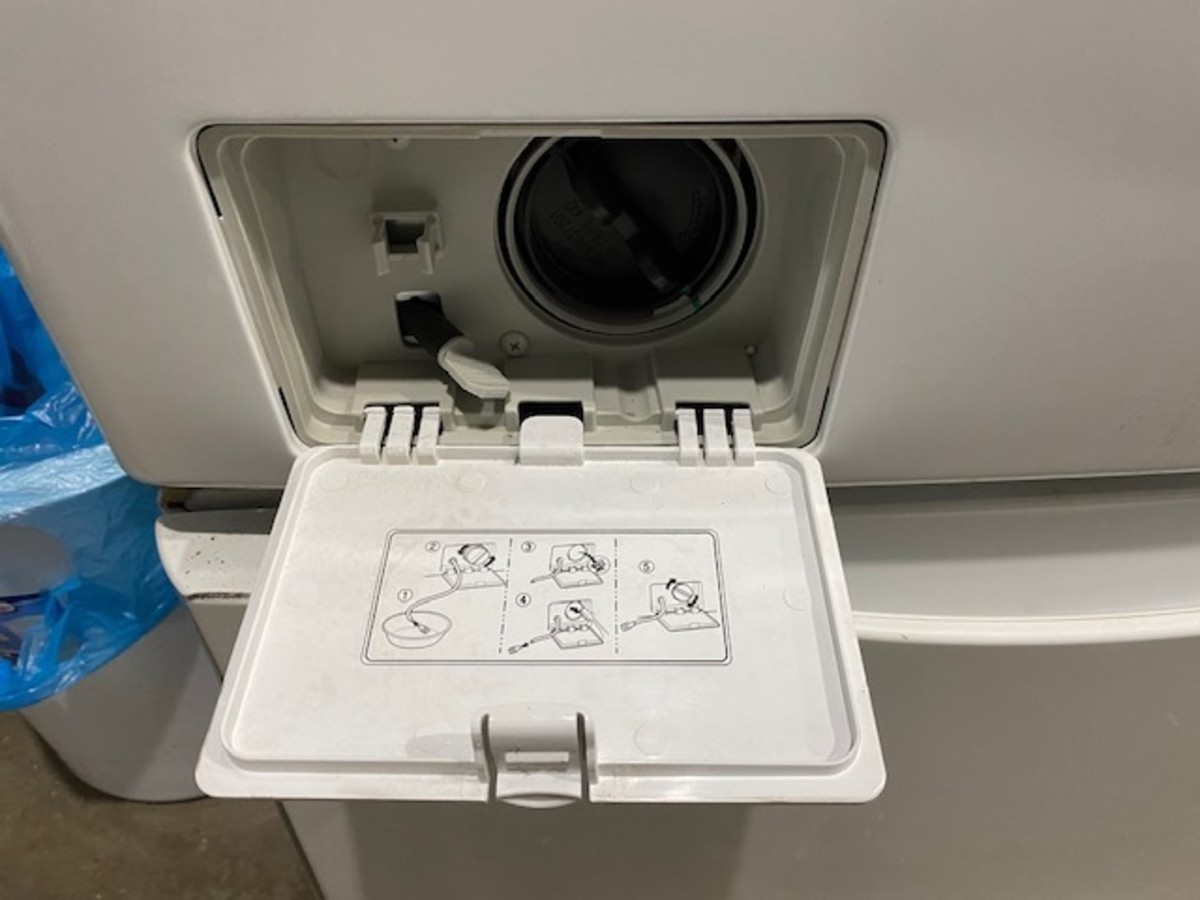
A clogged pump often causes water retention and prevents door unlocking.
Drain the Filter Access Panel
Place a container under the bottom front access door. Open the panel, which may require unscrewing on some models. Unscrew the drain filter cap counterclockwise. Let water drain slowly into the container. Up to 2 gallons of water may spill, so be prepared.
Clean the Drain Filter
Pull out the filter assembly. Remove lint, coins, or debris. Rinse under running water. Reinsert and tighten the cap clockwise until snug. Clean the filter every 3 months to prevent clogs and “IE” errors.
Full Internal Access: Panel Removal Guide
For motor, tub, or bearing work, full disassembly is required.
Remove the Top Panel
Remove the two rear screws. Slide the panel back, then lift off. This exposes the control board, heater, and dispenser.
Remove Console and Dispenser
Pull out the detergent drawer by pressing the internal tab. Remove three screws, two long ones near the dispenser and one in the top corner. Lift the console up and disconnect the color-coded wiring harnesses. Connectors are keyed, so do not force mismatches.
Access Rear Components
With front and top panels off, you can reach critical systems. Unscrew all perimeter screws on the rear panel. Lift the panel upward to disengage slots. This exposes the motor, drain pump, and wiring. The ground wire attaches from the motor to the tub. Remember to reconnect it during reassembly.
Extract Tub and Motor (Advanced)
Only attempt this if replacing bearings, motor, or shocks.
Release Suspension System
Shock absorbers require using pliers to compress locking tabs and remove pins. For suspension springs, release one at a time while supporting the tub. Remove counterbalance weights by taking off bolts and lifting them off, both top and bottom. The tub is heavy. Have a helper assist.
Remove the Drum
Disconnect the air hose and wiring harnesses. Remove drain hoses and dispenser lines. Slide the motor out from the rear. Lift the inner drum out through the front. LG drums can often be split for bearing replacement, but this requires specialized tools.
Reassemble with Confidence
Reassembly is the reverse of disassembly, but mistakes cause leaks or electrical faults.
Refit the Door Boot Seal
Stretch the rubber gasket over the front panel lip. Insert the clamp into the outer groove with the spring side down. Use a spring tool to compress and lock the clamp. Lubricate the seal with silicone spray to prevent pinching.
Verify All Connections
Ensure all connectors click into place. Reattach the ground wire to the tub. Match color-coded harnesses to your photos. Check for no loose strands in power connections.
Test Before Closing
Reconnect power and water. Run a short rinse cycle. Check for leaks at the filter and hoses. Verify proper door seal and drain function. Watch for error codes. If the door won’t lock now, recheck latch alignment and wiring.
Prevent Future Lock Issues
Avoid recurring problems with simple habits.
Avoid IE Error Triggers
Do not overload the machine with towels or heavy fabrics. Ensure water pressure is adequate. Check inlet screens monthly and clean them if needed. For machines over 8 years old, consider preemptive latch or pump replacement.
When to Replace the Door Latch
If the door won’t unlock even after resets and manual releases, the latch is likely faulty.
Symptoms of Failed Latch
Watch for these signs. No click when closing the door. Lock light stays on indefinitely. Manual release doesn’t work. Visible burn marks or melted plastic on the assembly. Replacement takes 20 to 30 minutes with basic tools. Use OEM parts for reliability.
Maintenance Schedule for Longevity
Keep your LG washer running smoothly with regular care.
Care Intervals
Clean the door seal and detergent drawer monthly. Inspect hoses for cracks quarterly. Drain the pump filter every 3 months. Flush inlet screens quarterly. Check leveling legs annually. Test heater and NTC sensor with a multimeter annually.
Frequently Asked Questions About Opening LG Washers
Why won’t my LG washing machine door open after a cycle ends?
The door remains locked due to safety features. Water inside the drum, high internal temperatures, or a control board glitch can keep the lock engaged. Wait 2 to 3 minutes if the drum is warm. Run a drain cycle if water is present. Try a power reset by unplugging for 60 seconds.
How do I manually release the door on an LG front loader?
Remove the top panel by unscrewing the two rear mounting screws. Slide backward and lift off. Locate the 1-inch plastic tab near the door latch. Pull it firmly downward to release the lock. Alternatively, use the front bottom access panel to find the emergency lever.
What does the “IE” error code mean on my LG washer?
“IE” indicates an inlet error. The machine failed to fill with water within 6 minutes, often from unbalanced loads with heavy items. This triggers flood mode, locking the door for 15 to 20 minutes. Leave the machine plugged in to allow the automatic drain cycle to complete.
Can I open my LG washer if the power is out?
Yes. If the drum is empty and cool, the door may open manually. Use the emergency release tab behind the top panel or the front access lever. If water remains inside, you cannot open the door without power to run a drain cycle.
How often should I clean the drain filter on my LG washing machine?
Clean the drain filter every 3 months. Regular cleaning prevents clogs that cause water retention and “door won’t open” errors. Remove lint, coins, debris, and small items from the filter housing.
Is it safe to force the door open if it’s stuck?
No. Forcing the door can damage the latch mechanism, crack the glass, or void your warranty. Always try the manual release methods first. If nothing works, the door latch assembly likely needs replacement.
Final Thoughts on Opening Your LG Washing Machine
Knowing how to open an LG washing machine isn’t just about fixing a stuck door. It’s about mastering the system and handling 95% of lock and access issues without a service call. Start with simple resets and manual releases before resorting to full disassembly. Always prioritize safety by unplugging the machine and letting the drum cool before working inside.
Document every step with photos during disassembly. Label screws by location using tape. This makes reassembly straightforward and prevents leaks or electrical faults. Keep up with regular maintenance, including quarterly filter cleaning and annual component checks, to prevent lock issues from recurring.
For machines over 8 years old, consider preemptive replacement of the door latch or pump. With this guide, you have the knowledge and confidence to handle most stuck-door scenarios safely and effectively.



