
A leaking or corroded washing machine water valve isn’t just a nuisance, it’s a ticking time bomb for water damage. Whether the handle snapped off after 20 years of service or your cold water valve drips constantly, replacing it is one of the most effective DIY plumbing upgrades you can make. The good news is that with the right tools and approach, installing a washing machine water valve takes under 30 minutes for standard replacements and costs as little as $10 per valve.
This guide walks you through every step, from shutting off the main water supply to testing for leaks. You’ll learn how to avoid common pitfalls like cross-threading and dropped parts, and discover pro tips like using a bent wire brush for deep thread cleaning.
Shut Off Water and Prepare Workspace

Before touching any tools, protect your home from unexpected flooding. A single misstep during valve replacement can release hundreds of gallons if the main line stays open.
Turn Off Main Water Supply
Locate your building’s main water shut-off valve, usually found in the basement, utility room, or near the water meter. Turn the handle clockwise until fully closed. In multi-unit buildings, notify neighbors before cutting supply.
Release Residual Pressure
Open a nearby faucet, like in the kitchen or bathroom, to drain remaining water from the pipes. This prevents spurting when disconnecting hoses. Confirm the water is off by attempting to run the washing machine briefly. No flow means you’re safe to proceed.
Protect Floor and Drain
Place rags or small containers under the valve to catch residual drips. Cover the floor drain with a piece of cardboard or plastic. A dropped valve or fitting can vanish into the drain, requiring costly retrieval. If the laundry box is recessed, pull the washing machine forward slightly for better access.
Remove Old Water Valve Safely

Corroded or broken valves are common in homes over 20 years old. The key to removal without damaging pipes is using two wrenches and controlling torque.
Use Two Wrenches to Prevent Pipe Damage
Position a 1-inch wrench on the stationary hex-shaped female fitting behind the valve. This keeps the wall pipe from twisting. With a second adjustable wrench, grip the body of the old valve. Turn the valve counter-clockwise to loosen. If it resists, apply steady pressure. Do not jerk. Old thread sealant or corrosion may require extra force. Never use pliers because they can crush brass fittings.
Handle Broken or Seized Valves
If the handle broke off, clamp onto the valve stem with channel locks. If the valve body crumbles during removal, use a screw extractor or locking pliers on the remaining piece. Work slowly to avoid damaging internal threads. Once removed, inspect the female fitting. If threads are stripped or the pipe is corroded beyond repair, skip to copper pipe replacement.
Clean and Inspect Fittings
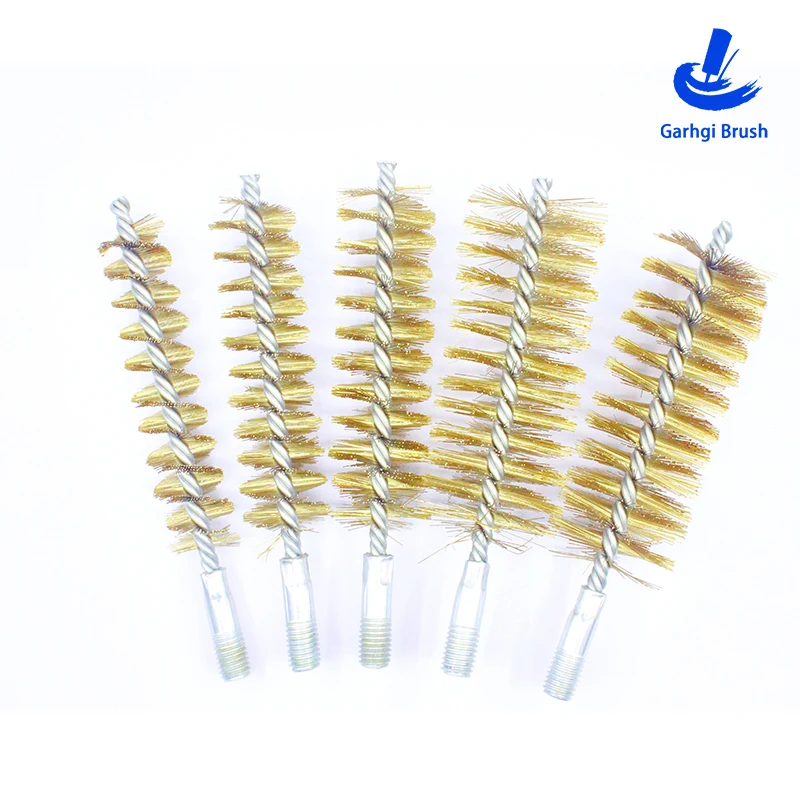
A leak-free seal depends on clean, undamaged threads. Skipping this step causes 70% of post-installation drips.
Scrub Threads with Bent Wire Brush
Use a 90-degree bent wire brush to clean corrosion and old PTFE tape from inside the female fitting. Standard brushes won’t reach deep enough. Rotate the brush clockwise while pushing in to remove all debris. Check for pitting or cracks in the brass. If the fitting wobbles or metal is thin, the entire line may need cutting and a SharkBite repair.
Check for Jagged Pipe Edges
If the valve was removed by cutting the copper pipe, inspect the end. A jagged or beveled edge prevents proper sealing with push-fit fittings. Use a right-angle pipe cutter to make a clean, square cut if needed.
Install New Water Valve Correctly

Choosing the right valve and sealing method ensures long-term reliability. Most replacements use standard ½-inch male-thread brass boiler drain valves.
Select the Right Replacement Valve
Buy a ½-inch male brass valve, red for hot, blue for cold. Modern models are tab-less, eliminating friction against the housing that causes sticking. Avoid plastic valves because they fail under constant pressure. If replacing a dual-valve assembly, ensure the new unit matches the mounting pattern and uses reusable fittings.
Apply PTFE Tape Clockwise
Wrap PTFE thread tape around the male threads of the new valve. Always wrap clockwise, as you look into the open end, so the tape doesn’t unravel during installation. Use 3 to 5 wraps to fill thread grooves without overbuilding. Do not use tape on push-fit connections. Only use it on threaded joints.
Hand-Start to Prevent Cross-Threading
Screw the valve in by hand first. If it resists after one full turn, back it out and restart. Cross-threading ruins both the valve and fitting. Once fully hand-tight, use the two-wrench method again. Hold the base fitting steady and tighten the valve clockwise with the second wrench.
Align Handle Position
If the handle isn’t vertical when closed, slightly loosen the top nut on dual assemblies or adjust the final turn angle. Make sure the handle doesn’t rub against the wall or housing. Newer tab-less designs eliminate this issue.
Connect Hoses and Finalize Setup
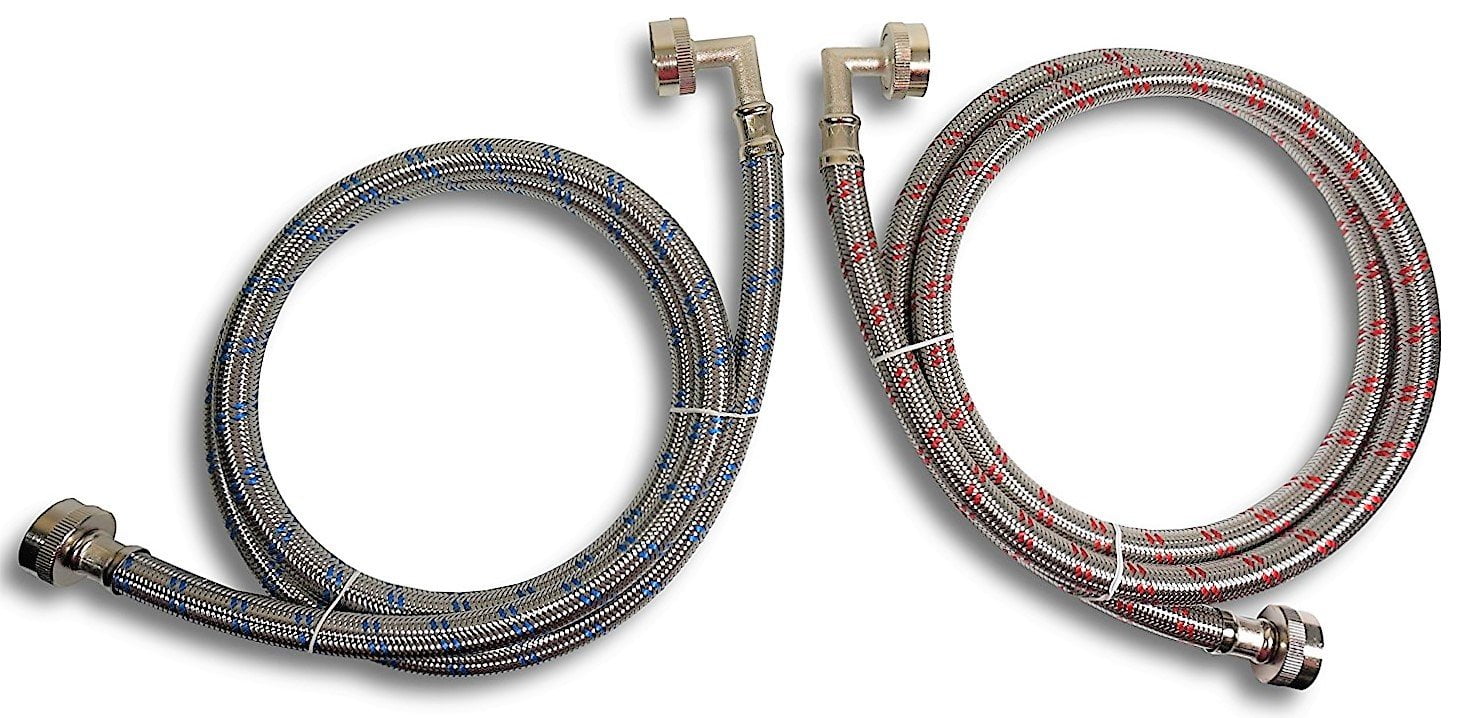
Now that the valve is secure, attach the washing machine hoses with attention to bend direction and color coding.
Attach 6-Foot Hoses with 90-Degree Bends
Use new 6-foot braided stainless steel hoses rated for 10 times normal water pressure. Attach the straight end to the wall valve. The 90-degree elbow should face down or toward the back of the washer to prevent kinking. Tighten with a 15/16-inch wrench, just until snug. Overtightening crushes the internal rubber washer and causes leaks. The factory-installed washer provides the seal. No additional tape is needed on hose connections.
Match Color to Temperature
Connect the red hose to the hot water valve, typically on the right, and the blue hose to cold on the left. If valves aren’t color-coded, label them immediately with waterproof tape or a marker.
Advanced Install: Automatic Shut-Off Valve
For flood prevention, upgrade to an automatic shut-off system that cuts water when leaks are detected.
Install Adapter and Piping
Thread an adapter onto each existing shut-off valve. Run PEX or flexible plastic pipe from the adapters to the new automatic valve unit. Use push-to-connect fittings or PVC cement as required.
Mount Unit and Connect Sensors
Mark and drill holes for mounting. Use hollow-wall anchors to secure the unit to drywall. Plug the washing machine into the unit’s outlet, then plug the unit into the wall. Place the leak sensor on the floor behind the washer. It detects water via two metal contacts. If overflow occurs, the system shuts off water automatically.
This setup costs about $225 and takes 1 to 2 hours but eliminates the need to manually close valves after each load.
Fix Corroded Pipes with SharkBite Fittings
When old copper lines are too damaged to thread, replace them with push-fit technology.
Cut Pipe with Right-Angle Cutter
Use a right-angle pipe cutter to make a clean, square cut in tight spaces. Standard cutters often bind or create beveled edges that prevent proper sealing. Deburr the inside of the pipe with a reamer or file.
Install Push-to-Connect Fittings
Push a SharkBite or equivalent fitting fully onto the copper pipe until it bottoms out. A stainless steel grab ring and O-ring create the seal. No soldering or glue required. Attach the new valve to the fitting. Test with caps before connecting hoses.
Test for Leaks and Verify Operation
Never skip testing. Even a small drip can lead to major water damage over time.
Slowly Restore Water Pressure
Open the main water supply slowly to prevent water hammer, a pressure surge that can damage pipes and valves. Listen for banging. If heard, install water hammer arrestors.
Inspect All Connections
Check the valve-body joint, hose connections, and any new fittings for drips or misting. A flashlight helps spot tiny leaks. If a connection leaks, shut off water, disconnect, clean threads, reapply tape, and reinstall.
Activate Hot Water System
Turn on the water heater and open the hot water valve. Cold line pressure alone won’t reveal hot-side leaks. Run a hot wash cycle to test full system performance.
Prevent Future Failures
A successful installation isn’t complete without a maintenance plan.
Replace Hoses Every 5 to 7 Years
Even if hoses look fine, replace them every 5 to 7 years, maximum 10. They degrade under constant pressure. Keep spare hoses and valves on hand for emergencies.
Label Uncolored Valves
If your valves aren’t color-coded, mark them clearly with red and blue tape or paint. This prevents confusion during future repairs or hose swaps.
Keep Tools Ready
Store a 1-inch wrench, PTFE tape, and bent wire brush in your laundry room. For homes with aging plumbing, a right-angle pipe cutter is a smart investment.
Troubleshoot Common Issues
Even careful installations can go wrong. Here’s how to fix the most frequent problems.
Valve Won’t Tighten Straight
If the valve body won’t seat evenly, cross-threading is likely. Remove it, inspect threads, and restart by hand. Use two wrenches to align the fitting before final tightening.
Leak at Valve Base
This is caused by dirty threads or insufficient tape. Remove the valve, clean with a bent wire brush, reapply PTFE tape clockwise, and reinstall.
Handle Breaks During Use
This is common in 20-year-old valves. Replace both hot and cold valves at once. If one failed, the other is likely close behind.
Washer Won’t Fill After Replacement
Check the internal screen filter on the hose inlet for debris. Also verify the solenoid voltage, 24V or 120V, matches your machine using a multimeter.
Dropped Valve into Drain
Always cover the drain before starting. If a part falls in, use a magnet or grabber tool. If unreachable, consult a plumber. Don’t risk clogging the main line.
Frequently Asked Questions About Installing Washing Machine Water Valves
How long does it take to install a washing machine water valve?
For standard valve replacements, the entire process takes under 30 minutes. More complex installations, like adding automatic shut-off systems or replacing corroded copper pipes, take 1 to 2 hours.
Can I replace just one valve or do I need to replace both?
If one valve fails, it’s smart to replace both at the same time. If one failed after 20 years, the other is likely close to failing too. Replacing both prevents a second repair visit.
What type of valve should I buy for replacement?
Use ½-inch male brass boiler drain valves. Choose tab-less designs to prevent friction against the housing. Red indicates hot, blue indicates cold.
Do I need special tools for tight spaces?
Yes. A right-angle pipe cutter makes clean cuts in confined areas. A 90-degree bent wire brush reaches inside female fittings for deep cleaning. A stubby screwdriver helps with recessed mounting screws.
Why does my new valve still leak after installation?
The most common causes are dirty threads, insufficient PTFE tape, or cross-threading. Remove the valve, clean threads thoroughly with a wire brush, reapply PTFE tape clockwise, and reinstall carefully.
How often should washing machine hoses be replaced?
Replace hoses every 5 to 7 years, even if they look fine. They degrade under constant pressure. Burst hoses cause some of the most costly water damage in homes.
Key Takeaways for Installing Your Washing Machine Water Valve
Installing a washing machine water valve is a high-impact DIY task that prevents costly water damage. By following these steps, shutting off water first, using two wrenches to prevent pipe damage, cleaning threads with a bent wire brush, applying PTFE tape correctly clockwise, and testing thoroughly, you ensure a reliable, leak-free connection.
The key steps are preparing the workspace with drain protection, removing the old valve carefully to avoid damaging pipe threads, cleaning all fittings thoroughly, and applying PTFE tape in the correct direction. Always hand-start the valve to prevent cross-threading, and test all connections before reassembling.
Consider upgrading to automatic shut-off systems for added protection, and replace hoses every 5 to 7 years. With the right preparation, even corroded, seized valves can be replaced safely in under an hour.



