
Is your washing machine shaking violently, making loud banging noises, or slowly migrating across the floor during spin cycles? These are clear signs your washer needs leveling. A properly leveled washing machine isn’t just about reducing noise. It protects your appliance’s internal components, prevents floor damage, and extends the lifespan of drum bearings and suspension systems. Modern washers spin at extremely high speeds, and even a slight tilt can cause significant imbalance and costly repairs. The good news: leveling your washer is a simple DIY task that takes under 30 minutes with basic tools.
In this guide, you’ll learn exactly how to diagnose imbalance accurately, adjust your specific type of leveling feet correctly, lock them in place, and verify stability with a test run. Whether you have a top-loader, front-loader, or a model installed under a countertop, these step-by-step instructions will eliminate vibration and ensure smooth operation for years.
Essential Safety Steps Before Leveling
Before touching any leveling feet, follow critical safety and preparation procedures to ensure accurate results and prevent damage to your appliance or home.
Remove Shipping Bolts on Front Loaders
If you’re installing a new front-load washing machine, shipping bolts must be removed before anything else. These metal rods secure the drum during transport to prevent damage. Leaving them in place will destroy the drum and suspension components when the machine spins at high speeds. Locate the back panel, remove the bolts with a wrench, and store them in a safe place in case you need to move the machine later.
Disconnect Power and Water First
Always unplug the washing machine and disconnect water hoses before attempting any leveling work. Never attempt to level a machine while it’s connected to power or water. Pull the washer away from the wall to ensure enough space to access all four corners and the base. Verify the machine sits on a solid, flat surface. Avoid placing washers on warped wood, vinyl flooring, or thick carpet, as these surfaces can cause instability even with proper leveling.
Gather the Right Tools
Using incorrect tools leads to inaccurate readings and wasted effort. You’ll need a 3-foot spirit level for accurate readings across the entire machine frame. A 12-inch level works but provides less accuracy. Small torpedo levels should be avoided because they only measure a tiny section and can give false readings. Additional required tools include an adjustable wrench, work gloves for grip, a flashlight if working under a countertop, and non-skid pads or Wobble Wedges for slippery or uneven floors.
Diagnose Your Washer’s Imbalance
Don’t guess whether your washing machine needs leveling. Even if the machine appears level visually, small imbalances cause major problems at high spin speeds. Use these proven diagnostic methods to confirm the issue.
Perform the Rock Test
Place your palms on opposite top corners of the washing machine and gently rock it side-to-side and front-to-back. If any foot lifts off the ground during this test, the washer is unlevel. If the machine shifts or wobbles excessively, adjustments are definitely needed. Repeat this test after leveling to confirm stability. A properly leveled machine should feel solid and immovable when rocked.
Use the Water Level Test for Top Loaders
For top-loading models, fill the tub with water just below the pulsator. If the pulsator appears centered in the water, the machine is level. If it’s off-center, the washer is tilted in that direction. This method is especially useful for models where the top surface isn’t perfectly flat, as it tests the actual leveling of the entire machine rather than just the frame surface.
Inspect Foot Contact Visually
Look underneath the washing machine. If one or more feet aren’t touching the floor, that’s your source of vibration. Even a 1/8-inch gap allows the foot to bounce during spin cycles, amplifying noise and causing the machine to walk across the floor. All four feet must make solid contact with the floor for proper stability.
Identify Your Leveling Leg Type

Knowing your washing machine’s specific leg mechanism ensures correct adjustment and prevents mistakes that could undo your work later.
Neoprene or Nylon Legs on Newer Models
Modern washing machines commonly feature neoprene or nylon legs that grip the frame tightly when turned. These legs resist movement even when the machine is slid out for cleaning. To adjust them, turn the foot directly. No separate lock nut is needed. Use work gloves for better grip, as these materials can be slippery. A wrench may be required on stubborn legs that have become compacted over time.
Jam Nut Legs on Older Models
Many Whirlpool, Maytag, and older LG models feature jam nut legs with a locking nut above the foot. These require a two-step adjustment process. First, turn the foot to set the desired height. Then, tighten the jam nut against the base of the machine to lock it in place. This locking step is critical. If the nut isn’t secured, the leg will twist when the machine vibrates during spin cycles, undoing your leveling work within minutes.
Rotation Direction Matters
Always turn the foot itself, not the lock nut, when adjusting height. Counterclockwise rotation raises the washer by extending the leg. Clockwise rotation lowers the washer by retracting the leg. The lock nut only tightens or loosens. It doesn’t change the height. Remember this simple rule: turn the foot to level, turn the nut to lock.
Step-by-Step Leveling Process
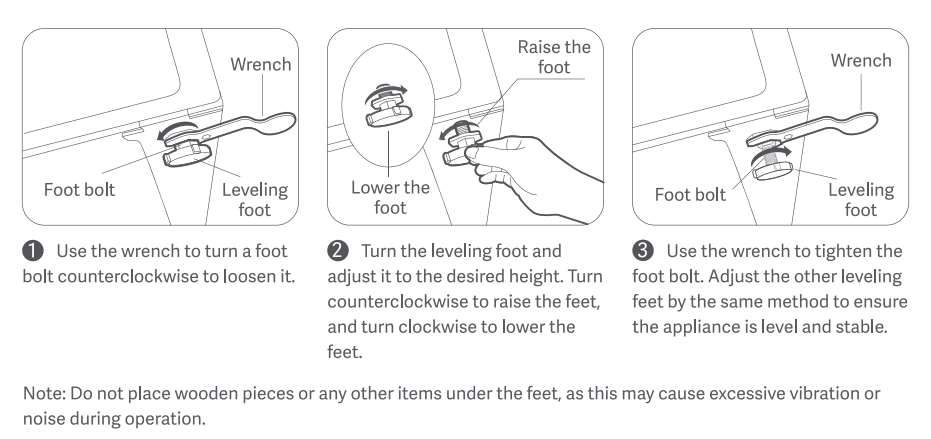
Follow this proven four-phase method to achieve perfect balance. Take your time with each phase. Rushing leads to inaccurate results.
Phase 1: Prepare the Machine
Ensure the washing machine is completely empty and in its final installed position. If the machine is installed under a countertop, remove the front access panel for better visibility. This panel is usually held by two screws at the bottom. Place the spirit level on the flat metal frame at the top front corner. Never place the level on the lid. Modern lids are often curved and will give completely false readings. The flat casing edge is the only reliable surface for accurate measurement.
Phase 2: Adjust Front-to-Back Level
Place the level front-to-back across the top edge of the machine. Note which end the bubble lean toward. This indicates the low side. To raise the low corner, turn the corresponding rear leg counterclockwise. For example, if the front is low, raise the front legs. If the back is low, raise the rear legs. Make small adjustments, about 1/4 turn at a time, then recheck the level. Once the bubble is centered front-to-back, ensure the opposite leg touches the floor snugly. Don’t leave any foot floating or raised.
Phase 3: Balance Side-to-Side
Rotate the level to lie side-to-side across the machine. Identify the low side by noting which direction the bubble drifts. Turn the low-side front leg counterclockwise to raise that corner. Then adjust the opposite front leg until both front legs are firmly on the floor. Recheck the front-to-back level after this adjustment. Changes to one axis often affect the other, so verify both directions after each major adjustment.
Phase 4: Lock and Verify
Tighten all jam nuts securely against the machine base if your model has them. Use the wrench to secure them firmly, but avoid over-tightening which can damage the threads. Confirm all four feet are in full contact with the floor. No gaps should exist. Recheck the spirit level in both directions. The bubbles should be perfectly centered in both views. Finally, perform the rock test again. No movement whatsoever means success.
Run Final Tests and Calibration
A leveled washing machine must perform reliably under real operating conditions. Skip this step and you may discover problems only after reassembling everything.
Test with a High-Speed Spin Cycle
Load the washer with approximately 6 pounds of laundry. Old towels work well for this test. Select the Rinse and Spin or highest spin cycle available. Watch carefully during the spin-up phase. Minimal vibration is normal. Violent shaking or walking across the floor means the leveling needs adjustment. Listen for loud banging or clunking sounds. These indicate persistent imbalance issues that must be addressed.
Run Brand-Specific Calibration Modes
Some washing machine models require electronic recalibration after physical leveling adjustments. LG washers need a specific calibration process. Place approximately 6 pounds of laundry in the drum. Press Power, then select Rinse and Spin. Press Start Pause. The drum will calibrate automatically for 2 to 3 minutes. Monitor for rocking during this process. If rocking occurs, repeat the calibration.
Samsung models use a built-in Calibration Mode that varies by model. Start with an empty drum. Press specific button combinations such as Temp plus Spin to enter the mode. Let it run for 3 to 5 minutes. This ensures internal sensors recognize the balanced operation and adjust accordingly.
Handle Special Installation Scenarios
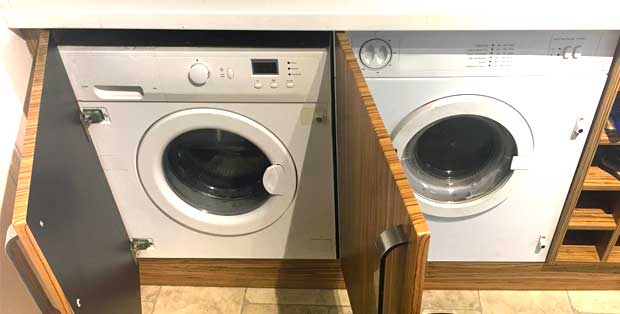
Some washing machine setups require extra care and specialized techniques to level correctly.
Washer Installed Under a Countertop
Limited space makes adjustment significantly harder. Remove the front toe panel for access to the feet. Use a small flashlight and a thin wrench if clearance is tight. Make tiny adjustments. Small changes have big effects in confined spaces. Push the machine back gently after leveling. It may shift slightly during this process. Recheck stability once in the final position.
Uneven or Slippery Floors
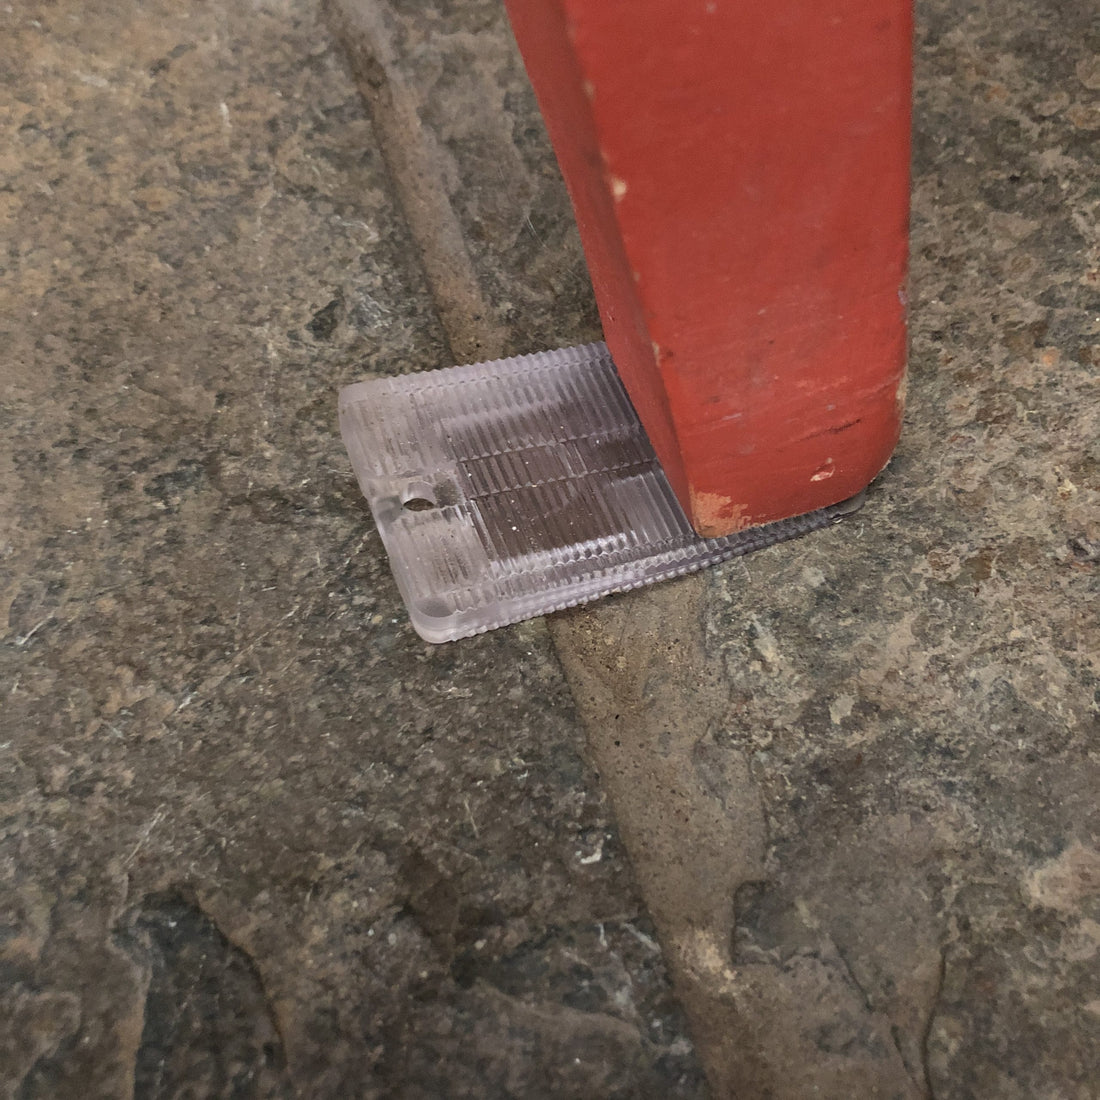
Even a perfectly level washing machine can slide on slick surfaces. On tile, wood, or linoleum, install non-skid pads under each foot to prevent lateral movement during spin cycles. On carpet or uneven surfaces where leveling feet can’t extend far enough, use Wobble Wedges. These are tapered plastic shims designed specifically for this purpose. Use soft plastic wedges for hard floors and hard plastic wedges for carpet. Slide the wedge under the raised foot until contact is firm.
Washer on a Pedestal
Never use the washing machine’s own feet when installed on a pedestal. Fully retract the washer’s feet and lock them with their nuts. Use the pedestal’s leveling feet instead. Level the pedestal first, then place the washer on top. This ensures stability and prevents interference between the two leveling systems.
Troubleshoot Persistent Problems
If vibration continues after following all leveling procedures, consider these common causes and solutions.
The Floor May Be the Real Issue
Even with perfect feet adjustment, an uneven or spongy floor causes persistent instability. Use Wobble Wedges under the machine to compensate for floor irregularities. Alternatively, install a 3/4-inch plywood base under the machine to distribute weight evenly across a larger surface area.
Loose or Unlocked Feet
A jam nut that wasn’t tightened properly allows the leg to rotate during operation. Recheck all lock nuts. Tighten each one securely with a wrench. This is the most common reason vibration returns after successful leveling.
Internal Mechanical Failure
Worn drum bearings, damaged shock absorbers, or broken suspension rods can mimic leveling issues. Signs include grinding noise during operation, visible drum wobble when spinning by hand, or oil stains appearing under the machine. Leveling adjustments won’t fix internal damage. Professional repair is required in these cases.
Unbalanced Load Issues
Even a perfectly leveled washing machine will shake violently if laundry is clumped to one side. Always distribute clothes evenly in the drum. Avoid washing single heavy items like king comforters alone. Balance heavy items with lighter clothing.
Maintain Long-Term Stability
Leveling isn’t a one-time fix. Vibrations and machine movement can loosen components over time, requiring periodic maintenance.
Recheck Every Six Months
Perform the rock test twice yearly. If the machine wobbles, recheck foot contact and tighten jam nuts. This preventative maintenance catches small issues before they become major problems.
Always Re-Level After Moving the Washer
Any time you pull the machine out for cleaning or maintenance, re-level it. Sliding can twist the legs, especially on jam nut models. The effort takes only a few minutes and prevents future vibration problems.
Prevent Mold in Front Loaders
After each use, leave the door slightly ajar with a small towel or door wedge. This allows airflow and prevents mold and musty odors from developing in the rubber gasket. A clean machine operates better and lasts longer.
Frequently Asked Questions About Leveling a Washing Machine
How do I know if my washing machine needs leveling?
Signs include violent shaking during spin cycles, loud banging or clunking noises, the machine walking across the floor, or visible tilting. The rock test provides confirmation. If the machine wobbles or any foot lifts when rocked, leveling is needed.
Can I use a small level for checking washer balance?
Avoid small torpedo levels. They only measure a tiny section and can miss subtle tilts across the machine. A 3-foot spirit level provides accurate readings across the entire frame and is strongly recommended for proper results.
Do all washing machines have leveling feet?
Yes. All washing machines have adjustable leveling feet, though the type varies. Neoprene or nylon legs are common on newer models. Jam nut legs with locking nuts are found on many older Whirlpool, Maytag, and LG models.
Why does my washer still shake after leveling?
Possible causes include an uneven floor requiring Wobble Wedges, loose jam nuts that need tightening, internal mechanical problems like worn bearings, or an unbalanced laundry load. Check each possibility systematically.
Should I use a washing machine pad or mat for extra stability?
Non-skid pads are recommended for slippery floors like tile, wood, or linoleum. They prevent lateral movement during unbalanced loads. Wobble Wedges address uneven floors where feet can’t compensate fully.
Key Takeaways for Leveling Your Washing Machine
A properly leveled washing machine runs quietly, protects internal components, and lasts significantly longer. The process requires only a few basic tools and under 30 minutes of your time. Always start with accurate diagnosis using the rock test and spirit level. Identify your specific leg type before making adjustments. Make small incremental changes, checking both axes after each adjustment. Lock jam nuts securely to prevent loosening. Finally, verify with a test spin cycle using a balanced load. Remember: the spirit level is your truth-teller, and the rock test is your final judge. Follow these steps and enjoy a vibration-free laundry experience for years.



