
Is your washing machine filling with water but refusing to spin or agitate? This frustrating issue is one of the most common appliance failures, and the culprit is often a worn or broken drive belt. Replacing a washing machine drive belt is a straightforward DIY repair that can save you hundreds compared to a professional service call. With basic tools and about 30 minutes, you can restore full function to your washer.
This guide walks you through every step, from diagnosing belt failure to testing your machine post-repair. You’ll learn how to access the belt safely, remove the old one, install the new belt correctly, and avoid common mistakes that lead to noise or premature failure.
Diagnose Belt Failure First
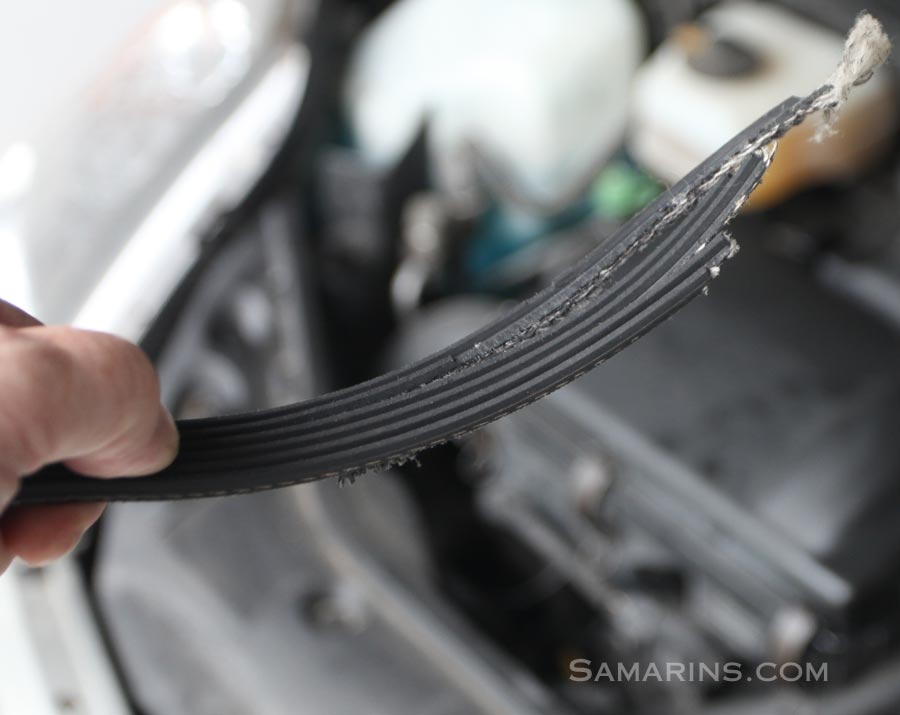
Before removing any panels, confirm the drive belt is actually the issue. Misdiagnosis leads to unnecessary work and wasted parts.
Check for Common Symptoms
A failing drive belt shows clear signs that make diagnosis straightforward. Watch for these indicators during normal operation.
• No spin or agitation despite normal fill and drain cycles
• Squealing or screeching sounds during the spin cycle
• Burning rubber smell emanating from the cabinet
• Visible belt slippage or complete breakage visible through panel gaps
If your washer fills with water but does nothing else, the drive belt is likely the first suspect, especially in machines over three to five years old.
Perform the Pinch Test
With power off and access granted, locate the belt and pinch it between your fingers to check tension. A healthy belt resists pinching with less than 1/4 inch (6 mm) of deflection. If you can pinch the belt together more than 1/4 inch, it has stretched significantly and requires replacement. This quick test confirms wear even when no visible cracks are present.
Look for Visual Damage
Inspect the belt closely for physical signs of deterioration. Check for cracks or fraying along the edges, which indicate advanced wear. Look for glazing, which appears as a shiny, hardened surface indicating past slippage. Also check for displacement, where the belt has slipped off the pulleys and now lies at the base of the machine. If any of these conditions are present, replacement is required immediately.
Disconnect Power and Water
Safety comes first when working on any appliance. Working on a live or pressurized washer risks shock, leaks, and injury.
Cut Electrical Supply
Unplug the washer from the wall outlet, or turn off the circuit breaker labeled for laundry. Never rely on the control panel being off, as this does not fully disconnect power. Always disconnect at the source before beginning repairs.
Shut Off Water Valves
Turn both hot and cold water supply valves clockwise until they are fully tight. This prevents accidental flooding when moving the unit or if a hose is disturbed during repair.
Disconnect Hoses
Place a towel under the connections to catch any remaining water drips. Disconnect the inlet hoses and the drain hose. This makes the washer lighter and much safer to tilt or lay down for access.
Gather Tools and Correct Belt
Using the right tools and the correct replacement part ensures a smooth repair process.
Required Tools
Having the proper tools on hand before starting prevents mid-project trips to the hardware store.
• Phillips screwdriver for removing front and top panels
• 5/16-inch nut driver common for Whirlpool, Maytag, and KitchenAid models
• Putty knife to release Frigidaire top panel spring clips
• 10 mm socket wrench for Samsung motor bolts
• Dry cloth for cleaning pulleys
• Wooden block to support the washer when positioned on its back
Select the Right Drive Belt
Never reuse an old belt. Always install a new one that matches your specific model number.
| Brand | Part Number | Models Served |
|---|---|---|
| Frigidaire | 8574157 | Top Load |
| Whirlpool/KitchenAid/Maytag | W11239857 | Front Load |
| Whirlpool | WPW10006384 | General/Top Load |
Pro Tip: Find your model number on the tag behind the lid or inside the door frame, then verify the correct belt online before purchasing.
Access the Drive Belt by Model
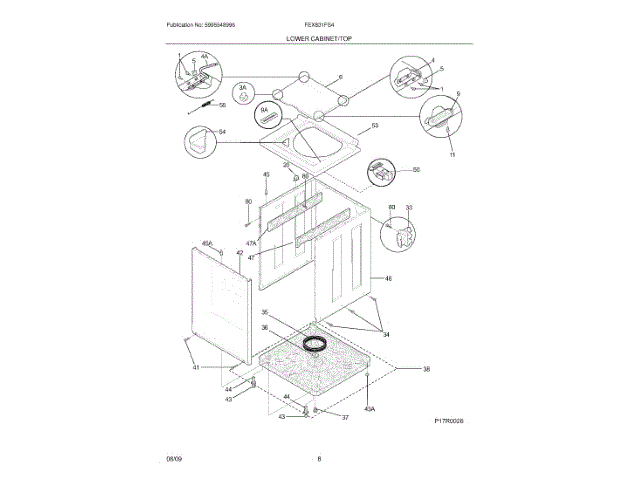
Access methods vary significantly between brands and load types. Choose the procedure that matches your washing machine.
Frigidaire Top Load: Front Panel Removal
Plan for approximately 20 minutes for this access method.
- Release the top panel by inserting a putty knife into the top front corners, about 3 inches from each side. Gently pry inward to pop the spring clips, then lift the top slightly.
- Remove front panel screws by unscrewing the two Phillips screws at the bottom of the front panel.
- Detach the panel by pushing down on the panel to release the hooks, then tilting it outward and removing it completely.
The belt is now visible at the bottom front of the machine.
Whirlpool/KitchenAid/Maytag Front Load: Rear Panel Access
This method takes less than 10 minutes and provides the quickest access.
- Position the washer by carefully tilting it backward or laying it on its front. Place a towel underneath to protect the finish.
- Remove rear screws using a 5/16-inch nut driver to remove the two screws securing the back cover.
- Remove the panel by lifting off the cover. The belt runs between the motor and drum pulley and is now fully exposed.
No disassembly of the inner tub is needed for this access method.
Whirlpool Top Load: Bottom Front Access
Plan for 15 to 25 minutes for this procedure.
- Lay the washer on its back by pulling the unit forward and gently laying it on its back. Place a wooden block under the front legs for stability.
- Remove the front panel by unscrewing the two 5/16-inch screws. Lift the panel straight up and out to remove it.
The motor and transmission pulleys are now exposed for belt work.
Samsung Top Load: Underside Motor Access
Plan for 20 to 30 minutes for this more involved access method.
- Position the washer by tipping it forward and setting it on its back.
- Loosen motor bolts using a 10 mm socket wrench to loosen the motor mounting bolts.
- Create slack by pulling the motor away from the drum to release belt tension.
The belt can now be removed from the exposed pulleys.
Bosch and General Front Loads
Most Bosch models use rear access similar to Whirlpool front loaders. Remove the one to three screws from the back panel to access the belt connecting the rear motor spindle to the large drum pulley. Some models may require top panel removal first, so consult your specific model’s documentation.
Remove Old Belt Safely
Once accessed, remove the old belt without damaging surrounding components.
Release Belt Tension
The method depends on your specific model design.
• Idler pulley systems (Frigidaire, Whirlpool): Push the idler pulley toward the motor to slacken the belt
• Adjustable motor systems (Samsung): Loosen bolts and slide the motor away from the drum
• Fixed tension systems (some front loads): Manually stretch and roll the belt off the pulleys
Slide Off Pulleys
- Remove from the smaller pulley first by sliding the belt off the motor pulley
- Then remove from the larger pulley by rolling it off the drum or transmission pulley
- Extract completely by pulling the belt out from under the assembly
Dispose of the old belt immediately to avoid confusion during the installation phase.
Inspect Pulleys and Clean Before Install
Skipping inspection risks rapid failure of the new belt. This step is critical for long-term success.
Check Pulley Condition
Inspect both pulleys carefully before installing the new belt. Spin the motor pulley by hand; it should turn smoothly without wobble or grinding. Inspect the drum or transmission pulley for chips, worn grooves, or rust. If either pulley shows visible damage, replace it before installing the new belt to prevent premature failure.
Clean All Surfaces
Wipe both pulleys thoroughly with a dry cloth to remove all oil, dirt, and old rubber debris. Any residue left behind causes slippage and overheating, leading to rapid belt wear. Use a mild degreaser if needed, but ensure surfaces are completely dry before proceeding with installation.
Verify Tensioner Function
On idler pulley systems, ensure the pulley spins freely on its arm and check that the spring is intact and provides firm pressure. A seized or damaged tensioner will ruin the new belt quickly and cause the same failure symptoms you just repaired.
Install New Drive Belt Correctly
Proper routing and tension are critical for performance and longevity of the replacement belt.
Route the Belt Properly
The general rule is smaller pulley first, then larger.
- Loop around the motor pulley by placing the ribbed side of the belt into the grooves of the motor pulley
- Stretch to the drum pulley by pulling the belt up and around the large drum or transmission pulley
- Roll into place by using your hand to rotate the pulley and guiding the belt fully into the groove
Never force the belt into place. If it won’t seat properly, recheck the routing.
Match Belt to Pulley Grooves
The ribbed side of the belt must face the grooves on both pulleys. Ensure the belt sits flat without twisting. It should not ride on the edge of the pulley or rub against the housing.
Apply Correct Tension by Model

Tension requirements vary by design. Use the correct method for your specific machine.
Frigidaire: Idler Pulley Method
- Slide the new belt under the transmission
- Route around the motor pulley
- Push the idler pulley forward against the spring tension
- Roll the belt onto the large pulley while holding tension
The belt is properly tensioned when it feels snug and fully seated.
Samsung: Motor Adjustment Method
- Place the belt on the motor pulley
- Stretch to the drum pulley
- Lift the motor slightly to create proper tension
- Hold the position and tighten the 10 mm bolts
Critical: Do not over-tighten, as this strains the motor shaft and can cause premature failure.
Whirlpool Front Load: Fixed Tension
These belts rely on elasticity for tension. Once routed, the belt should feel tight with minimal slack. Rotate the drum by hand to confirm grip and check for slippage.
Verify Installation Before Reassembly
Test everything while you still have easy access. This saves time if adjustments are needed.
Rotate Drum by Hand
Turn the drum clockwise manually. The belt should move smoothly with no slippage or binding. Listen carefully for any rubbing or grinding sounds that indicate improper seating.
Check Belt Seating
Visually trace the entire belt path. Confirm no part of the belt touches the cabinet or wiring. Ensure it is fully seated on both pulleys with no gaps or twisting.
Recheck Tension
Perform the pinch test again. Less than 1/4 inch deflection is ideal. If too loose, re-tension using the appropriate method for your model. If too tight, loosen slightly to prevent motor strain.
Reassemble and Reconnect
Now put everything back together in reverse order of disassembly.
Replace Panels
Reinstall all panels carefully to ensure proper fit and appearance. Front panels require hooking side tabs into slots, pushing up, and securing with screws. Rear panels need alignment of the locating pin with the gear case before snapping into place. Top panels require inserting front clips and lowering the back edge to snap down.
Ensure all screws are snug but not over-tightened to avoid stripping plastic components.
Return Washer to Upright
Carefully lift and set the washer upright. Avoid jerking motions that could dislodge hoses or damage internal components. Have someone assist if the washer is heavy.
Reconnect Utilities
- Attach water hoses by reconnecting hot and cold lines. Hand-tighten first, then turn a quarter-turn with pliers. Do not over-tighten, as this damages the fittings.
- Reattach the drain hose by securing it to the standpipe or pump connection
- Plug in power by restoring electricity at the outlet or circuit breaker
Test Washer Thoroughly
Final validation ensures the repair was successful and the machine operates properly.
Run Empty Test Cycle
Select a normal wash cycle with no clothes and run it completely. Observe the machine during the fill, agitation, and spin cycles.
Watch for These Signs
Success indicators include the drum spinning smoothly at high speed, no unusual noises like squealing or grinding, and no burning smells. Problem signs include belt slippage, machine wobbling, or failure to spin. If problems occur, recheck tension and alignment before proceeding.
Load Test for Real-World Performance
Run a small load of laundry to confirm full agitation and spin function under normal operating conditions. Listen for any changes in sound or performance that might indicate issues.
Prevent Future Belt Issues
Extend the life of your new belt with simple maintenance practices.
Clean Pulleys Annually
During routine cleaning sessions, wipe the motor and drum pulleys to prevent buildup that causes slippage. This takes just a few minutes and significantly extends belt life.
Check Tension Every 6 Months
Perform the pinch test during regular visual inspections. Catching belt stretch early prevents complete failure at inconvenient times.
Replace at First Sign of Wear
Do not wait for complete breakage. Cracks, glazing, or unusual noise during operation all indicate it is time for replacement. Keeping a spare belt on hand is wise if your model is prone to wear.
Frequently Asked Questions About Changing a Washing Machine Drive Belt
How do I know if my washing machine belt needs replacing?
Signs include the washer filling with water but not spinning or agitating, squealing noises during the spin cycle, a burning rubber smell, or visible cracks or slack in the belt. The pinch test showing more than 1/4 inch of deflection also indicates replacement is needed.
Can I replace the washing machine belt myself, or do I need a professional?
Replacing a washing machine drive belt is a straightforward DIY repair that most homeowners can complete with basic tools. The process takes 10 to 60 minutes depending on your model, and no special expertise is required. Following proper safety protocols and the correct procedure for your specific machine ensures success.
How much does a replacement washing machine belt cost?
Replacement belts typically cost between $15 and $40 depending on your machine’s brand and model. This is significantly cheaper than a professional service call, which can cost $150 or more. Always purchase the correct part number for your specific washer model.
Why does my new belt squeal after installation?
New belt squealing usually indicates improper tension. The belt may be too loose, causing slippage, or possibly too tight, straining the motor. Recheck the tension using the pinch test and adjust according to your model’s specifications. Also verify the belt is properly seated in the pulley grooves.
How long should a washing machine drive belt last?
With proper installation and maintenance, a washing machine belt typically lasts five to seven years. Regular cleaning of pulleys and checking tension every six months extends lifespan significantly. Replace immediately upon noticing cracks, fraying, or glazing to prevent damage to other components.
Key Takeaways for Changing Your Washing Machine Drive Belt
Replacing a washing machine drive belt is one of the most straightforward and rewarding DIY repairs you can perform. By following these steps, you restore full function to your washer, save significant money compared to professional repair, and avoid the inconvenience of a broken appliance.
Always use the correct part number for your specific model, thoroughly clean pulleys before installation, and verify proper tension using the pinch test. Taking time to inspect the tensioner and pulleys prevents premature failure of the new belt. With proper care and maintenance, your replacement belt should provide five or more years of reliable service.
If problems persist after replacement, suspect issues with the motor, drum bearings, or control board. However, in most cases of a washer that fills but won’t spin, the drive belt was the root cause and your repair is complete.



