Is your washing machine making a loud grinding or rumbling noise during the spin cycle? That unsettling sound is often the first sign of failing drum bearings, and ignoring it can lead to complete drum failure, water leaks, and an expensive replacement. Washing machine bearing repair is a challenging but rewarding DIY project that can save you hundreds of pounds compared to hiring a professional or buying a new appliance.
This comprehensive guide walks you through diagnosing bearing failure, evaluating whether repair is worth your time, gathering the right tools, and executing a full bearing replacement on both front-load and top-load washing machines. You’ll learn exactly how to split the tub, remove seized bearings, install new seals, and reassemble your machine for years of quiet operation.
Recognize the Warning Signs of Bearing Failure
Listen for Unusual Noises
The earliest indicator of bearing trouble is a distinct change in how your washer sounds during the spin cycle. A healthy machine runs quietly with only the hum of the motor and the sloshing of water. When bearings begin to fail, you’ll hear a low rumble that progresses to a loud grinding, roaring, or screeching noise as the drum speed increases. Many owners describe it as sounding like a concrete mixer or a rock concert inside their laundry room.
In LG Direct Drive models specifically, a persistent humming noise during spinning is a near-certain indicator of bearing wear. This hum differs from normal motor sound because it intensifies with drum speed and often vibrates through the floor.
Check for Physical Symptoms
Excessive vibration is another clear warning sign. If your washing machine starts “walking” or jumping across the floor during the spin cycle, even when properly leveled, the drum bearings are likely worn. Open the door and grip the drum firmly with both hands. Try moving it up and down. If you notice more than 1 millimeter of vertical play or wobble, the bearings have degraded significantly.
In severe cases, you may see exposed ball bearings or missing outer rings when inspecting the shaft area. Water leaking from the back or beneath the tub often accompanies bearing failure, indicating a compromised tub seal that has allowed moisture to corrode the bearings.
Inspect and Confirm Bearing Damage
Perform a Visual Check
Confirming bearing failure requires partial disassembly. Remove the rear seal and inspect the bearing housing directly. Look for water inside the housing, rust on the shaft surface, or cracked and brittle seals. Water intrusion is the leading cause of bearing failure because it washes away lubrication and causes metal components to corrode rapidly.
If your machine shows signs of water damage around the seal area, understand that the tub seal is likely compromised and must be replaced alongside the bearings. Never replace bearings without replacing the seal, because a damaged seal will flood the new bearings just as it did the old ones.
Test Drum Movement
A simple physical test confirms bearing condition. With the machine running on a spin cycle, observe whether the drum wobbles excessively or makes rhythmic thumping sounds. After shutting off the machine, manually rotate the drum. It should turn smoothly with no grinding resistance. Any roughness or irregular movement points to bearing damage that warrants replacement.
Decide Between Repair and Replacement
Consider Machine Age and Total Cost
Washing machine bearing repair isn’t always the right choice. Parts alone, including bearings, seals, and hardware, typically cost between £100 and £200. Adding professional labor brings the total to £300 to £500. For a machine under 5 years old, especially a high-end model like a Bosch or LG, bearing replacement is a smart investment that restores quiet operation and avoids unnecessary waste.
However, if your washer is over 8 years old, has multiple failing components like pump failure or control board faults, or the repair cost approaches the price of a new energy-efficient model, replacement may be more practical. New machines offer superior water efficiency, noise reduction, and reliability that may justify the investment.
Verify Your Tub Design Allows Repair
Not all washing machines can be repaired. The critical factor is whether the outer tub can be split. Many modern models, particularly newer Whirlpool and Samsung machines, use permanently sealed tubs that cannot be opened without destroying them. In these cases, manufacturers recommend replacing the entire rear tub assembly at much higher cost.
If your tub is split-type, which is common in Bosch, LG, and older Whirlpool models, bearing replacement is feasible. Before starting your repair, verify your model’s design by searching online for “replace bearings [your model number]” to confirm others have successfully split the tub.
Choose Between DIY and Professional Repair
Assess Your Mechanical Skill Level
Washing machine bearing repair demands intermediate to advanced mechanical skills, patience, and a full toolset. You’ll handle heavy components, remove seized metal parts, and reassemble everything with precise alignment. One mistake, like cracking the tub or misseating the seal, leads to leaks or immediate failure.
Experienced DIYers can save hundreds in labor costs by completing this repair themselves. But if you lack confidence, the necessary specialty tools like bearing pullers and tub presses, or the time required, hiring a professional is the safer choice. Pros bring expertise, proper equipment, and often offer a warranty on their work.
Avoid Common Costly Mistakes
Several DIY errors can turn a manageable repair into a disaster. Forcing a stuck pulley damages the drum shaft permanently. Misaligning the tub halves causes leaks at the joint. Skipping seal grease leads to premature seal failure within months. Over-tightening tub screws warps the plastic and creates stress cracks.
If you’re uncertain about any step, consider purchasing a pre-assembled replacement tub. It’s more expensive but eliminates the most difficult steps involving bearing press tools and precise alignment.
Gather Essential Tools and Parts
Build Your Repair Toolkit
Success depends on having the right equipment. You’ll need hand tools including Phillips and flathead screwdrivers, pliers, vice grips, and snips. Socket and bit sets should include Torx T20 and T25 drivers plus 10mm, 13mm, and 17mm sockets. Specialty tools like a bearing puller, chisel, metal rod, and punch are essential for removing seized components.
For installation, a tub press tool is critical, though many DIYers improvise one using threaded rods, washers, and nuts to save money. Top-load repairs require a scissor jack to lift the heavy spin basket. Stock up on chemicals including penetrating oil like WD-40, high-temperature lithium grease, silicone sealant, and asphalt solvent for cleaning. Safety gear includes work gloves, eye protection, and wooden blocks for supporting the heavy tub assembly.
Order Quality Replacement Parts
Never reuse old bearings or seals. Always install a complete replacement kit for reliability. Your parts list should include front and rear bearings, typically the Whirlpool 6206-0625 SKF-marked variety that fits many models. You’ll need a new tub seal with integrated spring, commonly part number W10435302. New hardware includes the drive shaft nut, washers, and retaining rings. Don’t forget gasket sealant and kit-specific grease for the seal cavity.
Pro Tip: Always order OEM or SKF-branded bearings. Generic bearings may save £20 but often fail within months, doubling your effort and cost.
Repair Front-Load Washing Machines
Remove the Tub Assembly
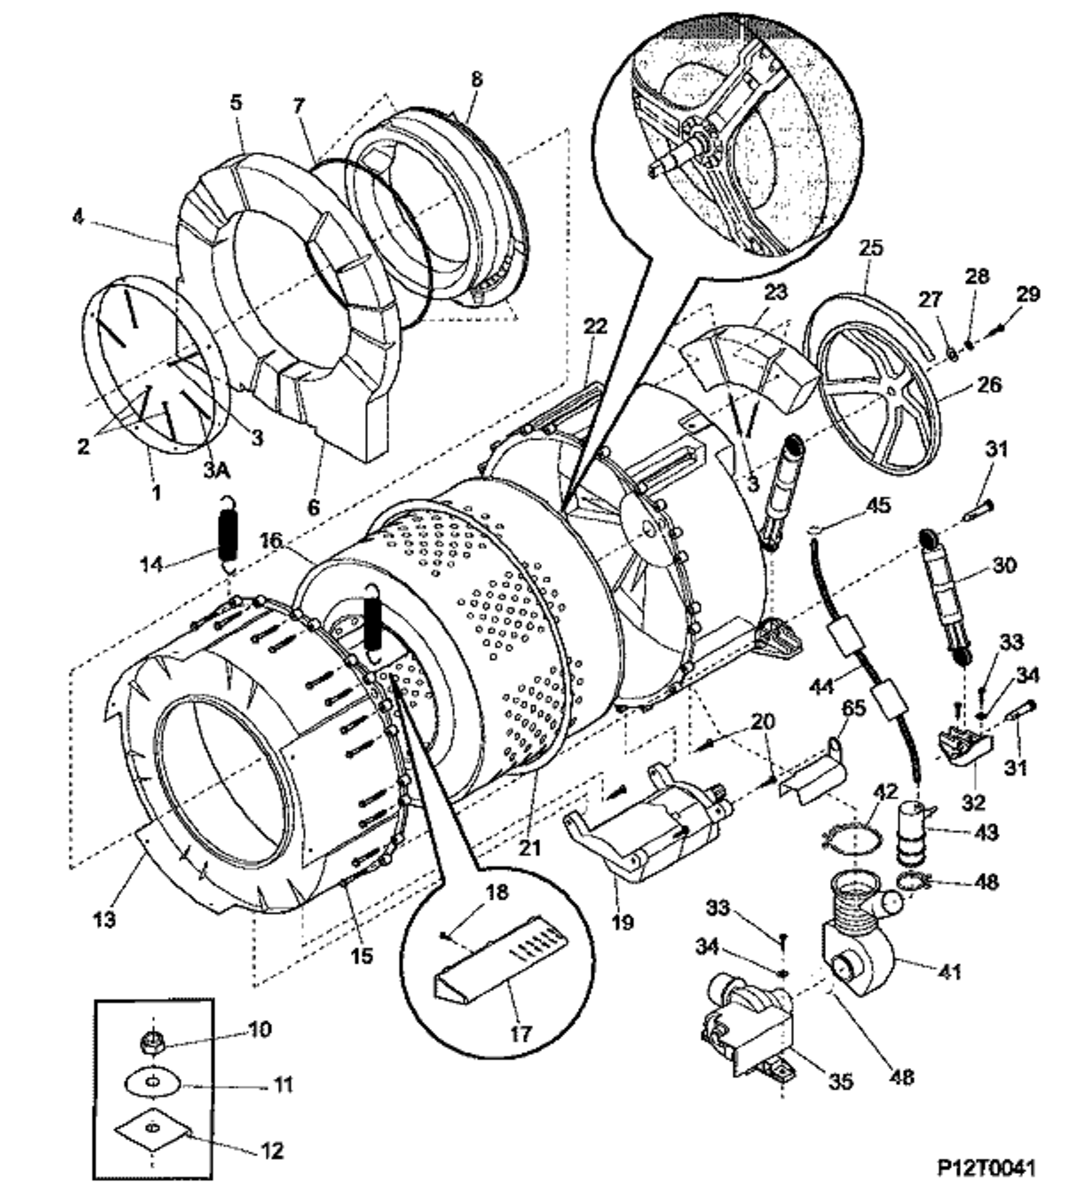
Begin by unplugging the washer and turning off water supplies. Remove the top panel using Torx T20 or T25 bits. Take out the soap dispenser and front panel, disconnecting wiring and removing the door seal. Note the position of the spring and retaining band for reinstallation.
Remove counter-balance weights from the top and front. Disconnect the heating element, sump, and motor wires, taking photos first for reference. Remove the motor and back panel. Detach springs and legs, then lift the entire tub and drum assembly out of the machine casing carefully.
Split the Tub and Remove Bearings
Place the tub on wooden blocks to protect the plastic. Remove Torx screws around the tub edge. Break any plastic locking tabs with pliers or a chisel. Separate the front and rear tub halves, then slide the inner drum out.
Remove the pulley bolt, typically 13mm, tapping if seized. Extract the rear bearing using a chisel or puller, working evenly around the edge. Flip the rear half and remove the front bearing using the same technique. Clean the housing thoroughly with P400 to P600 sandpaper, removing all burrs and debris. Wash with high-pressure water and allow to dry completely.
Install New Bearings and Seal
Lubricate bearing seats with lithium grease. Use a bearing press or DIY spacer tool to seat new bearings flush with the housing. Ensure even pressure around the outer edge to prevent misalignment.
Pack the new seal completely with grease, eliminating all air pockets. Apply gasket sealant to the seal’s outer edge. Press the seal in using a PVC pipe and hammer until it sits flush with the housing. Wipe away excess sealant immediately.
Reassemble and Test
Reattach the pulley and slide the drum back into the rear tub half. Align the seal seam at the 12 o’clock position. Apply silicone sealant to the tub joint and rejoin the halves. Tighten screws in an alternating pattern to prevent warping.
Perform a leak test before reinstalling the tub. Fill with water above the seal line and wait 30 minutes, checking for drips. Reinstall the tub, reconnect all wiring and components, and run a test cycle with no clothes. Listen for unusual noise or vibration indicating improper reassembly.
Repair Top-Load Washing Machines

Extract the Spin Basket
Tape the lid open to prevent accidental closing. Pry up the top panel using a putty knife near the front corners. Remove the wash plate by exposing the central 7/16-inch bolt under the hub cap. Disconnect the back hose and remove the tub ring by pressing the plastic tabs.
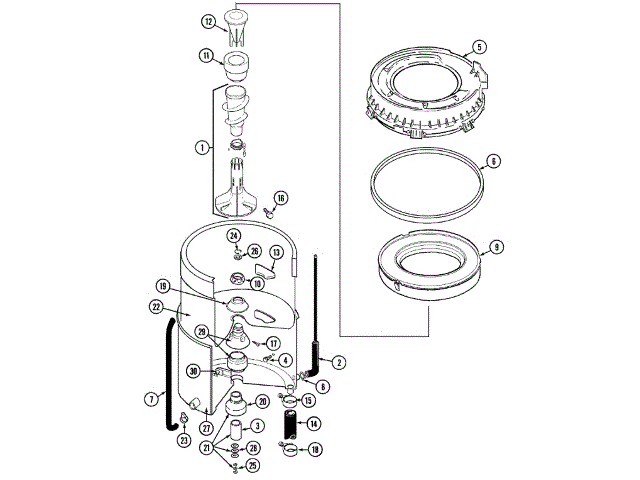
Remove the six Phillips screws from the drive hub. Use a scissor jack method: place a board cut to the inner diameter on the drive shaft, position the jack under the board contacting the metal rim, and slowly lift the basket off the shaft. With help, remove the heavy basket completely.
Remove Motor and Drive Shaft
Lay the washer on its back to access bottom components. Remove the rotor bolt using a quarter-inch hex driver, then remove the four stator bolts. Take off the retainer ring, stator, and motor shield. Unplug the motor wire harness.
Loosen the drive shaft nut using channel locks. Tap the shaft out with a hammer; the tub seal comes out with it. Knock out the bottom bearing and spacer using a metal rod, alternating positions for even force.
Press in New Bearings
Clean the tub interior thoroughly and clear the weep hole with a wire. Place the top bearing in the tub and use a tub press tool to seat it until the locking bar aligns with the sump area. For the bottom bearing, lay the washer flat, slide the spacer and bearing onto the press rod in order, thread on the press nut, and tighten until the bearing protrudes approximately 1/8 inch.
Reassemble and Seal
Insert the new drive shaft through the top bearing, seating with a mallet and wood block. Thread on the drive shaft nut and tighten using locking pliers on the shaft tip to prevent rotation. Reinstall the stator, rotor, and shield, tightening the rotor bolt with a screwdriver through the rotor holes to lock it in place.
Pack the new seal completely with grease from the kit. Apply adhesive around the outer perimeter and top edge. Press the seal in using a PVC pipe and hammer. Allow 24 hours for adhesive to cure before use. Reinstall the basket, hub, wash plate, and tub ring. Run a test cycle with no clothes to verify quiet operation and no leaks.
Prevent Future Bearing Failure
Install the Seal Correctly
The number one reason for repeat bearing failures is poor seal installation. Always completely pack the seal cavity with high-temperature grease. Use fresh adhesive on both edges of the seal. Allow the full 24-hour cure time before running the machine. Ensure the weeper hole remains clear to prevent pressure buildup that forces water past the seal.
Maintain Your Washing Machine
Extend bearing life with simple habits going forward. Avoid overloading the machine because excess weight stresses bearings and the spider assembly. Run monthly service washes with limescale remover to prevent mineral buildup on the shaft. Inspect the spider for rust during routine cleaning and replace the drum if corrosion is severe. Clean the drum shaft area whenever you access it for other maintenance.
Choose Quality Parts for Lasting Results
Why SKF Bearings Matter
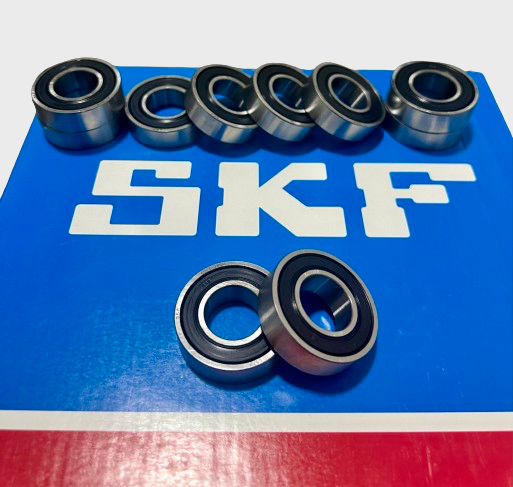
Not all bearings are equal. SKF-marked bearings like the 6206-0625 offer superior tolerance and fit, better corrosion resistance, and longer lifespan under load compared to generic alternatives. The slightly higher cost of quality bearings pays off in years of reliable operation rather than premature failure.
Generic bearings may save £20 but often wear out in under a year, doubling your repair effort and cost. When investing in a major repair, the quality of components determines whether your washing machine runs quietly for a decade or fails again within months.
When to Replace the Entire Drum
If the spider, which is the central component connecting the drum to the spindle, is cracked or heavily corroded, replace the entire drum rather than just the bearings. The spider is usually riveted and cannot be repaired. A failing spider destroys new bearings quickly regardless of how well you seal and maintain the machine.
Key Takeaways for Successful Washing Machine Bearing Repair
Washing machine bearing repair is a major job but one that can save you hundreds of pounds and keep a functional appliance out of the landfill. Diagnose the problem accurately by listening for grinding noises and checking for drum wobble. Evaluate whether your machine’s age and condition justify the repair investment. Use quality SKF bearings and a complete seal kit for reliability. Take your time during reassembly, ensuring proper alignment and adequate adhesive cure time before running the machine.
Whether you tackle this repair yourself or hire a professional, understanding the process helps you make informed decisions and ensure the job is done right. With proper installation and regular maintenance, your newly repaired washing machine can run quietly for years to come.
Frequently Asked Questions About Washing Machine Bearing Repair
How do I know if my washing machine bearings are failing?
Listen for a grinding, rumbling, or roaring noise during the spin cycle, especially if it intensifies with drum speed. Check for excessive vibration causing the machine to walk across the floor. Open the door and try moving the drum up and down; more than 1mm of vertical play indicates bearing wear.
Can I replace washing machine bearings myself?
Yes, if you have intermediate mechanical skills, patience, and the right tools. The repair requires specialty equipment like a bearing puller and tub press. If you’re not comfortable with heavy components and precise alignment, hiring a professional is safer.
How much does washing machine bearing repair cost?
Parts typically cost £100 to £200. Professional labor adds £200 to £300, bringing the total to £300 to £500. DIY repair costs only the parts and tool investment, which may be a fraction of professional rates if you already own or can borrow equipment.
How long does it take to repair washing machine bearings?
A professional completes the job in 2 to 4 hours. DIYers should plan for a full day, accounting for troubleshooting stuck parts, shopping for tools, and careful reassembly. Rushing leads to mistakes that cause leaks or immediate failure.
What causes washing machine bearings to fail?
Water intrusion is the primary cause. A compromised tub seal allows water to reach the bearings, washing away lubrication and causing corrosion. Over time, this destroys the bearing surfaces. Regular seal inspection and avoiding overloading help prevent premature failure.