
Is your Crosley washing machine refusing to spin, making loud banging noises, or displaying error codes? Many owners face these frustrating problems, but the good news is that most issues can be resolved at home without expensive service calls. Crosley washers share a proven design with Whirlpool, Kenmore, and Maytag vertical modular washers, which means repair solutions are well-documented and often DIY-friendly.
This guide walks you through diagnosing and fixing the most common Crosley washing machine problems. From free firmware recalibration to replacing worn suspension rods and thrust bearings, you’ll learn step-by-step techniques that save time and money.
Enter Diagnostic Mode Before Repairs

When your Crosley washer won’t start, spin, or agitate, the problem may not be mechanical. Firmware glitches are surprisingly common and often resolve without any tools or parts.
Confirm Your Model Is Compatible
Check that your washer has six lights in a single row on the control panel and features a lid lock mechanism. This design is shared across Crosley, Whirlpool, Kenmore, and Maytag vertical modular units. If your model matches this description, the diagnostic sequence below will work for you.
Activate Diagnostic Lights
Follow this precise sequence to enter diagnostic mode:
- Turn the washer completely off
- Rotate the cycle dial to the 12:00 position (topmost point)
- Within 6 seconds, rotate the dial: three clicks clockwise, one click counterclockwise, then one click clockwise
If successful, the control panel lights will begin blinking. No response means your timing was off. Repeat the sequence and try again.
Run System Recalibration
Once the lights blink:
- Rotate the dial four clicks clockwise
- Press and hold the Start button
The machine runs a 2 to 3 minute self-check, cycling the motor, pump, and lid lock. This clears software loops and recalibrates internal systems.
Reset and Verify Operation
After the cycle ends, the lid unlocks automatically. Repeat the full recalibration sequence once more with an empty drum for a complete factory reset. If the washer now runs normally, the issue was software-related. If problems persist, move to hardware diagnostics.
Fix Common Error Symptoms
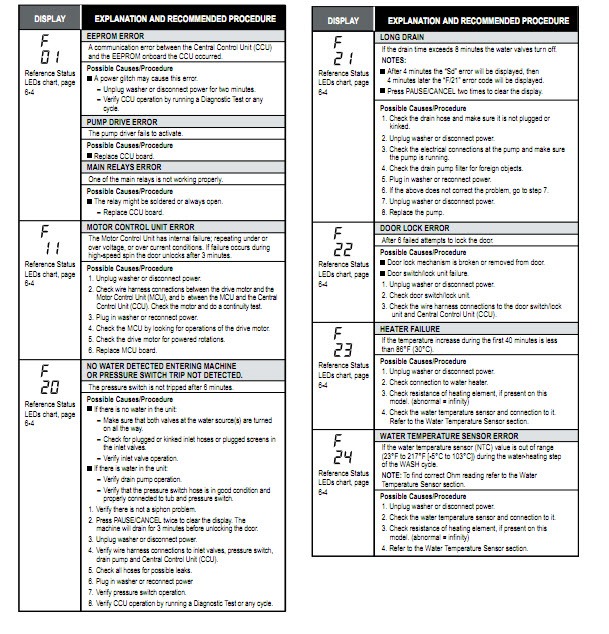
When recalibration fails, specific symptoms point to distinct hardware problems. Use this guide to match what you see and hear to the likely cause.
Washer Won’t Start
Check these common causes:
• Power supply issues: Ensure the unit is plugged in and the outlet works
• Lid not fully closed: The machine won’t start if the lid isn’t secured
• Faulty door switch: If the lid appears closed but the washer doesn’t respond, test or replace the switch
No Spinning or Agitation
• Try recalibration first: Many no-spin cases are firmware issues
• Inspect the drive belt: A loose or snapped belt prevents motion
• Check thrust bearing failure: Look for melted plastic near the drive shaft
Loud Banging During Spin
• Worn suspension rods: This is the number one cause of violent shaking
• Unbalanced load: Redistribute laundry before assuming mechanical failure
• Damaged friction cups: These wear out and allow rods to slip
Water Leaks or Overflow
• Clogged drain hose: Disconnect and clear debris
• Failed pump seal: Replace the drain pump if water pools underneath
• Faulty water inlet valve: If the washer fills when turned off, the valve may be stuck open
Burning Smell or Smoke
Stop immediately and unplug the unit. This indicates motor, wiring, or bearing overheating. Inspect the thrust bearing for seizure. Call a technician for electrical faults or burning odors.
Replace Suspension Rods for Stability
Excessive vibration, tub misalignment, or loud banging during spin cycles usually means your suspension rods have worn out. Replacing them restores stability and prevents further damage.
Gather Required Tools
• 1/4-inch nut driver
• Channel locks (pliers)
• Standard screwdriver
• Moving blanket
• Two 4×4 wood blocks or sturdy bin for support
Safety First: Unplug the washer and turn off water valves before starting any repairs.
Remove Back Panel and Top
- Move the washer away from the wall
- Remove two top screws and the harness cover screw
- Unscrew all perimeter screws on the back panel
- Loosen the drain hose clamp with channel locks. Remove the quarter-inch screw securing the drain stub
- Support the panel, slide it upward, and remove it
- Take off the harness cover and remaining top screws
- Slide the top forward, lift, and push back to release. Lean the washer gently backward against a moving blanket
Install Front Suspension Rods
- Reach inside and grasp the front rod. Pull up to release the retainer, then drop and feed it through the friction cup
- Push out the old friction cup
- Insert the new cup (newer versions have a hooked bottom edge for easier installation)
- Align the new rod with the groove, insert, rotate, and drop into place
- Tilt the tub slightly to guide the rod through
Repeat on the opposite side. Once both front rods are installed, check tub level. If the rear still sags about an inch, rear rods are also worn.
Install Rear Suspension Rods
- Flip the top back down and lean the washer forward
- Remove rear rods using the same pull-up method
- Support the tub by placing two 4×4 blocks under the motor assembly to relieve tension
- Guide each new rear rod up through the friction cup, attach the retainer, rotate to lock, and drop into place
- Remove supports so the tub settles onto the new rods
Reassemble the Washer
- Flip the top back down. Align tabs with slots and push forward until flush
- Guide the power cord carefully. Align the back panel’s bottom hooks with recessed wells
- Reconnect the drain hose and slide the panel into place
- Install the flat-headed, coarse-threaded plastic screw first. This secures the drain hose base and prevents leaks
- Reinstall all perimeter screws and the harness cover
Run a test cycle to confirm reduced vibration and noise.
Repair Thrust Bearing on CW6000 Models
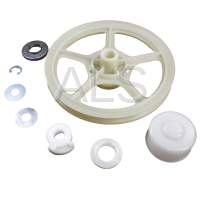
For Crosley CW6000 and similar models, failure to spin or agitate often traces to a failed thrust bearing assembly. This part manages the drive shaft’s load and rotation.
Diagnose Bearing Failure
Tip the washer onto its side and inspect:
• Melted or broken plastic near the drive shaft
• Missing C-clip from the pulley
• Stripped shaft teeth
• Loose or damaged drive belt
Heat and friction cause these failures. If any signs appear, replace the bearing kit immediately.
Source the Correct Part
Order a thrust bearing kit that includes the drum seal and washer. Components are not sold separately.
• Cost: $50 to $97
• Delivery: 3 to 5 business days
• Compatibility: Confirmed for CW6000 series
• Order from authorized parts channels for fast shipping
Install the New Bearing
- Remove the failed bearing and inspect the shaft. If damaged, the entire transmission may need replacement
- Align the flat side of the new bearing with the shaft
- Use the included plastic alignment tool to snap it into place
- Slide the bearing on, ensuring all three tabs are seated. The cam tab must face straight down
- Critical Step: Remove the bearing temporarily. Apply a generous amount of included grease to the inner surface. Skipping this causes rapid failure
- Slide the greased bearing back onto the shaft
- Secure with the C-clip
- Roll the dust cover back into position over the shaft
Test the Repair
Reinstall the door and run multiple test cycles without laundry. Confirm smooth spinning, normal agitation, and no grinding or squealing noises.
Prevent Future Failures
Regular maintenance extends your Crosley washer’s life, potentially up to 20 years with proper care.
Schedule Firmware Checks
If your washer acts intermittently, starts sometimes, or skips cycles, run the diagnostic recalibration every few months as a preventive measure.
Inspect Suspension System Annually
Lift the tub gently and check for:
• Sagging at the rear
• Cracked or loose friction cups
• Rust on suspension rods
Replace parts at the first sign of wear to avoid violent shaking.
Keep Bearings Lubricated
While the thrust bearing only needs grease during replacement, ensure no moisture or debris enters the shaft area during cleaning.
Avoid Overloading
Heavy loads increase stress on rods, bearings, and belts. Stick to manufacturer load guidelines.
When to Call a Professional
Some situations demand expert help, even if you’re handy with repairs.
Electrical Problems or Burning Smells
Unplug immediately and call a technician. Internal wiring faults or motor shorts pose fire risks.
Gas Appliance Repairs
Never attempt repairs on gas dryers or ovens. Combustion systems require certified handling.
Warranty Protection
DIY attempts can void warranties. If your unit is under coverage, use authorized service to preserve protection.
High Water Damage Risk
If leaks are ongoing or you’re unsure about reassembly, professional service prevents costly water damage.
Available Repair Services
Certified technicians offer same-day or next-day appointments and 7-day emergency service. Diagnostic fees apply but credit toward repair costs. Service radius extends up to 50 miles from major hubs. Scheduling is available by phone, and parts support offers fast shipping for quick repairs.
Frequently Asked Questions About Crosley Washing Machine Repair
Why won’t my Crosley washing machine start at all?
Check the power supply first. Ensure the unit is plugged in and the outlet works. Then verify the lid is fully closed and the lid lock is engaging. If these basics check out, try the diagnostic mode recalibration. If nothing works, the door switch or control board may be faulty.
How do I know if my suspension rods need replacing?
Excessive vibration, loud banging during spin cycles, and a tub that sits noticeably lower on one corner are clear signs. Try redistributing loads first. If the problem persists, the suspension rods have worn out and need replacement.
Can I replace the thrust bearing myself?
Yes, with moderate DIY skills. You’ll need the specific thrust bearing kit for your model (around $50 to $97). The repair requires tipping the machine on its side, removing the old bearing, applying the included grease generously, and reassembling. Skipping the grease application is the most common mistake that causes premature failure.
How often should I run diagnostic mode on my Crosley washer?
Run recalibration if your washer acts intermittently, starts sometimes, skips cycles, or locks up unexpectedly. As a preventive measure, running it every few months keeps the firmware updated and can prevent many problems before they start.
Is it worth repairing an older Crosley washing machine?
With proper maintenance, Crosley washers can last up to 20 years. If your machine is relatively new or the repair cost is less than half the price of a new unit, repair is worthwhile. Suspension rod and thrust bearing repairs are affordable and extend the machine’s life significantly.
Key Takeaways for Crosley Washing Machine Repair

Crosley washers built on the proven Whirlpool platform are durable when maintained properly. Start with software fixes since they’re free and resolve many issues. For mechanical problems, suspension rods and thrust bearings are the usual suspects and are manageable DIY projects with basic tools and patience.
Always prioritize safety by unplugging the washer, supporting the tub during repairs, and using correct fasteners. Proper greasing of the thrust bearing isn’t optional. It’s what keeps your repair lasting. By following this guide, you’ll restore performance, eliminate noise, and extend your washer’s lifespan for years to come. For persistent electrical issues or warranty concerns, contact professional support for peace of mind.



