
Imagine returning to your cabin after a long winter, ready to wash off the dust from your last trip, only to find your washing machine leaking, making strange noises, or completely dead. The culprit is frozen water inside the pump, hoses, or valves. When water freezes, it expands and can crack plastic components, burst hoses, and destroy the internal plumbing of your washer. This is especially common in units stored in unheated spaces like garages, RVs, basements, or vacation homes where temperatures drop below 32°F.
Winterizing a washing machine is essential maintenance in freezing climates, not an optional task. The process removes or protects residual water in the system using non-toxic antifreeze or thorough drying. Skip it, and you risk costly repairs or total appliance failure. Most manufacturers void the warranty if freeze damage occurs due to improper storage. In this guide, you will learn the safest, most effective ways to winterize any type of washer, including top-load, front-load, and RV models, so it starts right up when warm weather returns.
Turn Off Water Supply and Disconnect Power
Before doing anything, safety comes first. Begin by turning off both the hot and cold water supply valves behind the washer to prevent any accidental water inflow during the process. Then, unplug the machine from the wall outlet or switch off the circuit breaker. Never rely on the machine control panel alone because physical disconnection ensures no electrical surges occur if someone unknowingly powers it on.
Use only a grounded three-prong outlet for the washing machine. Avoid extension cords or adapters as they increase fire and shock risks. With power and water turned off, you are now safe to proceed with draining and preparing the unit.
Drain and Disconnect Inlet Hoses
Even after shutting off the valves, water remains in the inlet hoses. Disconnect both the hot and cold hoses from the faucet side and let them drain completely into a shallow pan or bucket. Lower the hose ends to floor level to maximize drainage because gravity helps pull out every drop.
Leaving these hoses connected risks trapped water freezing between the valve and faucet, which can burst the inlet valve housing. Once drained, cap or plug the hose ends to keep debris out during storage.
Add RV Antifreeze to the Washing Machine Drum
Pour 1 quart (1 liter) of non-toxic RV or marine-grade antifreeze directly into the empty wash basket. This amount is sufficient for most standard machines. For larger units or extreme cold zones, up to 1 gallon may be used for full saturation of all internal components.
Only use non-toxic RV or marine-grade antifreeze (propylene glycol). Never use automotive antifreeze (ethylene glycol) because it is toxic, harmful to septic systems, and can leave dangerous residues inside the machine. RV antifreeze is typically pink or green in color, safe for plumbing, and designed for appliances exposed to freezing temperatures.
Circulate Antifreeze Through the Drain System
Plug the washer back in temporarily. Select a Rinse and Spin or Spin Only cycle. Let it run for 30 to 60 seconds so the antifreeze mixes with any remaining water and flows into the pump and drain lines.
For better protection, pause the cycle mid-drain to let the mixture sit in the pump for a few minutes before completing the drain. This ensures antifreeze coats internal components. Most of the fluid will drain out, which is normal. The small amount left behind protects critical parts from freezing damage.
Front-Load Washer Special Steps

Front-load washers need extra care compared to top-load models. First, wipe the rubber door seal dry with a towel, especially in the folded groove where water collects. Trapped moisture in this area can freeze and tear the seal.
Next, remove the detergent drawer completely. Clean it, dry it, and store it outside the machine. The fabric softener compartment often holds water that can freeze and crack the plastic dispenser.
Leave the door slightly ajar, about 2 to 3 inches, using a wooden block or elastic cord. Do not prop it wide open because the heavy door can warp hinges or misalign the lock mechanism. Avoid tape or adhesives, which can damage the finish.
Drain the Pump Filter on Front-Load Models
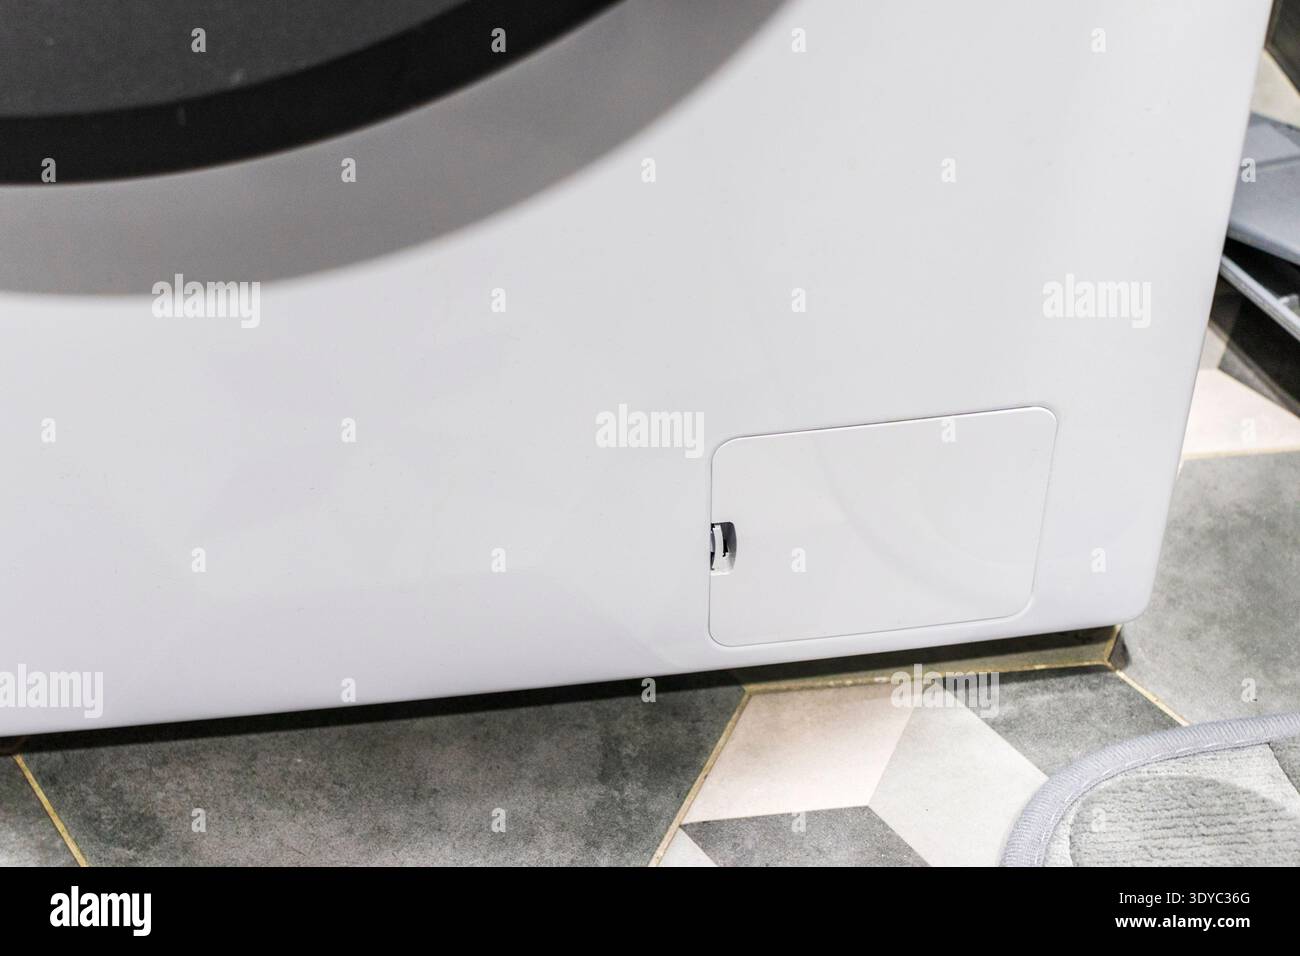
Locate the drain pump filter, which is usually behind a small access panel at the bottom front of front-load models. Place a towel underneath, then unscrew the filter slowly to release any leftover water.
Let it drain fully, then either leave the filter out during storage or place it inside the drum. This prevents water from freezing in the sump and cracking the pump housing. Reinstall the filter before restarting the machine in spring.
Winterize an RV Washer Using the Warm Cycle Method
In RVs, integrate washer winterization with the overall plumbing system. To ensure antifreeze reaches both water lines, turn on the washer and set the cycle to Regular Wash with temperature set to Warm. This opens both hot and cold inlet valves, allowing antifreeze to flow through all supply lines.
Watch the detergent drawer. Antifreeze should appear in both hot and cold compartments. Let the tub fill for 30 to 60 seconds, then turn the power off abruptly. The machine will automatically trigger a drain cycle, pulling antifreeze through the pump and drain hose. This step is critical because without active pumping, the drain system remains vulnerable to freeze damage.
Manual Winterization for Splendide Washers
If your Splendide model lacks an auto-winterize setting, follow this manual sequence to protect both solenoid valves.
Power OFF and set wash temperature to HOT. Turn program knob to Regular (Cotton Heavy Duty). Power ON and let it begin filling until antifreeze is visible in the drum. Turn knob to RESET and wait 5 seconds until the LED blinks. Turn to SPIN and let it drain completely. Turn to RESET again and wait 5 seconds. Change temperature to COLD. Repeat fill, RESET, and SPIN steps to flush the cold line. Power OFF when complete.
Complete Drying Method Without Antifreeze

If you prefer not to use antifreeze, complete drying is required. Start by disconnecting hoses and draining all water from the system.
Use a hair dryer on cold air setting (heat can warp plastic) taped to the inlet or drain hose. Blow air through the system for 5 minutes to force out trapped water. An air compressor works too. Attach it via adapter to blow out all lines.
For front-loaders, open the kick panel and manually drain 1 to 2 quarts from the pump sump by removing the cap. Leave the door and detergent tray open for airflow. Verify no water remains in softener cups. Warning: If even a small amount of moisture stays, freezing can still cause damage. Antifreeze is safer for uncertain conditions.
Store Hoses and Position the Machine Properly
After draining, coil inlet hoses neatly and store them inside the drum or nearby. Never leave them stretched or kinked because this can cause cracks. Keep the drain hose lowered to floor level during the final spin to use gravity for extra drainage.
For top-loaders, close the lid loosely or leave it slightly open for ventilation. For front-loaders, maintain the slightly ajar door position as described earlier. Store the machine in a stable, upright position. Avoid tilting unless specified by the manufacturer because it can damage internal components.
Label the Machine Before Storage
Attach a bright label to the washer stating: CONTAINS ANTIFREEZE – DO NOT USE UNTIL FLUSHED. This prevents anyone from starting a load unknowingly, which could mix antifreeze with clothes or contaminate the water supply.
Ensure the area is dry, clean, and protected from pests. Consider covering the unit with a breathable cloth. Never use plastic, which traps moisture and can cause condensation problems.
Flush and Restart After Winter Storage
When warmer weather returns, reverse the process carefully. Reconnect inlet and drain hoses securely. Turn on water supplies. If possible, run water through the hoses into a bucket first to flush any debris. Reinstall the detergent drawer and drain filter. Plug in the machine and restore power.
Run a Bulky/Sheets, Deep Water Wash, or Sanitize cycle with no laundry. Add half the recommended amount of HE detergent to help break down any sticky antifreeze residue. Inspect the water during the fill phase. If it looks foamy or tinted (pink or green), run an additional Rinse and Spin cycle until the water runs clear.
Your first real load should be old towels or rags to catch any remaining traces and avoid staining valuable clothing.
Common Mistakes to Avoid When Winterizing
Using automotive antifreeze is a critical error. Only use RV or marine-grade propylene glycol because automotive antifreeze is toxic and unsafe.
Skipping the drain pump activation is another common mistake. If the pump does not run with antifreeze, ice can still form inside. Always trigger a drain cycle after adding antifreeze.
Leaving hoses connected traps water in supply lines that can burst valves. Always disconnect and drain both inlet hoses.
Ignoring the detergent drawer is dangerous because the softener cup is a common freeze point that can crack. Remove and dry it thoroughly.
Over-opening front doors damages hinges. Prop them slightly ajar, not wide open.
What to Do If Your Washer Froze
If the machine was stored without winterization and temperatures dropped below freezing, do not power it on. Move it to a warm room and let it thaw slowly over 24 hours.
Check for cracks in hoses, pump, or valves. If the pump is frozen, some users gently pour boiling water over the exterior housing to thaw it, but never apply heat directly to plastic components.
In most cases, cracked components require replacement parts. Prevention is far cheaper than repairs.
Frequently Asked Questions About Winterizing a Washing Machine
Do I really need to winterize my washing machine if it is in a heated basement?
Even in a heated basement, power outages can occur during winter storms, causing temperatures to drop temporarily. Additionally, some basements get colder than expected. If your machine is near exterior walls or in an area that dips below 32°F, winterization is strongly recommended.
Can I use car antifreeze instead of RV antifreeze?
No. Automotive antifreeze (ethylene glycol) is highly toxic and dangerous if residues remain in the machine. It can contaminate your laundry and harm septic systems. Only use non-toxic RV or marine-grade antifreeze (propylene glycol) for winterizing washing machines.
How long does it take to winterize a washing machine?
The complete process takes 30 to 60 minutes for most machines. This includes turning off water and power, disconnecting hoses, adding antifreeze, running a short cycle, and preparing the unit for storage.
Will antifreeze damage the rubber seals on my washing machine?
RV antifreeze (propylene glycol) is generally safe for rubber seals when used properly. The primary risk is water trapped in the seal folds freezing and tearing the rubber. Wipe the seal dry before storage to minimize this risk.
What happens if I skip winterizing my washing machine?
Water remaining in the pump, hoses, valves, or detergent dispenser can freeze and expand, causing cracks and bursts. This damage can ruin the pump, crack the drum, destroy inlet valves, and crack detergent dispensers. Repairs can cost hundreds of dollars, and most warranties do not cover freeze damage.
Do I need to winterize a washing machine in an RV that is used year-round?
If the RV is heated and stored in a climate-controlled environment year-round, winterization may not be necessary. However, if the RV will be stored in unheated conditions during winter months, even occasional use requires proper winterization to protect the entire plumbing system.
Key Takeaways for Winterizing Your Washing Machine
Winterizing a washing machine takes less than an hour but saves hundreds of dollars in repairs. Whether you are storing a cabin unit, prepping an RV for snow season, or shutting down a garage washer, following these steps ensures your appliance survives the freeze intact.
The key is removing or protecting all water in the system, especially in hidden spots like the pump sump, door seal, detergent tray, and inlet valves. Use RV antifreeze (propylene glycol) for reliable protection, or go chemical-free with meticulous drying if you prefer.
Always flush thoroughly before reuse by running an empty cycle with detergent. Your first real load should be old towels or rags. With proper winterization, your washer will be ready to spin clean when spring arrives.



