
If your washing machine is making grinding noises, shaking violently during spin cycles, or failing to drain properly, the drum likely needs attention. Removing a washing machine drum is necessary to replace worn bearings, clear blockages, extract foreign objects, or perform deep cleaning. While this repair requires patience and the right tools, a determined DIYer can successfully remove drums from most top-load and front-load models including Samsung, Maytag, and Speed Queen.
This guide walks you through the complete process from diagnosing the problem to extracting the drum and preparing for reassembly. You will learn exact steps for both top-load and front-load machines, plus expert techniques for handling stuck components.
Signs Your Washing Machine Drum Needs Removal
Before disassembling your washer, confirm that drum removal is truly required. Certain symptoms strongly indicate internal failure requiring extraction.
Symptoms Indicating Drum Service
• Violent shaking during spin cycles that causes the machine to walk across the floor
• Grinding or rumbling noises, especially at high spin speeds
• Visible play in the drum shaft when you gently wiggle it up and down
• Clothes emerging soaked or not drying properly due to slow spinning
• Water leaks near the base of the machine from failed seals
Expert Note: Even without visible leaks, shaft play and unusual noises mean bearing failure is underway. Delaying repair risks damaging the motor, suspension, and drum permanently.
Essential Tools for Washing Machine Drum Removal
Having the right tools prevents damage and saves multiple trips to the hardware store. Gather everything before starting.
Must-Have Hand Tools
• Phillips and flathead screwdrivers
• Socket wrench set including 38mm socket for drum nut
• Breaker bar or torque extension for tight bolts
• Needle-nose pliers for small parts and debris
• Rubber mallet for gentle loosening
• Adjustable wrench
Specialized Tools for Stubborn Parts
• Impact wrench for removing seized 38mm drum nuts
• Chisel and hammer for breaking corrosion on stuck nuts
• Agitator removal hooks for evenly lifting stuck agitators
• Pulley or drum extractor for forcing stuck drums off shafts
• Penetrating oil such as WD-40
Safety Supplies
• Work gloves and safety goggles
• Magnetic tray or labeled containers for screws
• Flashlight and tweezers for inspection
• Camera or phone for documenting each disassembly step
Preparing Your Washing Machine for Drum Removal
Safety must be your first priority. Never work on a live appliance.
Pre-Removal Safety Steps
- Unplug the washer from the wall outlet.
- Turn off water valves and disconnect inlet hoses.
- Drain residual water using the pump filter or drain hose.
- Tape the lid open on top-loaders to prevent accidental closure.
- Move to a stable workspace with towels protecting the floor.
- Take photos at each step to ensure accurate reassembly.
Warning: Never skip power disconnection. Even standby voltage can be dangerous when handling internal wiring and components.
Removing a Top-Load Washing Machine Drum
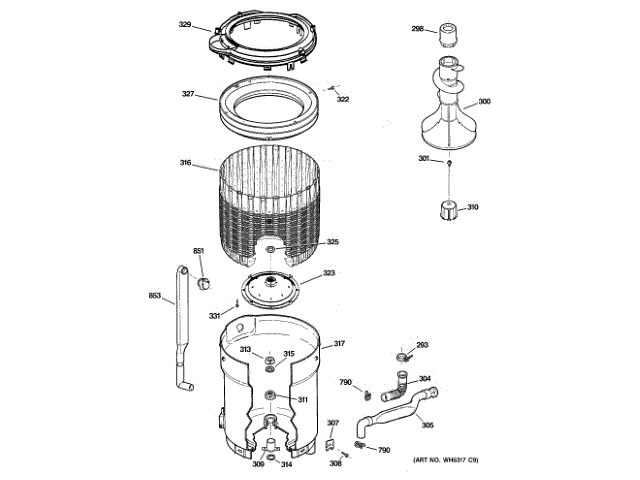
Top-loaders are generally simpler than front-loaders. Focus on the agitator, drum nut, and cabinet access.
Removing the Agitator and Wash Plate
Most top-load drums require agitator removal first.
- Lift the softener cup at the top center to expose the central bolt.
- Use a 3/8″ or 1/2″ socket wrench to loosen the bolt turning counterclockwise.
- Apply penetrating oil if the bolt resists and wait 15 to 30 minutes.
- Lift the agitator straight up. If stuck, insert agitator hooks into side holes and pull evenly.
- Inspect under the wash plate for coins, buttons, or lint using needle-nose pliers.
Avoid prying with screwdrivers as it damages the transmission or splines.
Loosening the Central Drum Nut
The drum is held by a large 38mm central nut.
- Try a standard socket first. If it slips or will not budge:
- Use an impact wrench with a 38mm socket for maximum effectiveness.
- Alternative method: Insert chisel edge into nut gap and tap with hammer to break the bond.
- Remove the nut and washer once loosened.
Pro Tip: Wrap the drum with a towel to protect it during chiseling. Minor thread damage is acceptable if the nut tightens later.
Accessing and Extracting the Drum
- Remove side screws hiding under plastic caps. Some models require top panel removal first.
- Release cable ties to free wiring harnesses without pulling connectors.
- Unscrew the front panel keeping all screws organized.
- Pull the drum straight out without twisting. If stuck, use a pulley extractor or tap gently with a rubber mallet.
Removing a Front-Load Washing Machine Drum
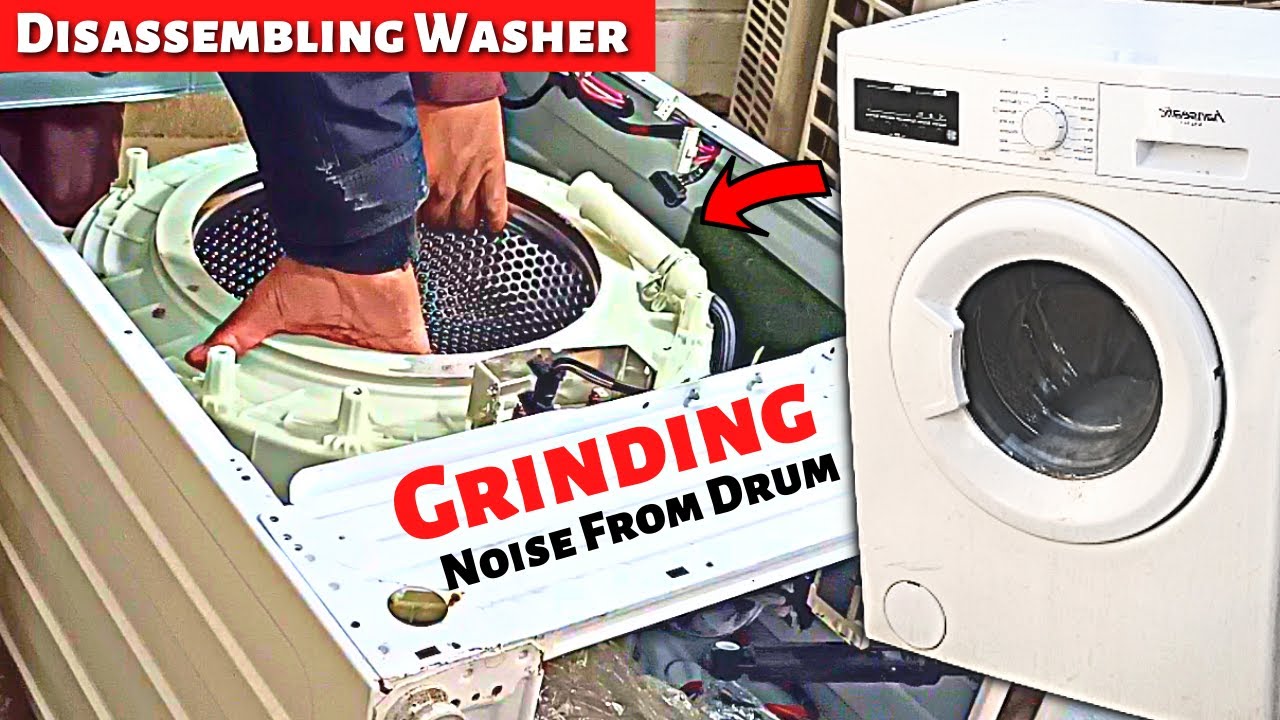
Front-loaders require full disassembly of panels, electronics, and suspension before drum extraction.
Accessing Internal Components
- Pull out the detergent drawer by pressing the central latch.
- Remove two Phillips screws behind the drawer compartment.
- Take off the top cover by unscrewing two rear screws and pulling cover toward you.
- Disconnect front panel connectors by pressing release tabs from the bottom.
- Remove three self-tapping screws holding the powder receiver and disconnect its hose.
- Unplug all control board connectors and remove the board from the panel.
- Open the pump filter cover and remove three bottom screws.
Removing Door and Rubber Seal
- Open the door and pull back the rubber gasket.
- Unhook the spring-loaded retaining ring and slide gasket into the drum cavity.
- Lift off the front panel carefully and set aside with the door.
- Disconnect the door switch if needed.
Caution: The door glass assembly is heavy. Support it during removal to prevent injury or damage.
Disconnecting Mechanical Systems
- Remove the pressure switch hose by pressing the clamp.
- Disconnect the ballast tank hose and upper handle.
- Loosen the pump drain clamp and remove the hose.
- Unplug the heating element connector.
- Remove the motor connector and two mounting bolts.
- Unscrew shock absorbers from the base and drum.
- Remove two main springs holding the drum in place.
Extracting the Front-Load Drum

With all systems disconnected, the drum is ready to come out.
- Lift the drum straight out or pull forward depending on your model.
- Use a flat surface to set it down avoiding scratches to the outer shell.
- Get help if needed because front-load drums are heavy.
Pro Tip: Place a towel under the drum during removal to protect the floor and drum finish.
Handling Stuck or Seized Components
Corrosion and detergent buildup are common enemies. Use these expert fixes for stubborn parts.
Stuck Agitator Solutions
• Apply penetrating oil around the base and wait 30 minutes
• Insert agitator removal hooks into side holes and pull upward evenly
• Avoid prying which damages the hub mechanism
Seized Drum Nut Techniques
• Use an impact wrench as the first choice for 38mm nuts
• Apply the chisel method by tapping the edge to shock threads loose
• Apply penetrating oil and wait before forcing cold metal
Drum Stuck on Shaft Methods
• Use a pulley extractor: hook arms into drum holes, tighten center screw against shaft bushing
• Apply gentle rubber mallet taps around the base if only lightly stuck
• Never use hammers on plastic parts as they can crack the tub
Inspecting and Cleaning the Drum Area
With the drum removed, thoroughly inspect and clean all components.
What to Check
• Plastic tub for cracks, rub marks, or deformation
• Bearings and seals by spinning by hand. Any grinding or play means replacement needed
• Suspension springs and shocks for tension loss or corrosion
• Drain holes for lint and debris blockage
• Pump and hoses for kinks, blockages, or leaks
Cleaning Best Practices
• Wipe drum and tub with a damp cloth
• Use tweezers and flashlight to remove trapped debris
• Run a drain test before reassembly by refilling and starting a drain cycle
Preventing Future Issues
• Check pockets before washing to prevent foreign objects
• Clean under the agitator every 6 to 12 months
• Avoid overloading which increases stress and debris jams
• Run monthly drum clean cycles with vinegar or washer cleaner
Reassembling Your Washing Machine
Reassembly is reverse of disassembly but precision matters for proper operation.
Key Reassembly Steps
- Align drum properly before tightening the central nut to prevent vibration.
- Torque the drum nut securely using a torque wrench if available.
- Clean threads thoroughly before reinstalling the nut.
- Tighten all screws securely. Loose screws cause banging noises.
- Seat rubber seals fully to prevent leaks.
- Reconnect all electricals including motor, heater, door lock, and pressure switch.
- Run a short test cycle with water watching for leaks, noise, and proper drainage.
Troubleshooting Common Problems
Even with careful work, issues may arise after reassembly.
Drum Will Not Come Out
• Likely stuck due to corrosion or dried detergent
• Apply penetrating oil and wait 30 minutes
• Use a pulley extractor. Do not force it
Found Damaged Seals or Bearings
• Replace them immediately
• Reassembling with worn parts leads to rapid re-failure
Washer Still Will Not Spin After Repair
• The problem may be electronic
• Check the control board, motor capacitor, or door lock switch
Stripped Threads on Drum Nut
• Clean threads thoroughly. Minor damage is usually acceptable
• Severe stripping requires nut replacement or professional consultation
Frequently Asked Questions About Washing Machine Drum Removal
How do I know if my washing machine drum needs to be removed?
Signs indicating drum removal is needed include violent shaking during spin cycles, grinding or rumbling noises, visible play in the drum shaft, clothes not drying properly, and water leaks near the base. These symptoms often point to bearing failure, blockages, or internal damage requiring drum extraction for repair.
Can I remove a washing machine drum without professional help?
Yes, with the right tools and patience, determined DIYers can remove drums from most top-load and front-load models. You will need an impact wrench, socket set, screwdrivers, and specialized tools like agitator hooks and a pulley extractor. Following safety protocols and documenting each step makes reassembly achievable for most homeowners.
What tools are absolutely essential for drum removal?
Essential tools include a 38mm socket for the drum nut, impact wrench for seized fasteners, Phillips and flathead screwdrivers, rubber mallet, needle-nose pliers, and penetrating oil. Specialized tools like agitator removal hooks and a pulley extractor are highly recommended for stuck components. Safety gear including gloves and goggles is also required.
How long does it take to remove a washing machine drum?
For top-loaders, expect 1 to 2 hours for an experienced DIYer. Front-loaders take 2 to 4 hours due to extensive panel and electronics removal. First-time attempts may take longer. Factor in additional time if components are seized or corroded.
What is the most difficult part of drum removal?
Removing the central 38mm drum nut is often the most challenging step because vibration and corrosion cause it to seize. Using an impact wrench or chisel method breaks the bond. The front-load drum extraction itself is physically demanding due to weight, requiring assistance in many cases.
Key Takeaways for Removing Your Washing Machine Drum
Removing a washing machine drum is a moderately difficult but achievable DIY task that resolves critical issues like bearing failure, excessive vibration, and drainage blockages. Success depends on using correct specialized tools including impact wrenches, extractors, and agitator hooks, following strict safety protocols by always unplugging the machine and securing water supplies, and meticulously documenting each disassembly step with photos for accurate reassembly.
Whether you are working on a Maytag top-loader, Samsung front-loader, or Speed Queen, this systematic approach from diagnosis through extraction gives you the confidence to restore your washer to like-new performance. With proper maintenance including regular drum cleaning and checking pockets before washing, your machine can run smoothly for years after drum service.



