
You’re facing a leak, a strange noise, or your GE washer won’t drain. The next step involves opening it up to diagnose the problem. However, GE washing machines aren’t one-size-fits-all, and how you open them depends entirely on whether it’s a top-load or front-load model, and even the specific generation matters. Jumping in without the right approach can damage clips, crack plastic, or void your warranty.
This guide gives you exact, model-specific steps to safely open any GE washer, from removing the main top on top-load models like GTW335ASNWW to accessing the rear-mounted pump on front-load models like GFW148SSMOWW. You’ll learn the right tools to use, common mistakes to avoid, and get direct access to motors, pumps, and tubs for effective repairs.
Identify Your GE Washer Type Before Starting
Before touching a screwdriver, confirm your model and style. Opening methods differ drastically between top-load and front-load units, and even among front-loaders, newer models have sealed cabinets that require different access points.
Find Your Model Number
Model numbers appear in different locations depending on the washer type.
• Top-load models: Check under the lid near the hinge, back of control panel, or on the rear or bottom-left side
• Front-load models: Look on the rim around the drum (visible when door is open) or on the lower front-right corner
Once you have the model number (such as GTW750CPL1DG or GFW850SPNRS), determine your access path before proceeding.
Open Top-Load GE Washers: Control Panel First
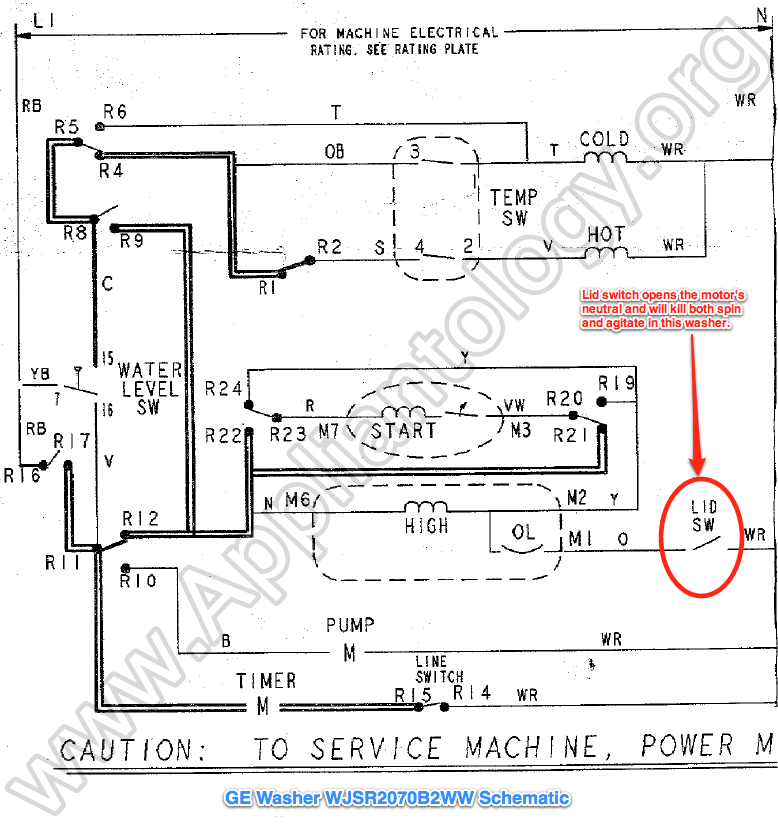
Top-load GE washers require removing the control panel and main top to access internal components like the motor, pump, and suspension system. This process involves several phases, starting with the control panel.
Remove the Control Panel
Follow these steps exactly to avoid damaging the panel or wiring.
- Unplug the washer and turn off water valves
- Locate two screws at the back of the control panel (may be hidden under caps)
- Remove screws, then slide the panel forward or to the side depending on your model
- Lift slightly and disconnect the wire harness from the main board
- Set the panel aside safely, never let it hang by wires
Pro Tip: Take a photo of the wiring before disconnecting. It makes reassembly foolproof.
Unlock the Main Top
The main cabinet top is held by spring clips with no screws on the front.
- Insert a plastic putty knife or trim tool under the front edge of the top, near the corners
- Push straight back about 1 inch to release the internal spring clips
- Once both sides are released, lift the front of the top up and pull forward
- Remove the entire top and set it aside
Warning: Never use metal tools because they scratch or crack the casing permanently.
Disconnect the Lid Switch
Before proceeding further, disconnect the lid switch to avoid electrical issues.
- Locate the wire retainer near the switch on the frame
- Squeeze the retainer with pliers to release the plug
- Lift the switch connector out and set aside
Now the tub and internal components are exposed for further access.
Access the Agitator and Inner Tub
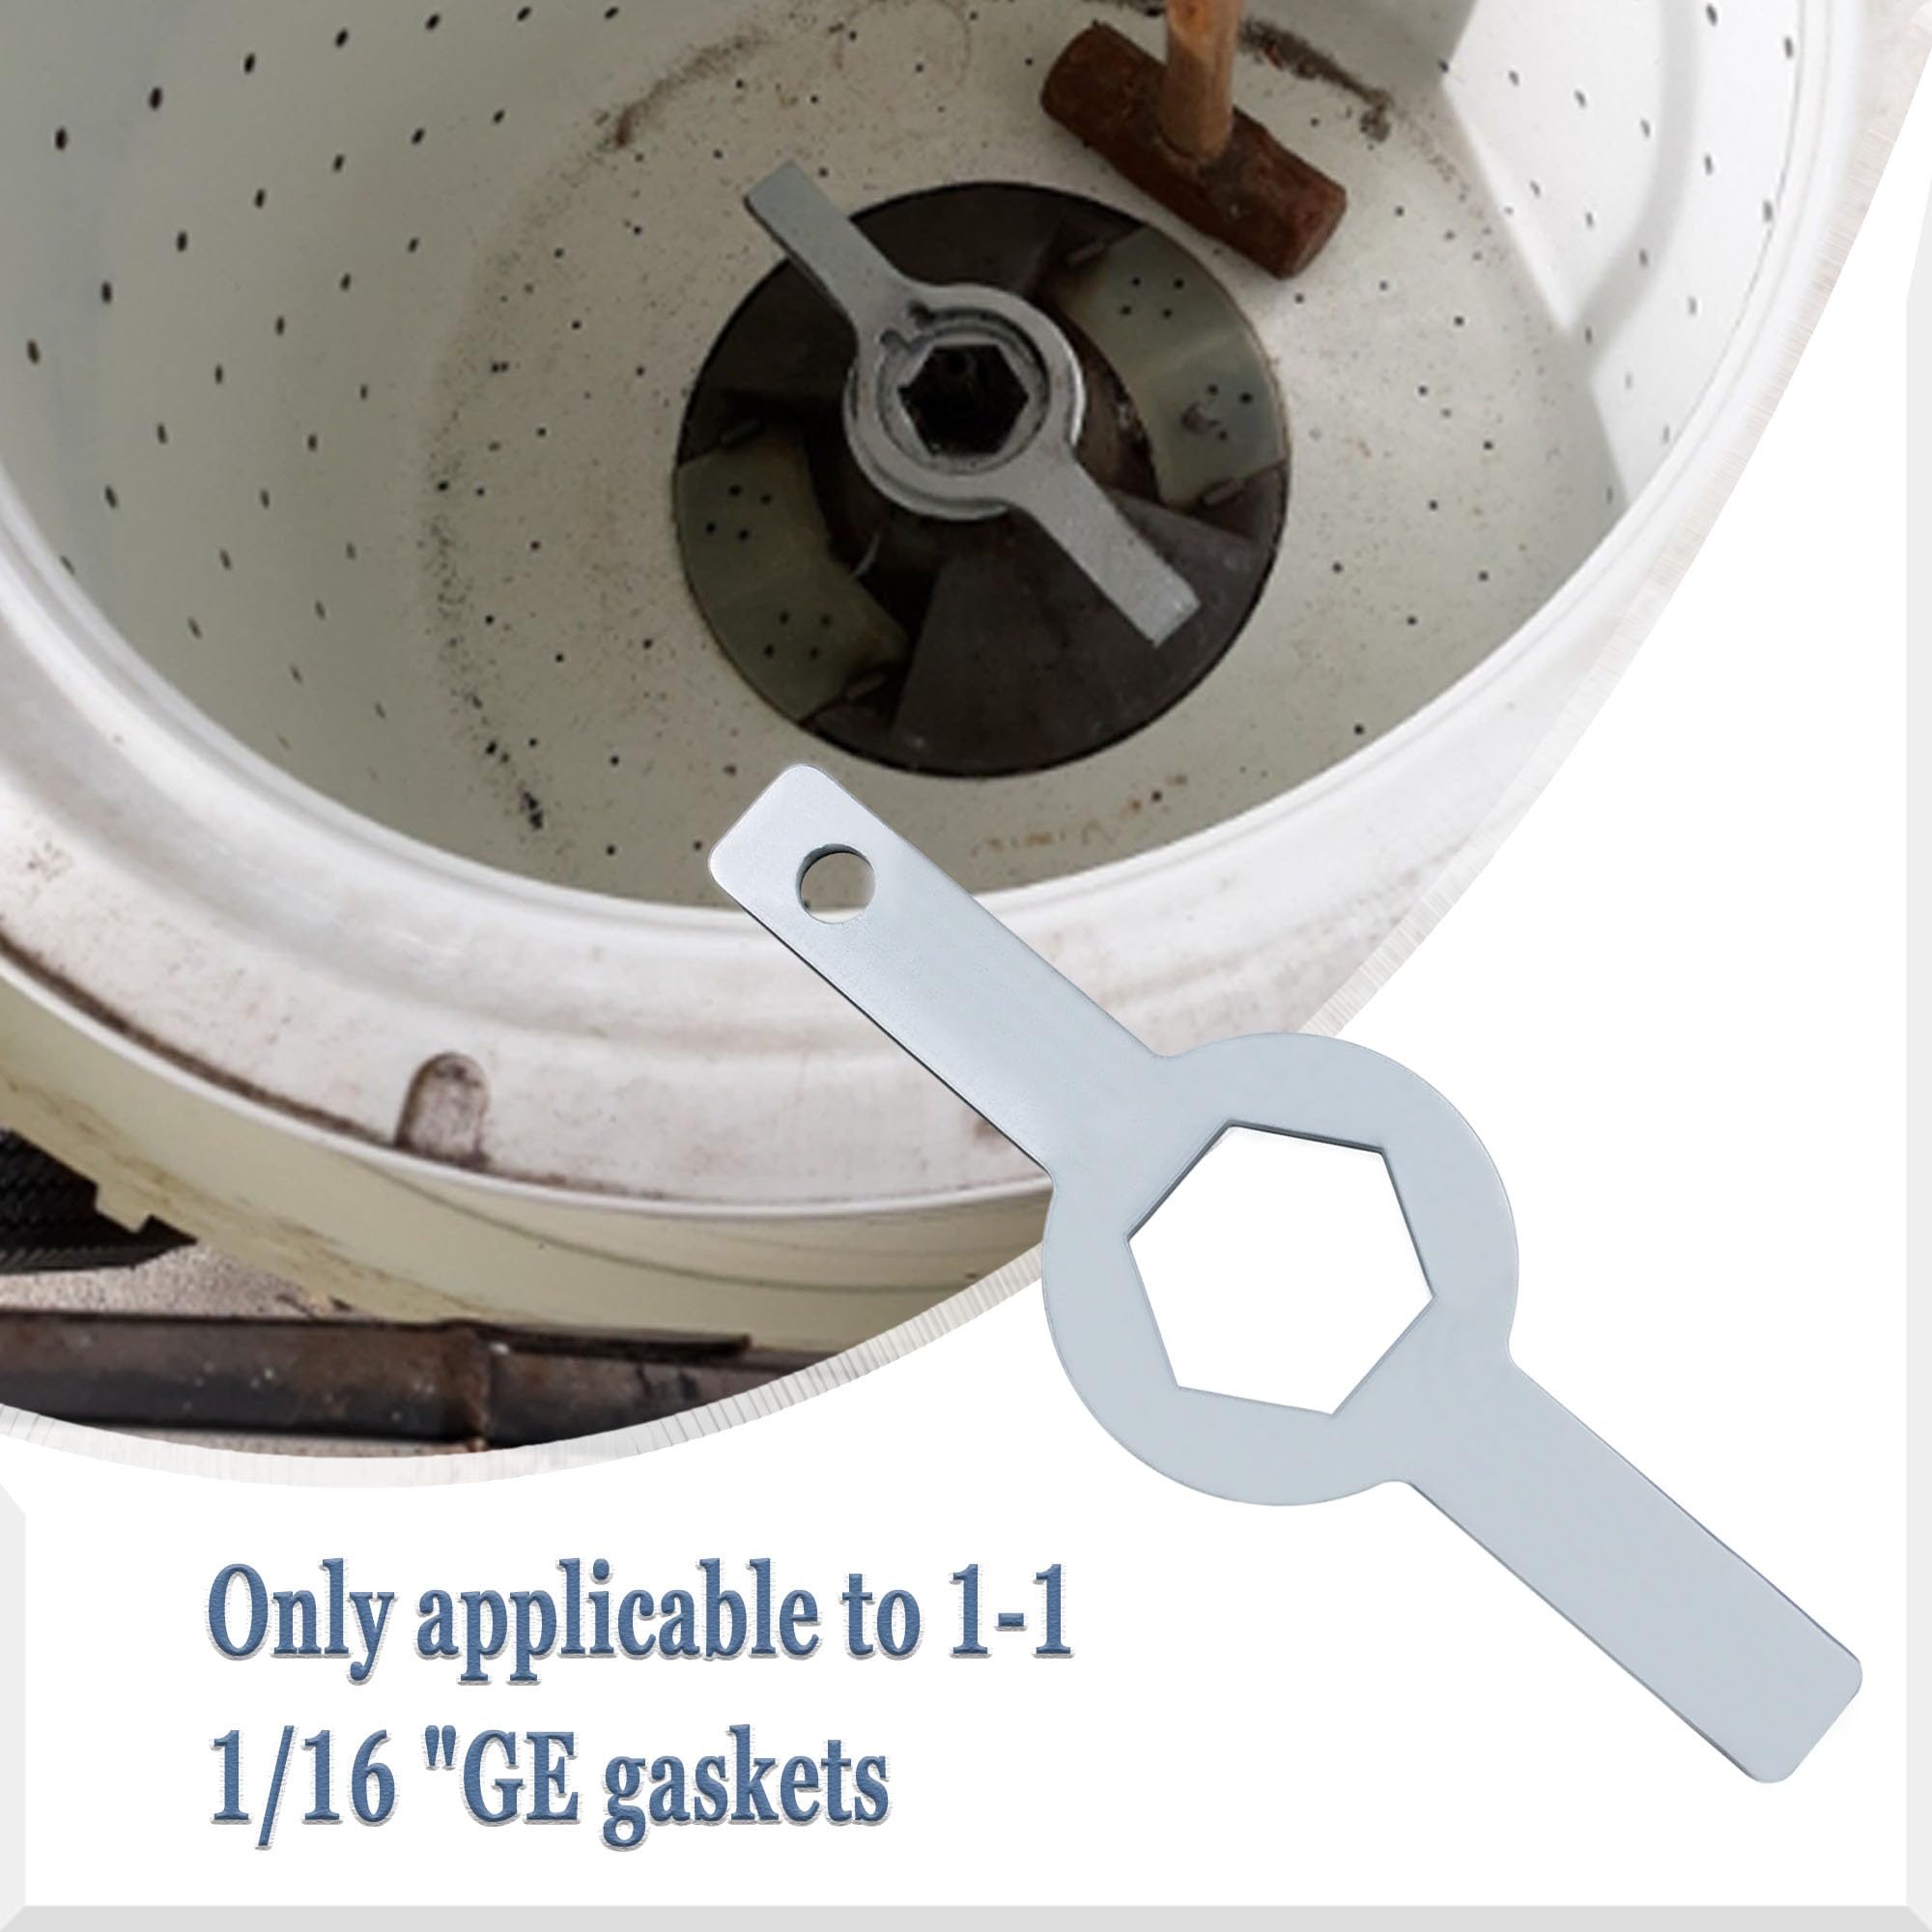
With the top removed, you can now remove the agitator and inner tub to reach the motor or pump if needed.
Remove the Fabric Softener Dispenser
- Lift the dispenser cap
- Rotate the cup counterclockwise and pull it out
Take Off the Agitator
- Use a 7/16″ socket to remove the central bolt underneath
- Pull the agitator straight up, it may be tight
- Set aside, then remove the drive block and washer underneath
Remove the Tub Nut (Reverse Thread)
The inner tub is secured by a large nut with reverse threads, meaning it tightens counterclockwise and loosens clockwise.
- Use a 1 11/16″ tub nut wrench
- Tap the wrench clockwise with a hammer to break it loose
- Unscrew by hand once loose
- Lift the inner tub straight off
Time Tip: This step can take 5 to 10 minutes if the nut is corroded. A sharp hammer tap often breaks the seal.
Extract the Outer Tub and Motor Assembly

Now you can access the motor, pump, and suspension system for major repairs.
Disconnect Key Components
- Drain the water by removing the drain hose clamp and letting residual water drain into a pan
- Disconnect the pressure tube from the tub side and switch
- Unplug motor wires, noting positions before disconnecting
- Remove the grounding wire screw
- Release wire retainers with pliers to free the harness
Release Suspension Rods
- Lift the outer tub slightly to unclip the four suspension rods from the base
- Use a broom handle to push out lower bushings if stuck
Remove the Tub and Motor Assembly
- Tilt the assembly forward
- Lift out carefully because it is heavy
You now have full access to the motor, pump, and drive system for troubleshooting or replacement.
Open Front-Load GE Washers: Two Different Approaches
Front-load models vary significantly. Older models let you remove the front panel, while newer one-piece cabinet models like GFW148SSMOWW require rear access instead.
Remove Front Panel on Traditional Models
For models like GFW850SPNRS, access the drum and pump via the front using this method.
Locate and Remove Bottom Screws
- Pull off rubber feet at the bottom corners
- Unscrew the two front panel screws underneath
- Set screws aside in a safe location
Release Side Clips
- Slide a plastic trim tool into the gap between the front panel and frame at the bottom
- Push inward to engage and release the spring clips
- Listen for a click, that is the clip releasing
- Repeat on the other side
Mistake to Avoid: Forcing the panel without releasing both clips can break the tabs permanently.
Remove the Front Panel
- Once clips are released, lift the panel up slightly, then pull forward
- Set aside carefully
Now you can access the drum, door boot, and pump for service.
Access Rear-Mounted Components on Newer Models

On one-piece cabinet models like GFW148SSMOWW, you cannot remove the front panel. You must access components from the back instead.
Remove the Rear Panel
- Unplug the washer and move it away from the wall
- Locate the center rear panel covering the motor and pump area
- Remove 4 to 6 screws securing it
- Pull the panel straight off
Visual Cue: You will see the motor, belt, and drain pump from behind.
Tilt for Bottom Access If Needed
To reach the pump or hoses more easily:
- Place towels on the floor
- Tilt the washer back slightly and have a helper hold it
- Remove the bottom rear panel if present
- Work from underneath to access the pump
Safety Note: Never tilt more than 10 to 15 degrees because water can leak into the motor and cause damage.
Replace the Drain Pump Through Rear Access
This is a common fix for F02 error codes or no-drain issues.
Disconnect the Old Pump
- Unplug the wiring harness from the pump
- Loosen hose clamps on inlet and drain hoses
- Slide hoses off, expecting some water to spill
- Unscrew 2 to 3 mounting bolts
- Pull the pump out from the rear
Install the New Pump
- Position new pump and secure with bolts
- Reattach hoses and tighten clamps
- Plug in wiring connector
- Reinstall rear panel
- Return washer to upright position
Test Tip: Run a short spin cycle to check for leaks before full operation.
Bypass Lid Switch for Diagnostics on Top-Loaders
Need to test motor function with the lid open? Temporarily bypass the lid switch for diagnostic purposes only.
Steps to Bypass Safely
- Remove two screws on the lid’s side under rubber caps
- Lift lid off carefully
- Place the magnet from the lid directly on the lid switch sensor
- Start a spin cycle, motor should engage in 1 to 2 minutes
Warning: Never leave the washer unattended with the bypass active. Reattach lid before regular use.
Enter Diagnostic Mode for Error Codes
GE washers display error codes like F01, F02, and F03. You can pull them manually to diagnose issues.
How to Enter Diagnostics
- Press and hold Signal and Start for 3 seconds (varies by model)
- All indicator lights flash
- The display shows error codes
Common Error Codes and Fixes
| Code | Meaning | Likely Fix |
|---|---|---|
| F01 | Door Lock Error | Check latch, replace lock assembly |
| F02 | Drain Error | Clean filter, replace pump |
| F03 | Water Inlet Error | Check valves, supply lines |
Fix Vibration and Noise Issues
Loud banging during spin is not just an unbalanced load problem.
Causes and Fixes
• Worn suspension rods: Replace if sagging or leaking fluid
• Loose shock absorbers: Check mounting bolts and tighten
• Foreign objects: Inspect between inner and outer tub after removing inner tub
• Unlevel washer: Use a level and adjust legs accordingly
Pro Tip: After replacing suspension parts, run a test cycle empty to verify the fix.
Clear Drain Errors (F02)
If your washer won’t drain properly:
Clean the Pump Filter
- Front-load models: Open service panel at bottom front
- Place towels under filter area
- Unscrew cap counterclockwise, water will spill
- Pull out filter and remove lint, coins, or debris
- Reinstall tightly
Maintenance Schedule: Clean every 1 to 3 months to prevent buildup.
Replace Key Components When Needed
Door Lock Assembly
If the door won’t lock or F01 error persists:
- Remove front or rear panel depending on model
- Unplug the lock connector
- Unscrew and replace the assembly
- Test before reassembling everything
Drive Belt on Front-Load Models
If the drum spins slowly or not at all:
- Access via front or rear panel
- Remove old belt from motor and drum
- Install new belt, ensuring correct tension
- Reconnect power and test thoroughly
Reassemble in Reverse Order
Every step you took to open the washer must be undone carefully to ensure proper operation.
Top-Loader Reassembly Tips
• Tub nut: Tighten clockwise because it uses reverse threads
• Wiring: Route harnesses exactly as shown in your original photos
• Lid switch: Ensure wire retainer clicks into place securely
• Control panel: Slide back into slots before screwing
Front-Loader Final Checks
• Front panel: Ensure clips snap fully on both sides
• Hoses: Check for no kinks in drain or inlet lines
• Screws: Replace all bottom and rear screws in their original positions
Prevent Damage and Maintain Longevity
Opening your GE washer is safe if you follow the right steps every time.
Maintenance Tips
• Clean pump filter monthly to avoid clogs
• Use HE detergent only because excess suds damage pumps
• Avoid overloading to prevent straining the motor and suspension
• Level the washer to prevent vibration and premature wear
When to Call a Professional
Skip DIY if you are uncomfortable with electrical components, the model is still under warranty (DIY voids it), or you cannot identify the failure after opening the unit.
Contact GE Support at 1-800-432-2737 for professional assistance.
Key Takeaways for Opening Your GE Washing Machine
:max_bytes(150000):strip_icc()/top-load-washer-vs-front-load-2145868-v5-6606d79a51e446be957069689296fc44.png)
Opening a GE washing machine requires identifying your model type first because top-load and front-load models use completely different access methods. Top-load models require removing the control panel and main top to reach internal components, while front-load models may need either front panel removal or rear access depending on the specific model. Always unplug the washer and disconnect water supplies before beginning any disassembly, and take photos at each step to ensure accurate reassembly. The most common tools needed include a 1 11/16″ tub nut wrench for top-loaders, a plastic trim tool for releasing clips, and standard socket sets. Regular maintenance like cleaning the pump filter every 1 to 3 months prevents most drainage issues and reduces the need to open the machine for repairs.
Frequently Asked Questions About Opening GE Washing Machines
Can I open my GE washing machine myself at home?
Yes, you can open your GE washing machine at home with basic tools. Top-load models require removing the control panel and main top, while front-load models may need front or rear panel access depending on the model. Always unplug the washer first and follow model-specific instructions.
What tools do I need to open a GE top-load washer?
You need a Phillips screwdriver, flathead screwdriver, plastic putty knife or trim tool, a 7/16″ socket for the agitator bolt, and a 1 11/16″ tub nut wrench for the inner tub nut. Pliers and a flashlight are also helpful for visibility.
Why won’t the front panel come off my GE front-load washer?
Newer GE front-load models like GFW148SSMOWW have one-piece cabinets where the front panel cannot be removed. In these cases, you must access components through the rear panel instead.
How do I find the model number on my GE washer?
On top-load models, check under the lid near the hinge, back of control panel, or rear panel. On front-load models, look on the rim around the drum opening or on the lower front-right corner.
Does opening my GE washer void the warranty?
Yes, opening your GE washing machine may void the warranty if the machine is still covered. Check your warranty terms before attempting repairs, and contact GE at 1-800-432-2737 for warranty-related service.
How do I know if my GE washer needs rear access instead of front access?
If you have a newer front-load model with a sealed one-piece cabinet, you need rear access. The model number (like GFW148SSMOWW) and inability to release front panel clips indicate this design.



