
A washing machine pan is one of the most effective, low-cost safeguards against water damage in any laundry setup, especially in second-floor or finished basement installations. If your washer springs a leak, even a small drip from a loose hose or failing seal can cause thousands in flooring, subfloor, or ceiling damage. A properly installed drain pan catches that water and routes it safely to a floor drain or laundry tub, preventing disaster before it starts.
Knowing how to install a washing machine pan isn’t just about protection. It is often required by local plumbing codes, and with the right tools and a clear plan, this project is entirely doable for most homeowners. In this guide, you will learn every step, from selecting the right pan and preparing the drain to sealing, positioning, and testing, so your installation is watertight, code-compliant, and built to last.
Choose the Right Drain Pan for Your Setup

Measure Your Washer and Space
Before buying a pan, measure your washing machine’s footprint. Most front-loaders require a 27″ x 30″ pan with 2-1/8″ high sides, the industry standard. Confirm your machine fits within these dimensions, accounting for vibration and leveling feet. Also measure the space between the wall and nearby cabinets to ensure the pan can slide fully into place without interference.
Check for obstructions like gas valves, bifold doors, or baseboards. You may need to offset the pan forward by 3 to 4 inches from the back wall. If so, plan to drill a custom drain hole accordingly.
Select Material and Key Features
Drain pans come in plastic (PVC or ABS) or stainless steel. Plastic is lighter, easier to drill, and more common in DIY kits. Stainless steel is more durable but harder to modify. Choose based on your needs and installation environment.
Key features to look for include a pre-drilled 1-1/4″ hole (may need enlarging), an included 1″ PVC drain fitting with gasket and plastic nut, a flat bottom for full contact with flooring, and a lip height of at least 2″ for adequate containment. Ensure the kit supports indirect drainage if required by code, which means routing the pan’s drain into a laundry tub rather than directly into the sewer line.
Gather Tools and Materials for Installation
Essential Tools You Will Need
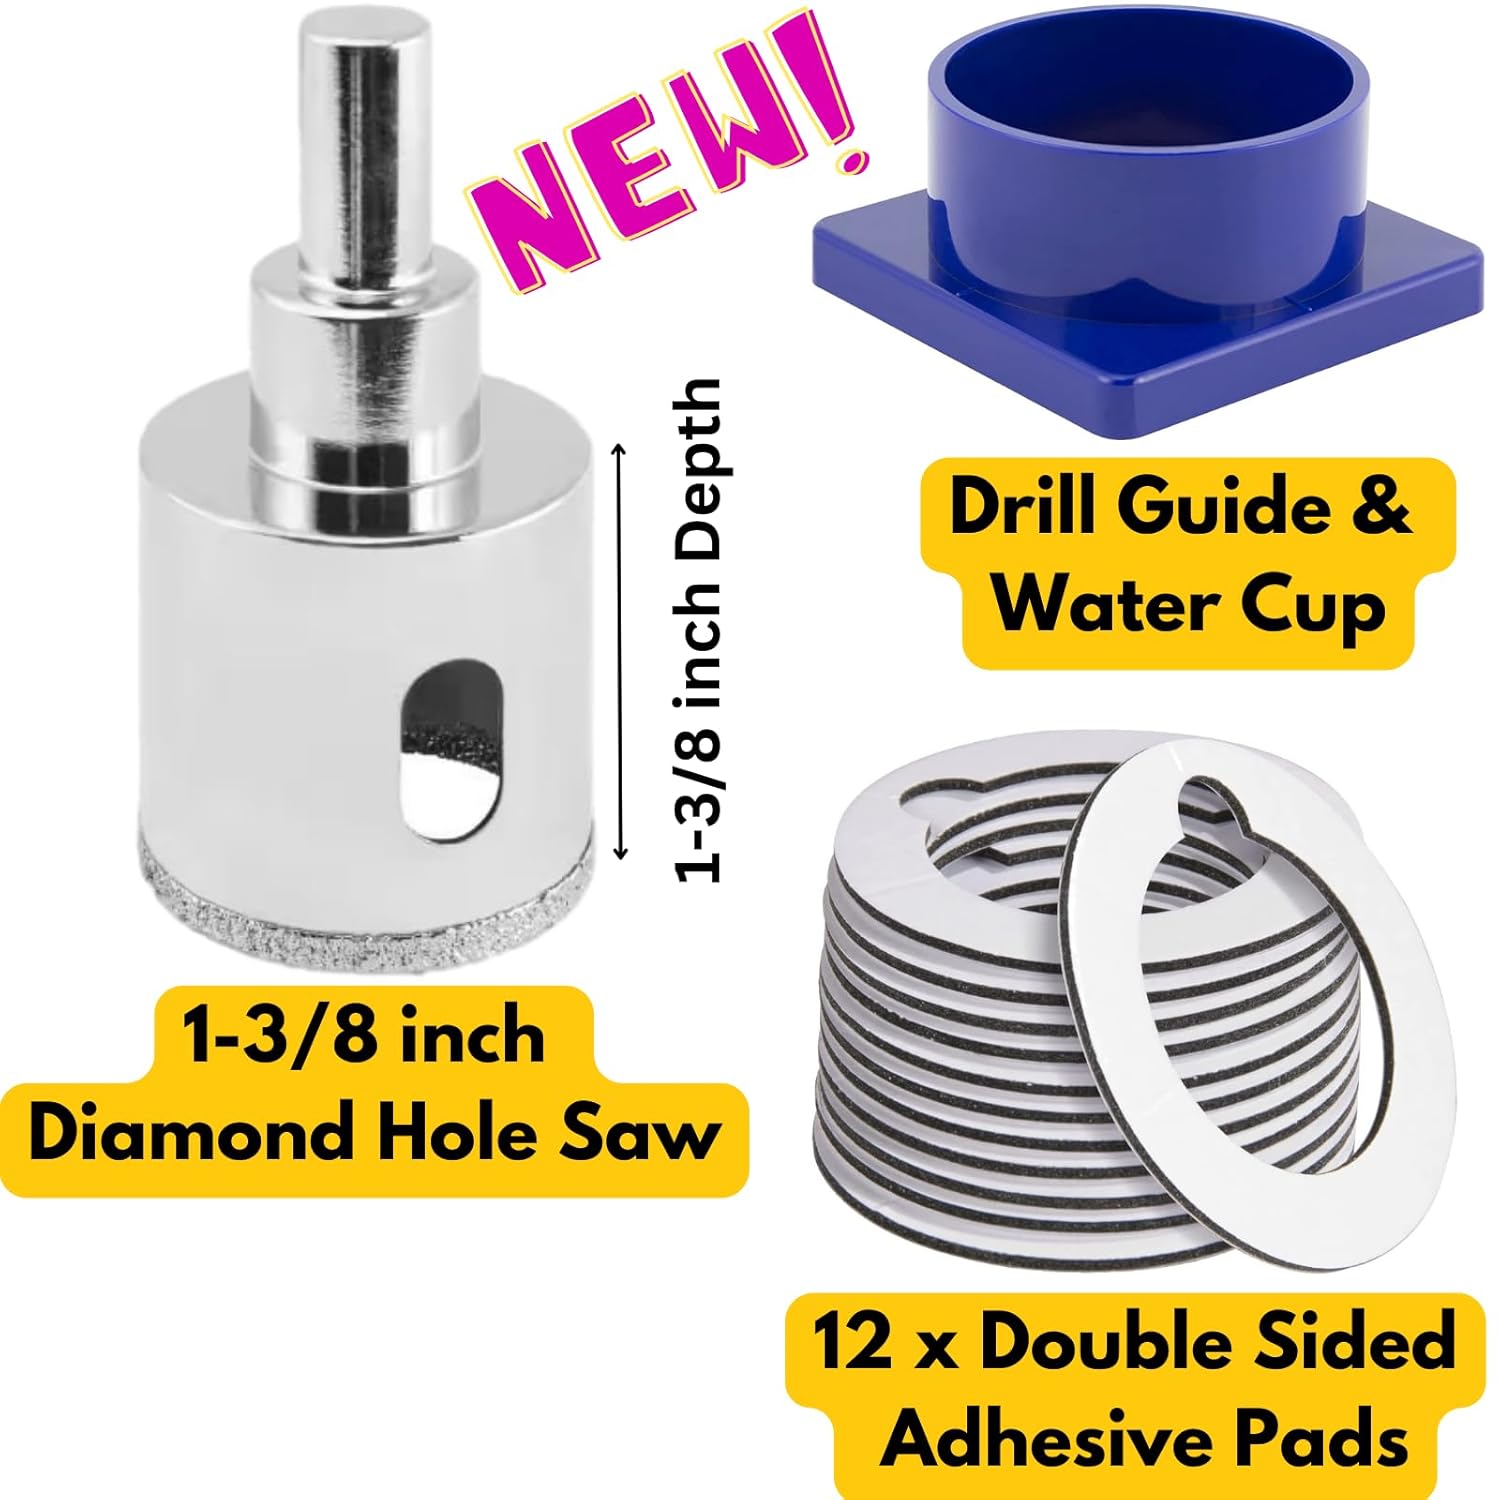
You will need a few specialized tools to move the washer and prepare the pan. A drill with 1-3/8″ hole saw or step bit is required for drilling the pan. You will also need a tape measure and marker, a level to ensure even placement, a Dremel with cutoff wheel for trimming PVC pipe, and a caulking gun for silicone application.
For moving the heavy washing machine, gather a furniture dolly or floor jack and a pry bar with 2x4s if working solo. Protect your floors with scrap plywood when lifting or sliding heavy appliances.
Required Materials List
Beyond the pan kit, gather these supplies. You will need 100% silicone sealant (plumbing-grade, waterproof), a 1″ PVC nipple (short pipe) for extension, an ABS or PVC drain fitting to match your existing pipe diameter, a rubber gasket and retaining nut (usually included), and plumber’s tape if threading metal fittings.
Verify your floor drain pipe is 1-1/2″ smooth ABS or PVC, the most common size. If not, get compatible fittings before starting the installation.
Safely Disconnect and Move the Washer
Turn Off Utilities Before Starting
Start by turning off the water supply valves behind the washer. Then unplug the machine from the electrical outlet. Disconnect both hot and cold water hoses, letting residual water drain into a bucket. Remove the drain hose from the standpipe or pump inlet.
Wear gloves and non-slip shoes. Clear the area around the washer to allow room for movement. This preparation prevents water damage and makes the machine easier to lift safely.
Lift and Relocate the Machine
Washing machines weigh over 200 lbs, so use proper lifting techniques or mechanical aids. The best method is to use a furniture dolly or appliance mover. Tilt the washer slightly and slide the dolly underneath. Roll it forward just enough to clear the installation zone.
An alternative method uses a floor jack with a plywood base. Place a 2×6 or plywood sheet under the jack to prevent floor damage. Position the jack under the front frame and raise the washer 2 to 3 inches, just enough to slide the pan beneath. For a solo option, leverage with 2x4s and pry bar by placing wooden blocks under one side, then lifting the opposite side using body weight on a pry bar. Slide the pan incrementally under the unit and work slowly, stopping if the washer feels unstable.
Prepare the Drain Pipe for Connection
Cut the Pipe to the Correct Height
If the existing drain pipe protrudes above the floor, it must be shortened. Use a Dremel with a cutoff wheel to cut the pipe so the top sits 3/4″ to 1″ above the finished floor. This allows space for the gasket and nut while keeping the pan’s drain lower than the lip.
Cut carefully, avoiding damage to surrounding tile or subfloor. If tile blocks access, you may need to cut it slightly to expose the pipe.
Install the Proper Fitting
For 1-1/2″ smooth ABS or PVC floor drains, use a slip-fit adapter. Insert it into the pipe and secure with silicone. For threaded drains, screw in a compatible fitting directly.
If the pipe is off-center, do not bend PVC. It weakens the material and risks leaks. Instead, drill a new hole in the pan at the correct offset. A pro tip is to use a 1.5″ sink drain assembly for a flush, adjustable fit. This eliminates the need for complex offsets and ensures complete drainage.
Drill and Install the Pan Drain Fitting
Mark the Hole Location and Drill
Measure from the back and side walls to the center of the drain pipe. For example, if the pipe is 23-1/2″ from the back wall and 22-3/8″ from the side, transfer those measurements to the pan. Mark the center point precisely.
Use a 1-3/8″ hole saw or step bit to drill from the top, then finish from the bottom to reduce burrs. Stop at 1-1/4″ if using a step bit to avoid weakening the pan. Ensure the hole matches the base of your drain fitting exactly.
Install the Drain Fitting Securely
Insert the rubber gasket onto the fitting. Slide the fitting up from the bottom of the pan through the hole. Thread the plastic nut onto the fitting from above and tighten by hand only.
Never use a wrench. Over-tightening cracks the nut or pan. Apply a thin layer of silicone on the threads and pan surface before tightening to seal micro-gaps. The gasket provides the main seal, and silicone fills imperfections.
Seal and Position the Pan Correctly
Apply Silicone for a Watertight Seal
To prevent water from seeping under the pan, run a continuous bead of 100% silicone around the underside edge where the pan meets the floor. Apply a second bead around the pipe penetration where the drain exits the floor. Smooth with a wet finger for a clean, airtight finish.
This step is critical. Silicone prevents capillary action from drawing water beneath the pan.
Set the Pan in Place
Carefully lower the pan over the drain pipe. Ensure it sits flat and level. The pan’s lip must be higher than the top of the drain pipe to allow gravity-fed drainage.
If there are gaps between the pan and wall, trim the pan’s edge or install a custom trim piece for a finished look. Avoid caulked gaps because they can trap moisture.
Reinstall and Test the Washing Machine
Place the Washer Back on the Pan
Wait 24 hours for silicone to fully cure before replacing the washer. Moving it too soon breaks the seal.
Use the dolly or jack to carefully slide the machine back into position. Ensure all four feet sit inside the pan and the unit is level. Check clearance behind the washer. Hoses and gas valves should not be pinched or strained.
Reconnect and Test for Leaks
Reattach the water supply hoses and drain hose. Turn on water valves slowly and inspect all connections for drips.
Run a short wash cycle or pour a bucket of water directly into the pan. Watch for water flowing freely to the drain, no pooling or standing water in the pan, and no seepage under the pan or around the drain. If water remains, check the pan’s level or lower the drain pipe.
Solve Common Installation Problems

Fix a Misaligned Drain
If the drain is not centered, drill a new hole in the pan at the correct location. Never bend PVC pipes. Use a sink drain assembly for flexible positioning.
Address Water Staying in the Pan
This indicates poor drainage. Causes include the drain fitting not being flush with the pan bottom, the pipe being too high (cut it shorter), or the pan not being level (adjust feet or add shims). Ensure the drain is the lowest point.
Stop Leaks Under the Pan
Reapply silicone to the perimeter and pipe joint. Confirm the gasket is seated and the nut is hand-tightened. Over-tightening is a common cause of failure.
Replace a Cracked Plastic Nut
Cracking is caused by using tools to tighten. Replace the nut and tighten by hand only. Use silicone to enhance the seal instead of force.
Maintain Your Washing Machine Pan
Perform Routine Checks
Even with a perfect installation, maintenance matters. Inspect every 3 to 6 months for debris, hair, or lint blocking the drain. Test drainage by pouring water into the pan. Check silicone seals for cracking or lifting.
A clean, clear drain ensures the pan works when needed.
Understand the Pan’s Purpose
A drain pan is a safety backup, not a daily drainage system. It should rarely hold water. If it does, investigate for slow leaks from hose connections, pump seals, or inlet valves.
Follow Code Requirements and Know When to Call a Pro
Meet Local Plumbing Codes
Many jurisdictions require drain pans for second-floor laundry rooms. Verify with your local building department before installing. Some codes mandate indirect drainage into a laundry tub to prevent sewer gas infiltration.
Use dual sealing for the strongest defense. Combine a rubber gasket (mechanical seal) with 100% silicone (chemical seal). Together, they block even the smallest leaks.
Know When to Hire a Professional
If you are uncomfortable cutting into flooring or tile, modifying drain pipes, or lifting heavy appliances alone, hire a licensed plumber or appliance technician. A professional ensures code compliance and long-term reliability.
Frequently Asked Questions About Installing a Washing Machine Pan
Do I really need a drain pan for my washing machine?
Yes, especially if your laundry room is on an upper floor or in a finished basement. A drain pan catches leaks before they damage flooring, subfloor, or ceilings below. Many local plumbing codes actually require them for second-floor installations.
What size drain pan do most washing machines need?
The standard size is 27″ x 30″ with 2-1/8″ high sides. This fits most front-load washers and dryers. Always measure your specific machine’s footprint before purchasing to ensure a proper fit.
Can I install a washing machine pan by myself?
Yes, with the right tools and careful planning. The biggest challenges are lifting the washer (which weighs over 200 lbs) and ensuring proper drainage connections. Using a furniture dolly or floor jack makes the job safer. If you are unsure about any step, hire a professional.
How long does the silicone take to cure before I can use the washer?
Allow 24 hours for 100% silicone sealant to fully cure before placing the washing machine back on the pan. Moving the machine too soon breaks the seal and compromises the entire installation.
What should I do if water pools in the pan after a cycle?
Water pooling means the drain is not working properly. Check that the drain fitting is flush with the pan bottom, the pipe is not too high (cut it shorter if needed), and the pan is level. The drain must be the lowest point for gravity to work.
Key Takeaways for Installing a Washing Machine Pan

Installing a washing machine pan is a smart, preventive upgrade that takes a few hours but can save thousands in water damage. The most critical steps are measuring your washer and space accurately, choosing a pan with the right features, and using both a rubber gasket and 100% silicone for a watertight seal.
Always allow 24 hours for silicone to cure before reinstalling the washer, and test the installation by pouring water into the pan to verify proper drainage. For second-floor installations, check your local plumbing codes, as drain pans are often required by law.
With careful measurement, proper sealing, and attention to detail, your pan will sit invisibly under the washer, ready to protect your home the moment a leak occurs.



