Commercial laundromats, hotels, and healthcare facilities rely on Dexter washing machines for heavy-duty performance. When a Dexter washer fails, downtime cuts directly into profits. Whether it is a machine that will not power on, water not filling, or coins passing through uncounted, quick and accurate Dexter washing machine repair is critical. This guide delivers a step-by-step approach to diagnosing and fixing the most common problems using genuine parts, proper tools, and factory-backed procedures.
You will learn how to locate model numbers, access control panels safely, test wiring, clean valves, and replace key components like the control board. With the right knowledge, you can reduce service calls, extend machine life, and keep operations running smoothly.
Find Your Model Number for Accurate Repairs
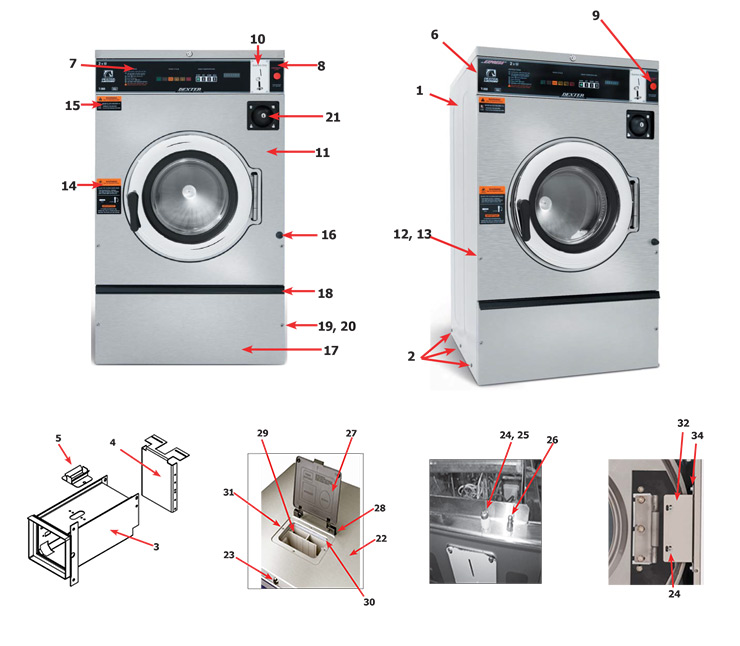
Before any repair, identify your Dexter washer is model number. This number unlocks access to correct schematics, parts, and service manuals. Without it, you risk ordering incompatible components and wasting valuable time.
Top Load Washer Locations
Check inside the lid first. If not there, inspect the back panel or control panel. The label may be recessed or partially hidden behind mounting brackets. Take your time examining these areas thoroughly before moving on.
Front Load Washer Locations
Open the door and examine the door seal rim. If nothing is visible, check behind the detergent drawer or on the back of the machine. Some units hide the label under a removable trim strip. Keep a flashlight handy for darker areas.
Stacked Unit Tips
On washer-dryer combos, look on the side panel or inside the door frame. These units often have dual labels, one for each appliance. Always confirm you are referencing the washer side when ordering parts.
Access the Control Panel Safely

The control panel houses the brain of your Dexter washer. To repair electrical faults or coin issues, you must open it, but only after following strict safety rules to prevent injury or damage.
Disconnect Power and Water First
Unplug the unit or lock out the circuit breaker. Then shut off both hot and cold water valves. Wait five minutes to allow internal pressure to release before disconnecting hoses. This step is mandatory for every repair.
Use the Dexter Service Key
This specialized tool releases hidden front panel locks. Insert it into the keyhole, usually near the base, and turn to unlock. Without this key, you cannot access the control board or wiring harness. Order one if you do not have it.
Remove Screws and Open Panel
Once unlocked, remove Phillips-head screws securing the top and sides. Gently pull the front cover forward. Be careful because wiring may still connect the door interlock or coin validator. Disconnect these carefully before full removal.
Diagnose Power and Control Failures

When a Dexter washer will not start or shuts down mid-cycle, the issue often lies in the control system. Start your diagnosis here before replacing expensive parts.
Check Door Interlock Function
A faulty door latch is a top cause of no-start conditions. Close the door firmly and listen for a click. If silent, inspect the interlock switch for damage or misalignment. Test continuity with a multimeter to confirm it is working properly.
Inspect Wiring for Loose Connections
Open the panel and locate two yellow wires and one brown wire on the back panel. These carry signals from the coin validator and door switch. Wiggle them gently while powering on. If the machine responds, reconnect and secure the terminals immediately.
Test the Control Board
For erratic behavior or frozen cycles, replace the main logic board. Part 9473-009-005 is a drop-in upgrade for older models. No reprogramming is needed. Simply swap and test the machine.
Fix No Water or Slow Fill Issues

Water inlet problems disrupt cycles and reduce cleaning efficiency. Most issues stem from clogs or worn seals, not full valve replacement. Address these quickly to avoid customer complaints.
Shut Off Supply and Depressurize
Turn off water valves and unplug the machine. Open the service panel and place towels underneath. Disconnect hoses slowly to avoid residual water spray. This prevents water damage to your workspace.
Remove and Clean Inlet Valve
Use an adjustable wrench to loosen mounting nuts. Pull out the valve assembly. Soak in deionized water and scrub the screen with a soft brush. Avoid abrasives that scratch internal surfaces and cause future problems.
Replace Worn O-Rings
Inspect rubber seals for cracks or flattening. Replace with genuine Dexter O-rings. Apply a thin layer of food-grade silicone grease before reinstallation to prevent leaks. This simple step extends the life of your repair.
Reassemble and Test
Reinstall the valve, hand-tighten nuts, then give a quarter-turn with the wrench. Reconnect hoses. Power up and run an empty test cycle. Watch for drips and confirm full water flow before calling the repair complete.
Stop Leaks at the Source

Persistent dripping damages floors and increases utility costs. Pinpoint the leak type before disassembling components. Quick identification saves money and prevents larger damage.
Identify Leak Origin
Run a fill cycle and observe where the water appears. Base leaks indicate inlet valve O-rings or hose connection issues. Door leaks suggest worn door boot seal or clogged drain pump problems. Back panel leaks mean cracked tubing or loose fittings.
Replace Door Seal
Remove the front panel and clamp ring. Pull the old seal from the drum lip. Install the new gasket, ensuring it seats evenly. Reattach the clamp securely, but avoid overtightening that can warp the metal.
Clear Pressure Switch Tube
A blocked tube causes overfilling or no-fill errors. Disconnect the small hose from the pressure switch. Blow air through it or flush with distilled water. Reconnect firmly to restore proper water level detection.
Repair Coin Mechanism Failures
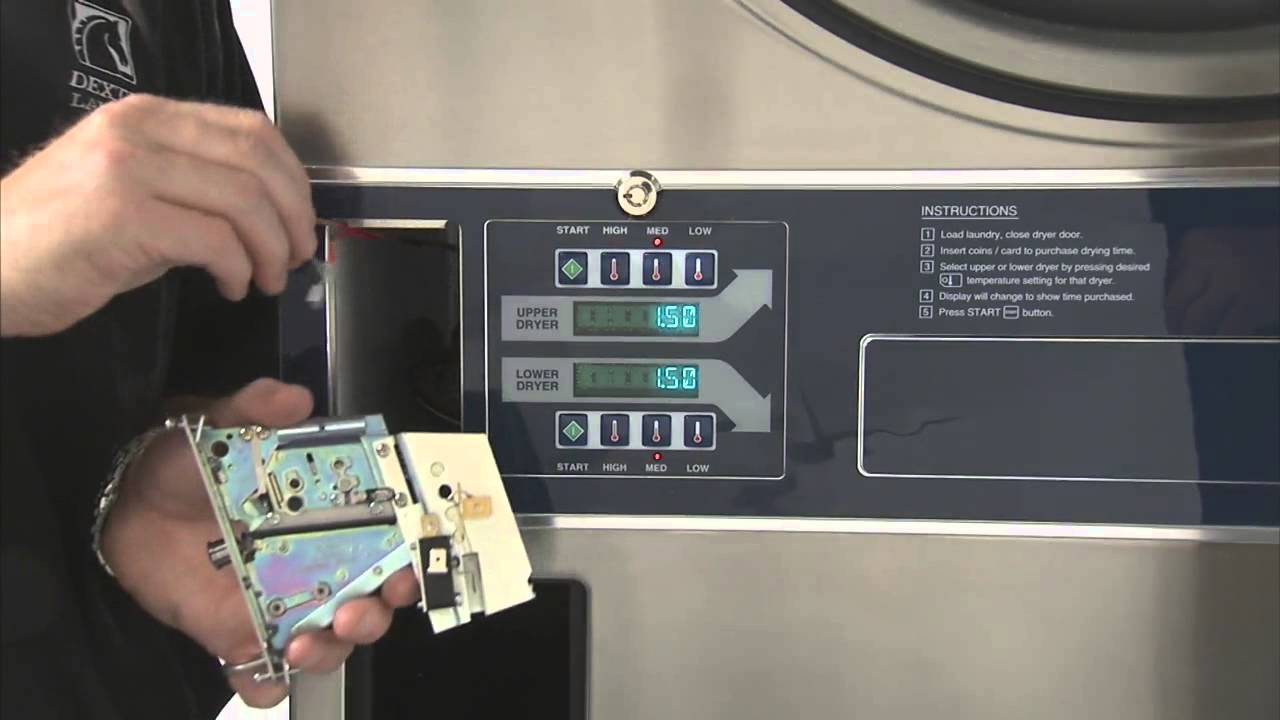
Coin acceptance issues are common in laundromats. Most stem from improper coin use, not internal defects. Fixing these problems keeps your revenue flowing without interruption.
Use Fresh, Standardized Coins
Mixing old thick dollar coins with newer thin ones jams the feeder. Always load fresh bank rolls. Never use recycled or mixed-denomination coins. This single change prevents most coin mechanism problems.
Clean the Coin Path
Remove the coin validator and guide rails. Use compressed air and a lint-free cloth to clear debris. Check for metal shavings or worn plastic edges that disrupt flow. Clean components regularly for best performance.
Adjust Guide for Correct Denomination
If switching from quarters to dollar coins, reset the guide mechanism. Do not attempt to adapt it for mixed thicknesses. This leads to jams and costly repairs. Use one denomination per machine consistently.
Reconnect Validator Wires
Ensure the yellow and brown wires are firmly attached to the validator terminal block. A loose connection mimics a faulty sensor. Secure with zip ties to prevent vibration loosening over time.
Resolve Vibration and Spin Problems
Excessive shaking during extraction damages the machine and surrounding area. This is not normal wear. It signals mechanical failure that requires immediate attention to prevent costly damage.
Inspect Suspension Shocks
Look for oil leaks or bent rods on shock absorbers. Press down on the tub. If it bounces more than once, shocks are worn and need replacement. Always replace in pairs for balanced support.
Check Drive Belt and Motor
Open the rear panel and examine the belt for fraying or glazing. Rotate the drum by hand. Resistance or grinding indicates bearing failure. Listen for squealing during spin-up to catch problems early.
Verify Drum Alignment
Misalignment stresses bearings and belts. Measure gap consistency between the inner and outer drum. If uneven, realign or replace damaged suspension mounts. Proper alignment extends component life significantly.
Replace Key Components Correctly
Some repairs require full part replacement. Use only genuine Dexter parts to ensure fit and durability. Generic parts often fail faster and cost more in the long run.
Install New Control Board
Power off the machine. Locate the old board behind the control panel. Disconnect all wiring harnesses. Remove mounting screws. Plug in the new board and reattach wires one by one. Test before full reassembly.
Swap Faulty Capacitors
For motors that hum but do not start, test the start capacitor. Discharge it with a resistor first. Replace with the same microfarad rating. Secure mounting bracket and reconnect terminals properly.
Upgrade Pilot Lights
Indicator lights fail over time. Turn off power, remove the old bulb or LED module, and snap in the new one. Confirm correct voltage rating before testing the machine.
Prevent Costly Breakdowns
Preventative maintenance beats emergency repairs every time. A small investment now avoids thousands in downtime later. Create a maintenance schedule and stick to it religiously.
Follow the Maintenance Schedule
Perform monthly inspections for leaks, clean lint traps, and verify coin path. Conduct quarterly deep cleaning of inlet valves, check belt tension, and test door interlocks. Replace seals and lubricate moving parts annually.
Train Staff on Proper Use
Ensure attendants know how to shut off water and power in emergencies. Teach them to spot early signs. Watch for dripping, slow cycles, or unusual noises. Early reporting prevents major failures.
Stock Critical Spare Parts
Keep on hand essential items like O-rings, pilot lights, the service key, and replacement hoses. This reduces downtime when failures occur. Check inventory monthly and restock before supplies run out.
Know When to Call a Pro
While many issues are DIY-fixable, some demand expert hands. Recognizing your limits prevents further damage and ensures customer safety. Do not attempt repairs beyond your skill level.
Complex Electrical Faults
If error codes persist after basic checks, or the control board fails repeatedly, contact a certified technician. Internal circuit tracing requires specialized tools and training. Save time and money by calling in experts.
Bearing or Transmission Failure
These repairs involve full drum removal and precision reassembly. Mistakes lead to immediate re-failure. Leave these jobs to professionals with factory training and proper equipment.
Discontinued Parts Challenges
Some components are no longer available. A technician can recommend workarounds or compatible upgrades. Do not waste time searching for unavailable parts.
Maximize Machine Lifespan
Dexter washers are built to last, but only with proper care. Follow these best practices to protect your investment and keep machines running reliably for years.
Use Genuine Parts Only
Aftermarket seals or capacitors may fit, but they fail faster. Always use Dexter OEM parts. They are engineered for commercial stress and backed by manufacturer support.
Standardize Coin Inputs
Eliminate mixed coin use entirely. Post clear signage indicating acceptable coin types. This prevents the majority of coin mechanism jams and keeps revenue flowing smoothly.
Schedule Professional Service
Arrange professional maintenance every three months for laundromats and every six months for hotels and hospitals. Technicians check motor windings, grounding, and safety interlocks that you cannot test at home.
Frequently Asked Questions About Dexter Washing Machine Repair
Why will my Dexter washer not start at all?
The most common causes are a faulty door interlock, loose wiring connections, or a failed control board. Check that the door closes firmly and listen for the latch click. Inspect the yellow and brown wires on the back panel for secure connections.
How often should I perform preventative maintenance on commercial Dexter washers?
High-volume laundromats need quarterly service. Hotels and healthcare facilities should schedule semi-annual maintenance. Regular inspections catch worn seals and bearings before they cause catastrophic failures.
Can I use aftermarket parts to save money on repairs?
Using genuine Dexter parts ensures proper fit, longevity, and safety. Aftermarket components often fail faster in commercial environments, leading to more frequent repairs and higher total costs.
What causes coin mechanism jams in Dexter washers?
Mixed coin denominations cause most jams. Older dollar coins are thicker than newer ones. Using recycled coins from mixed sources creates feeding problems. Always use fresh bank rolls of standardized coins.
How do I know if the control board needs replacement?
Signs include erratic behavior, machines shutting down mid-cycle, frozen displays, or persistent error codes. The control board 9473-009-005 is a direct drop-in replacement for several older models.
When should I call a professional technician instead of DIY repair?
Call a pro for complex electrical faults, bearing or transmission failures, repeated part failures, or when dealing with discontinued parts. Professional technicians have specialized tools and factory training.
Key Takeaways for Dexter Washing Machine Repair
Dexter washing machine repair does not have to mean costly downtime or guesswork. By locating your model number first, using the service key for safe panel access, checking loose wires, cleaning valves, and replacing worn parts with genuine components, you can fix most issues quickly and effectively.
Remember to always disconnect power and water before any repair. Address vibration problems early to prevent structural damage. Standardize coin inputs to prevent most coin mechanism failures. Stick to a regular maintenance schedule to catch problems before they become expensive emergencies.
When in doubt, call a qualified technician with factory training. With this guide, you are equipped to keep your Dexter washers running strong for years and protect your commercial laundry operation is bottom line.