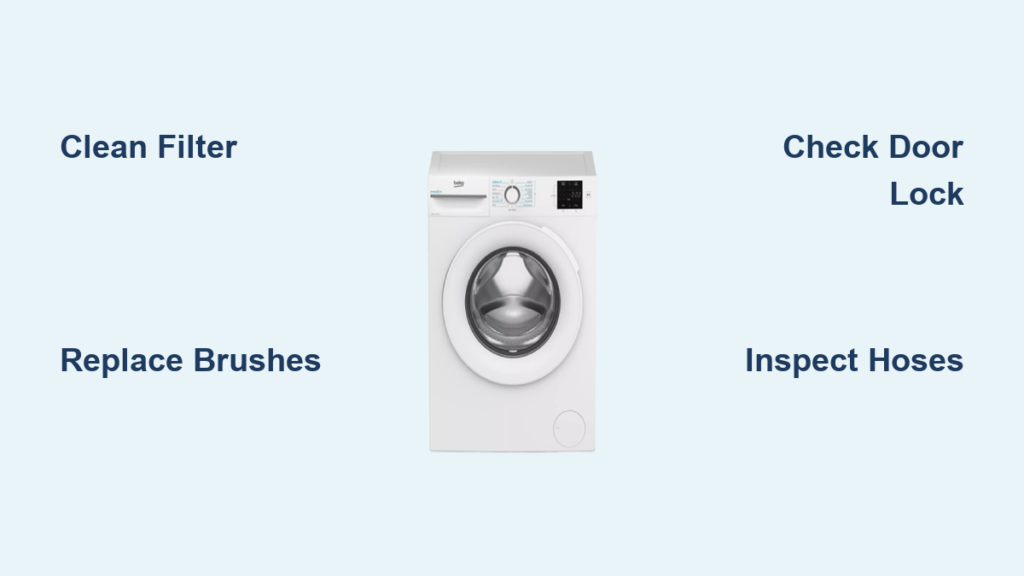
Is your Admiral washing machine making loud banging noises, failing mid-cycle, or flooding your laundry room? You’re not alone. Admiral washers, especially the VMW series built on Whirlpool platforms, are known for reliable performance but can develop predictable issues over time. The good news? Most problems like violent vibration, cycle interruptions, or continuous water filling are diagnosable and repairable with basic tools and know-how. In this guide, you’ll learn how to safely diagnose error codes, replace worn suspension rods and shock absorbers, fix speed sensor failures, and stop overfilling without calling a technician.
Safety First: Prepare Before Repair
Power and Water Shut-Off
Always disconnect power before opening the washer. Unplug the unit or turn off the circuit breaker. This prevents accidental energizing of the motor or control board during service. Next, shut off both hot and cold water supply valves behind the machine. Disconnect the hoses and drain any remaining water into a bucket. Never skip this step, even a small leak can damage flooring or create electrical hazards.
Move and Stabilize the Unit
Roll the washer to a clear workspace like a garage or patio. This gives full access to the back and sides. Tilt the unit slightly backward to check rear components, but always support the top panel once unlatched. Use a ladder or clamp it securely. Tape the lid or door open to prevent sudden closure while working underneath.
Wear Protective Gear
Put on work gloves. Inside the cabinet, you’ll encounter sharp metal edges, brittle plastic, and old shock absorber rods with jagged ends. Gloves reduce the risk of cuts. Keep a towel nearby to wipe up spills and protect floors from drips.
Diagnose Using Error Codes and Tests
Enter Diagnostic Mode
For Admiral VMW and Whirlpool-based models, enter diagnostic mode to uncover hidden errors. With the control panel off, press the following buttons in order: Left, Right, Right, Right, Left, Right. The lights will flash, indicating entry. Now use the timer knob to select test functions.
• One click clockwise: Cycle Complete light on, press Start to view stored error codes.
• Two clicks clockwise: Final Spin light on, press Start to run Automatic Test Cycle.
• Four clicks clockwise: Rinse light on, press Start to begin Calibration Mode.
Decode Two-Phase Error Lights
If your washer stops mid-spin with no text error, check the light pattern. Phase 1 shows Fill, Rinse, Final Spin, and Cycle Complete lights all on. Phase 2 shows Rinse, Final Spin, and Cycle Complete lights staying on. This means the control board is not receiving valid RPM feedback. The motor may be spinning, but the actuator is not reporting correctly. Rule out mechanical binding first before replacing electronics.
Run the Automatic Test Cycle
Verify system function with a full diagnostic run. Enter diagnostic mode, turn timer knob two clicks until Final Spin light is lit, then press Start. The machine will fill, agitate, rinse, and spin. If it completes without stopping, major components are functional. A failure during this test points to binding, worn shocks, or electrical faults.
Perform Key Physical Checks
Before replacing parts, do these quick inspections. Spin the tub by hand: open the lid and rotate the inner drum. It should turn smoothly. Resistance suggests a foreign object stuck between inner and outer tubs. Inspect motor connections: tilt washer back and check wiring to the motor capacitor and harness. Loose or corroded plugs mimic sensor failure. Test shock absorbers: lift the front edge 2 to 3 inches and drop. The unit should bounce once and settle. Multiple bounces mean worn shocks.
Fix Loud Banging: Replace Suspension Rods

Identify Failed Suspension Rods
Loud, rhythmic banging during high-speed spin, especially with heavy loads, typically means degraded suspension rods. These four rods, one in each corner, suspend the tub from the top frame. As they wear, the drum shifts violently, slamming into the cabinet. Replace all four at once, even if only two look bad, to ensure balanced support.
Remove the Top Panel
Locate three screws on the back: two secure the top, one holds a metal access panel. Remove all three. Lift the top panel forward and tilt it back. Align front tabs with frame grooves. Support the panel vertically with a ladder or clamp.
Replace All Four Rods
Start with one side. Reach into the tub and lift the old rod upward. Twist and slide it down through the top housing. Remove the old plastic cup from the top mount. Insert the new rod from below, threading it through the tub hole. Slide on the new plastic spacer and secure with the new plastic cup. Repeat for the remaining three corners.
Pro Tip: If a rod is stuck, gently shift the tub’s weight to relieve tension. Rotate the washer as needed for access.
Reassemble and Test
Lower the top panel, ensuring front tabs click into place. Reinstall the two top screws and back access screw. Return the washer to position. Run a heavy load to confirm the noise is gone.
Time Estimate: 30 to 45 minutes
Difficulty: Moderate
Critical Note: Never reuse old plastic cups. They crack over time and compromise rod stability.
Stop Excessive Vibration: Replace Shock Absorbers

Confirm Shock Failure
If the washer walks across the floor or vibrates intensely during spin, test the shocks. Lift the front slightly and drop. If it bounces more than once, shocks are worn. Unlike suspension rods, shocks are located at the front and rear bottom, dampening side-to-side and vertical movement.
Remove Old Shocks
Move the washer away from the wall. Lift the front and tilt back to access rear mounts. Use vice grips to clamp the shock rod and pull it from the bracket. Remove the old mounting ring. Do not reuse.
Warning: Worn shock rods can be sharp. Wear gloves.
Install New Front and Rear Shocks
Front shocks: insert new shock from underneath. Use the included ring to hold it in place. Push firmly until fully seated. New shocks are tighter, this is normal. Rear shocks: you may need to close the lid to access from below. Align with the mounting slot. If a clip is present, remove the old one, insert the new shock, then reattach the clip. Secure each with a new mounting ring.
Verify Installation
Lower the washer. Perform the bounce test again. It should now settle after one bounce. Reattach the door hook: insert into bracket, pull toward you, and lower until it snaps. Reconnect water hoses and power.
Model Note: Applies to ATW4676BQ1 and similar VMW-series Admiral washers.
Fix Cycle Interruptions: Replace and Calibrate Actuator
Diagnose Speed Sensor Failure
If the washer stops mid-cycle and diagnostic lights show Phase 1 and Phase 2 error codes, the actuator is likely faulty. This small module monitors drum RPM. Even if the motor spins, incorrect feedback prevents cycle progression.
Replace the Actuator
Access the rear of the washer. Locate the actuator near the motor. Disconnect the wiring harness. Remove mounting screws, usually 5/16 inch. Install the new actuator and reconnect the harness.
Part Tip: Use a model-specific replacement. Cross-reference your serial number.
Calibrate After Installation
Skipping calibration causes continued errors. After physical replacement, enter diagnostic mode: Left, Right, Right, Right, Left, Right. Turn timer knob four clicks clockwise until the Rinse light is on. Press Start. The system will calibrate for 5 to 10 minutes. Do not power off. Lights may flash, this is normal.
Test Full Operation
Run a complete wash cycle. Confirm fill, agitate, rinse, and spin complete. No error lights appear. Tub reaches high speed during final spin.
Expert Note: If the test cycle runs but normal cycles fail, recheck calibration. The control board must relearn the new sensor’s signal.
Stop Overfilling: Fix Water Inlet and Pressure System

Determine the Cause
Water that keeps filling, even when the washer is off, means one of two things. Water flows when unplugged indicates a stuck water inlet valve. Water stops when unplugged indicates a faulty pressure switch or clogged hose.
Replace Stuck Water Inlet Valve
Turn off water supply and disconnect hoses. Remove the back panel. Locate the valve assembly, two solenoids for hot and cold. Disconnect wires and remove mounting screws. Install the new valve and reconnect hoses and wires.
Result: Water will now stop when the cycle ends.
Clear Clogged Pressure Hose
If water stops when unplugged, the issue is likely the pressure system. Locate the small air hose running from the outer tub to the pressure switch, usually on the control panel. Disconnect it at both ends. Blow compressed air through the hose to dislodge soap scum or debris. Reconnect securely.
Case Proof: On model ATW4475XQO, this simple fix resolved continuous fill permanently.
Replace Pressure Switch if Needed
If blowing out the hose does not help, access the switch behind the control panel. Remove wires and mounting screw. Install a compatible replacement. Reconnect and test.
Prevention Tip: Clean the hose annually, especially with hard water or heavy detergent use.
Prevent Future Problems: Maintenance Tips
Inspect Tub Gap Monthly
Check between the inner and outer tubs for socks, underwear, or small items. These can cause binding, mimic motor failure, or damage suspension parts. Use a flashlight and tweezers if needed.
Avoid Overloading
While Admiral washers handle heavy loads, constant overloading stresses suspension rods and shocks. Distribute weight evenly. Do not cram in oversized comforters regularly.
Replace Parts in Pairs or Sets
Always replace all four suspension rods together. Replace front and rear shock absorber pairs at once. Mixing old and new parts creates imbalance and shortens new component life.
Use Correct Replacement Kits
Suspension rods and shocks vary by model. Confirm compatibility using your model number. Incorrect length or mounting style causes instability.
Quick Troubleshooting Decision Guide

| Symptom | Condition | Likely Fix |
|---|---|---|
| Loud banging in spin | Worse with heavy loads | Replace all 4 suspension rods |
| Washer walks or shakes | Bounces more than once | Replace front and rear shocks |
| Cycle stops mid-spin | RPM error lights | Replace actuator and calibrate |
| Floods during fill | Water flows when off | Replace water inlet valve |
| Floods during fill | Water stops when off | Clear pressure hose or replace switch |
| Tub hard to spin | Manual resistance | Remove foreign object between tubs |
Frequently Asked Questions About Admiral Washing Machine Repair
How do I enter diagnostic mode on my Admiral washer?
With the control panel off, press the buttons in this exact order: Left, Right, Right, Right, Left, Right. The lights will flash to confirm entry. Use the timer knob to select test functions.
What causes loud banging during the spin cycle?
Loud banging during spin, especially with heavy loads, usually indicates worn suspension rods. These four rods suspend the drum and degrade over time, causing the tub to slam against the cabinet.
Do I need to replace all four suspension rods at once?
Yes. Replace all four suspension rods simultaneously, even if only two appear worn. Mixing old and new rods creates imbalance and leads to premature failure of the new parts.
How do I calibrate the actuator after replacement?
Enter diagnostic mode, turn the timer knob four clicks clockwise until the Rinse light is on, then press Start. The calibration process takes 5 to 10 minutes. Do not interrupt power during this time.
Why does my Admiral washer keep filling with water?
Continuous water filling has two causes. If water flows when the washer is unplugged, the water inlet valve is stuck and needs replacement. If water stops when unplugged, the pressure hose is clogged or the pressure switch is faulty.
Key Takeaways for Admiral Washing Machine Repair
Most Admiral washing machine repairs are manageable with basic tools and safety awareness. From diagnosing error codes to replacing suspension rods, shocks, actuators, or fixing fill issues, each fix restores years of reliable service. Focus on symmetrical replacements. Always replace all four suspension rods together and both front and rear shocks as pairs. Follow calibration steps precisely after actuator replacement, or errors will persist. Perform simple maintenance like checking the tub gap monthly and cleaning the pressure hose annually to avoid repeat failures. With this guide, you will save hundreds compared to professional repairs and keep your laundry running smoothly.